Needless to say, WordPress is the most popular and most used content management system (CMS) in the world. In fact, more than 30% of websites on the internet is WordPress-powered. The reason why is nothing short of being self-explanatory — it’s free, it’s open-source, it’s extensible, and it has a chock-full of themes and plugins to enable you to design and transform it to become virtually any website you want. There’s no point
Plus, it’s very easy and quick to install. You don’t need to be a genius when it comes to tech for you to be able to create a WordPress website. Web hosting providers nowadays offer either pre-installation of WordPress for you or provide 1-click installation tools such as Softaculous, QuickInstall, and Fantastico, making the installation beginner-friendly.
There are two things that you need before installing WordPress:
- A domain name – your website name or the web address which the visitors access
- A WordPress web hosting provider – a service provider that makes your website accessible in the world wide web
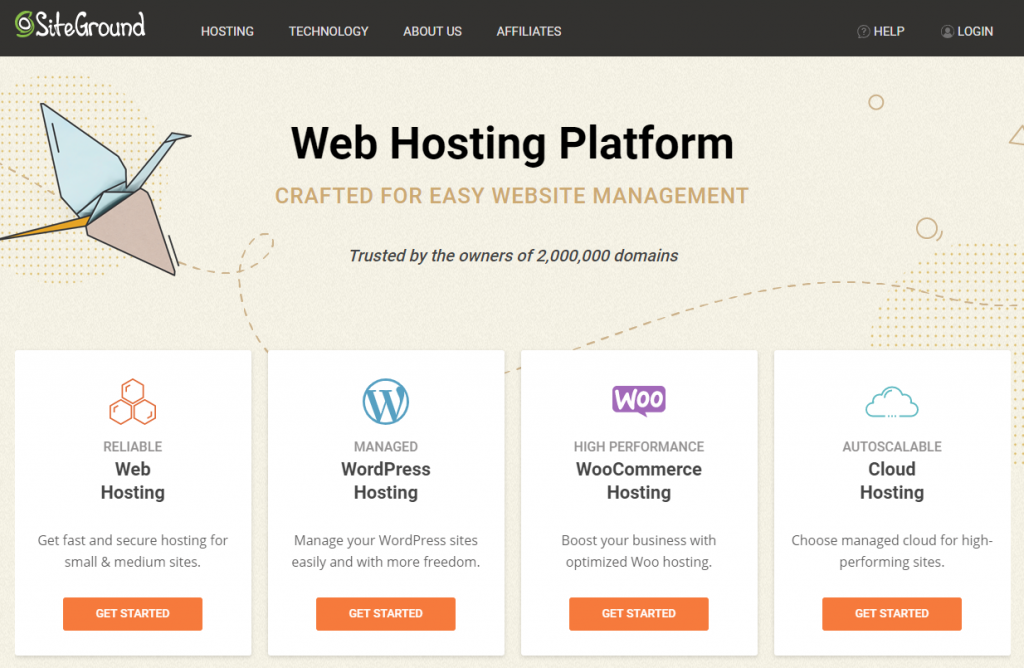
And, when it comes to hosting, choose a web host provider that provides solid security, fast performance, and high-quality support. Here are the web host providers that I highly recommend:
Installing WordPress on SiteGround
SiteGround is a well-trusted web host provider, especially by the beginners. It is well known for its highly-optimized hosting plans for WordPress, as well as its superb customer support.
SiteGround allows you to install WordPress using the SiteGround Wizard or via Softaculous. You can, of course, perform a manual installation.
| Host | Cost | Websites | Traffic | Website |
| Free and up | Unlimited | 25k visits per month | View Details | |
| Free and up | Unlimited | 25k visits per month | ||
| Free and up | Unlimited | 25k visits per month | ||
| Free and up | Unlimited | 25k visits per month |
Using the SiteGround Wizard
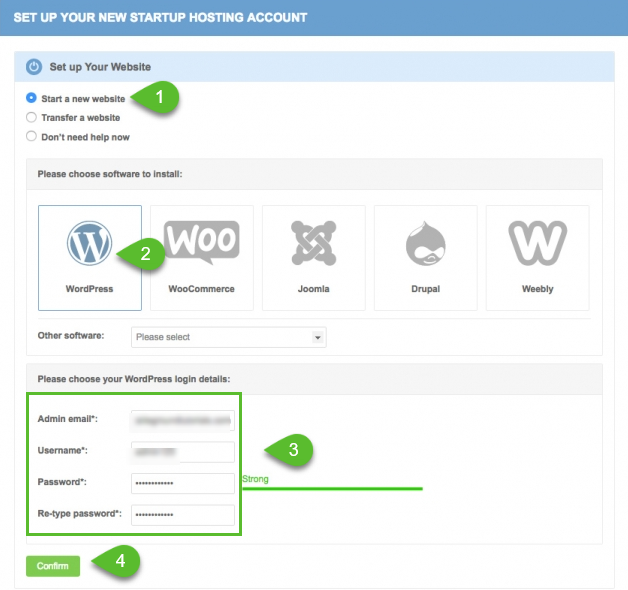
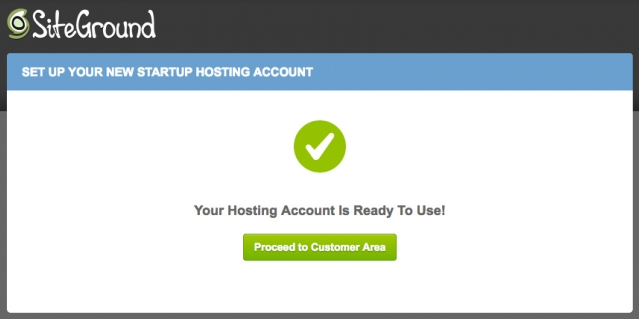
After signing up for a WordPress hosting package, SiteGround gives you all the login information you need. If it’s your first time to log in to your Customer Area, a popup will display asking if you want to start a new website. Tick that option and click on WordPress.
Enter the login credentials and click on Confirm.
Then, choose any enhancement that you would like for your WordPress website, tick the agreement confirmation box, and click Complete Setup.
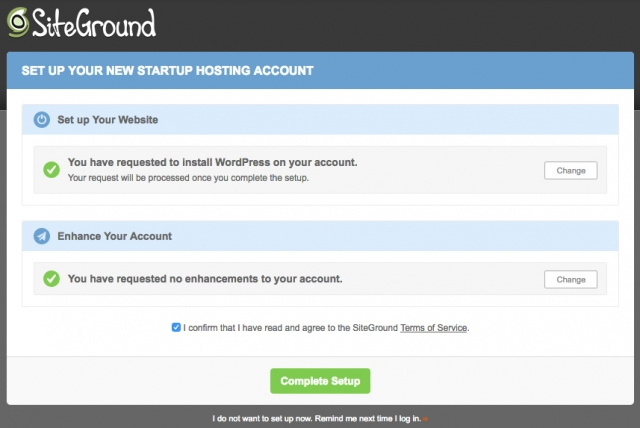
And, there you go! WordPress has been installed on your website. You can now go back to the Customer Area and you’ll find the new website under the My Accounts tab. If you click on the Go to Admin Panel button, you’ll be redirected to your WordPress login page.
Using Softaculous
SiteGround offers auto-installers such as Softaculous so that even non-techies or beginners can install WordPress in just a few minutes.
Softaculous is currently the most powerful script installer with more than 150 PHP software you can install with a few clicks. You can also perform extensive customization in the installation wizard so your website is on-brand. You can also set automatic website backups and migrate installations from one domain to another.
Let’s start!
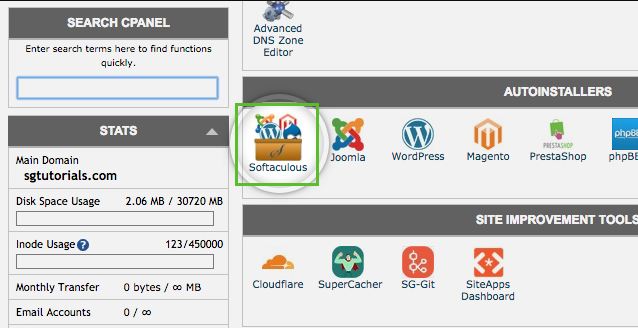
When you log in to cPanel, you’ll find Softaculous under Autoinstallers section. Click on it and you’ll be redirected to the list of applications that you can install using Softaculous.
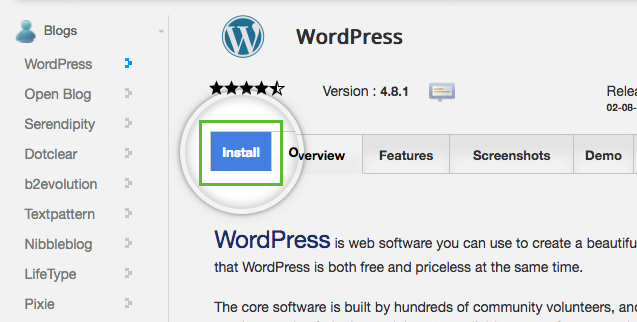
Click on the WordPress icon and you’ll get to the next page where you can click on the Install tab.
Fill out the necessary information:
- Protocol – This is where your website should be accessed from. Is it http:// or https:// ?
- Domain – This is the domain name where you want WordPress to be installed.
- Directory – If you want WordPress to be installed directly on your domain, leave this blank. Add a folder name if you want it to be installed in a subfolder of your website. For example, yourdomain.com/folder_name
- Site name – This is your website’s name.
- Site description – This is your website’s tag line.
- Admin username – This is the username for your WordPress admin dashboard login.
- Admin password – This is the password for your WordPress admin dashboard login.
- Language – Select which language do you prefer for your WordPress platform.
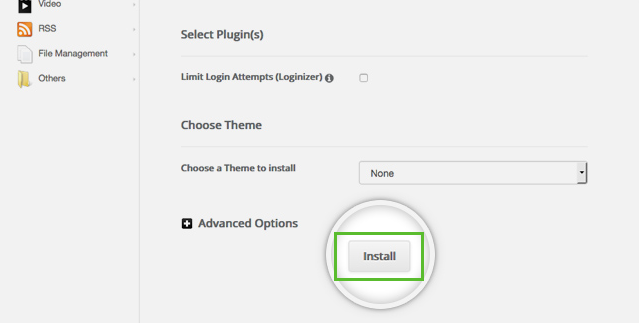
- Advanced options – This is where you can change the database name and table prefix.
Once done, click on the Install button.
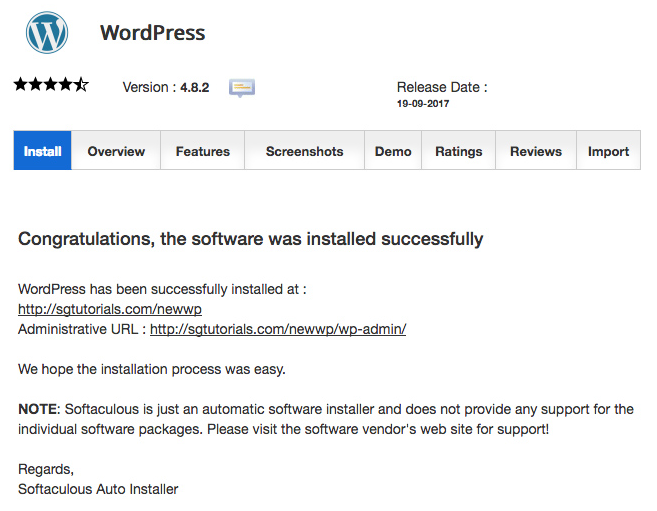
WordPress will install automatically and display a success message once complete. An administrative URL will be provided for you to be able to log in to your WordPress admin dashboard.
Once you logged in to WordPress admin dashboard, SiteGround will display a step-by-step wizard to help you further with setting up your website. You can click on the Start Now button and choose a website design that you prefer and other functionalities that you would need for your website. Once you’re done setting up, a success wizard will display and your website is now ready for customization and content creation.
Installing WordPress on A2Hosting
A2Hosting is one of the fastest and most reliable web hosting providers. It offers 20 times faster page loads than other managed WordPress hosting providers. It also offers a staging environment, free SSL, easy backups, and an A2 optimized WordPress website.

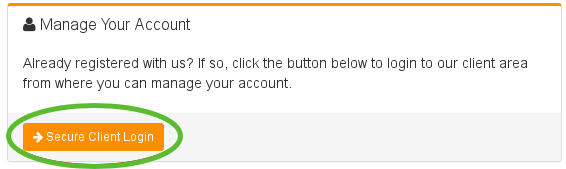
With A2Hosting, you can use Softaculous for installing WordPress or you can do it manually. To install WordPress using Softaculous, you need to log in to Customer Portal first through https://my.a2hosting.com. Click Secure Client Login under Manage Your Account.
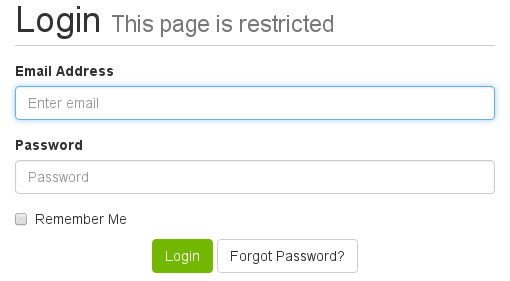
Log in using A2 Hosting Account associated email address and password.
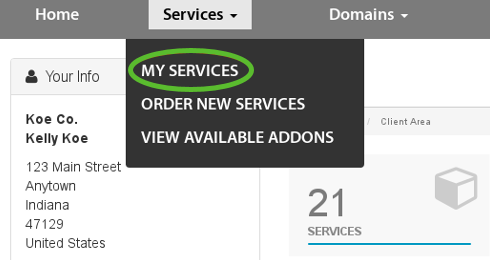
Under Services menu, click on My Services.
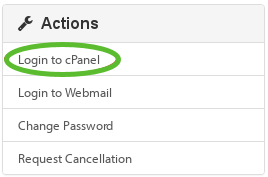
Select your hosting package under My Products & Services and click Manage. In the Actions sidebar, select Login to cPanel.
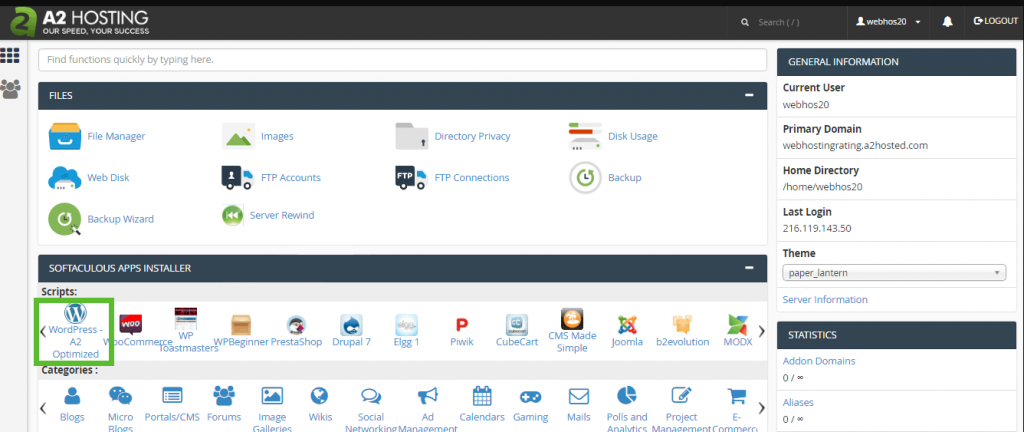
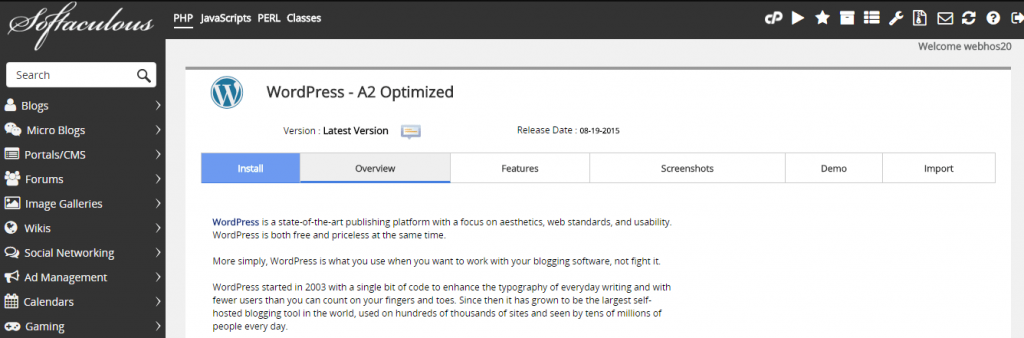
In the cPanel home screen, you’ll find the Softaculous Apps Installer section. Select WordPress and you’ll be redirected to the WordPress installation page.
Same procedure with SiteGround, simply click on the Install tab.
Fill out all the necessary installation information and click Install. And, that’s it!
Installing WordPress on WPEngine
WPEngine is one of the best and pioneers of the managed WordPress hosting industry. If you’re starting a WordPress website and want a superb hosting service in terms of performance, security, uptime, and support, then WPEngine is definitely a must. Its partners include Amazon Web Services and Google Cloud, and it continues to improve.
WPEngine makes it much easier to install WordPress on your website. Simply log in to the User Portal at http://my.wpengine.com/. Click on the Installs tab.

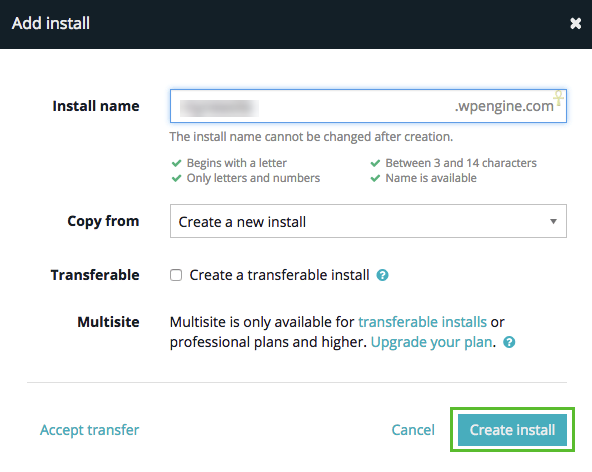
Click on Add Install in the top menu bar.

Fill out the form with all the necessary installation details.
- Install name – Enter the name of your WordPress install.
- Copy from – Select whether it should be copied from another install or create a new install.
- Transferable – Tick the checkbox if it should be transferable.
- Multisite – Select if it’s a WordPress multisite.
Once you’re done, click on Create Install.
Once the installation is done, you will receive an email notification that your install has been completed. You will now be able to access the WordPress admin dashboard and start customizing it.
Installing WordPress on Cloudways
Cloudways is a managed cloud hosting service provider that offers customers with a 1-click solution in launching web applications on cloud servers such as Digital Ocean, Vultr, Linode, Amazon Web Service, and Google Compute Engine (GCE).
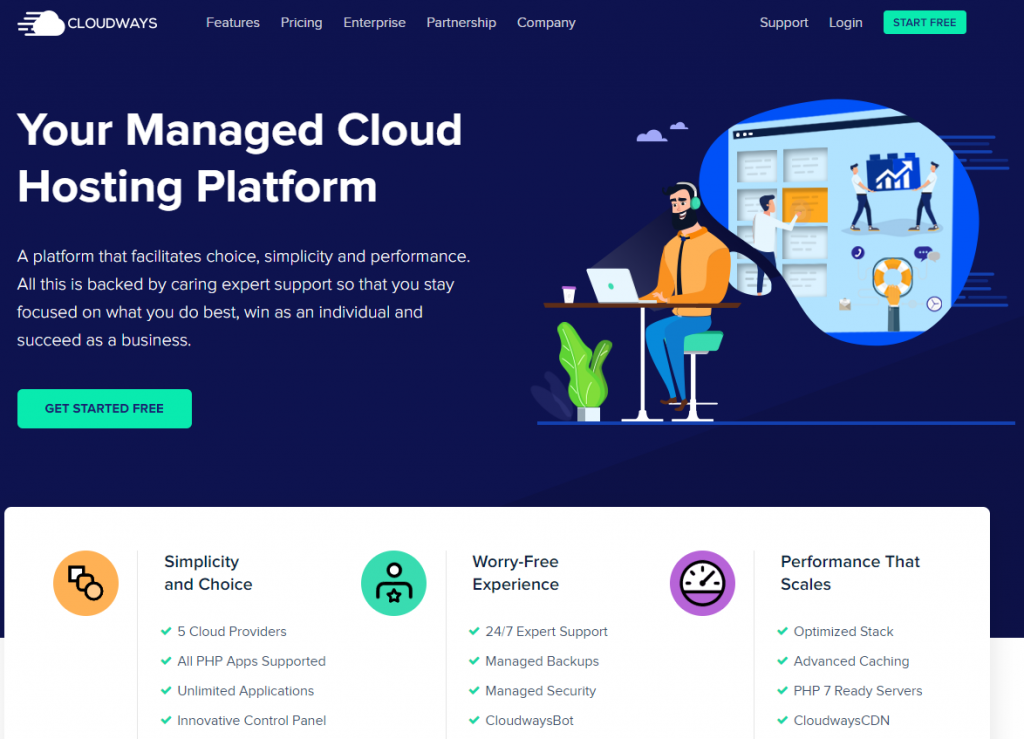
Cloudways’ pay-as-you-go plans allow you to monitor your server consumption real-time. It also provides free SSL certificate and 1-click provisioning. The downside of it, though, is you have limited server access and it does not support all programming languages.
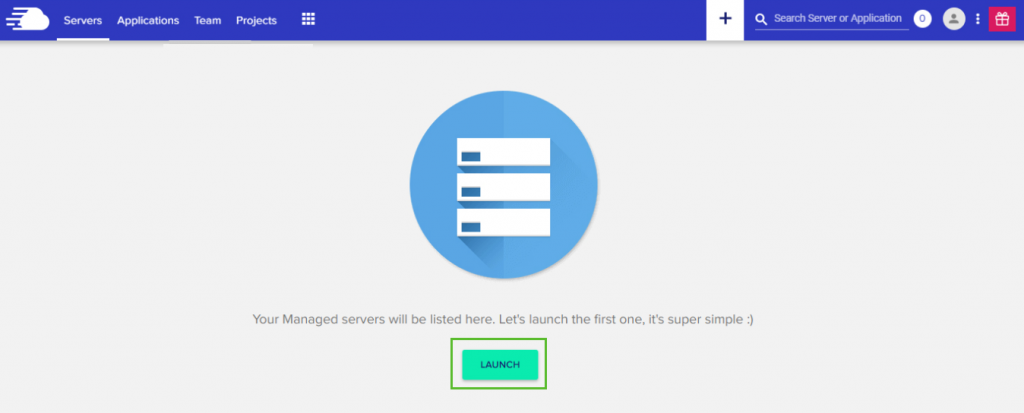
If you think Cloudways is for you, then go ahead and sign up. When you already have an account, log in to your Console. On the Servers tab, click Launch to start a new server.
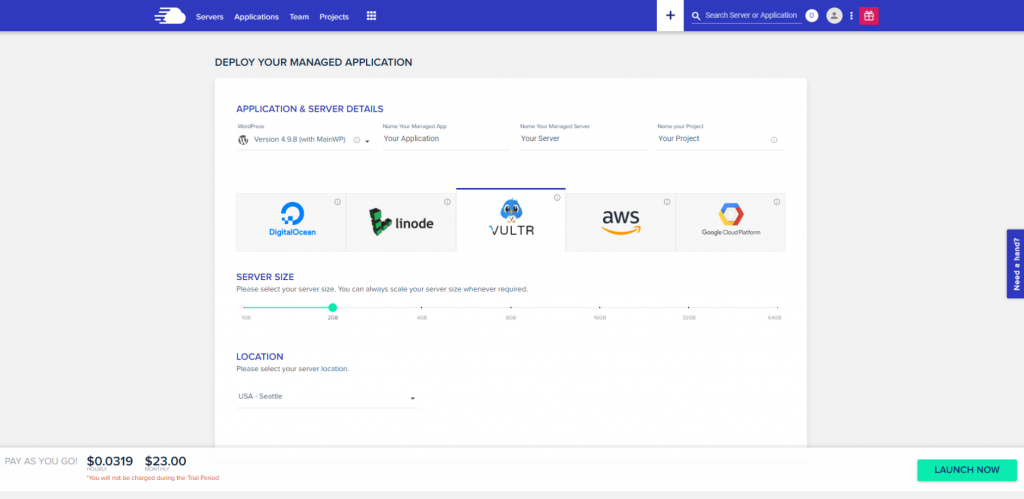
Set your Server Preferences and click Launch Now.
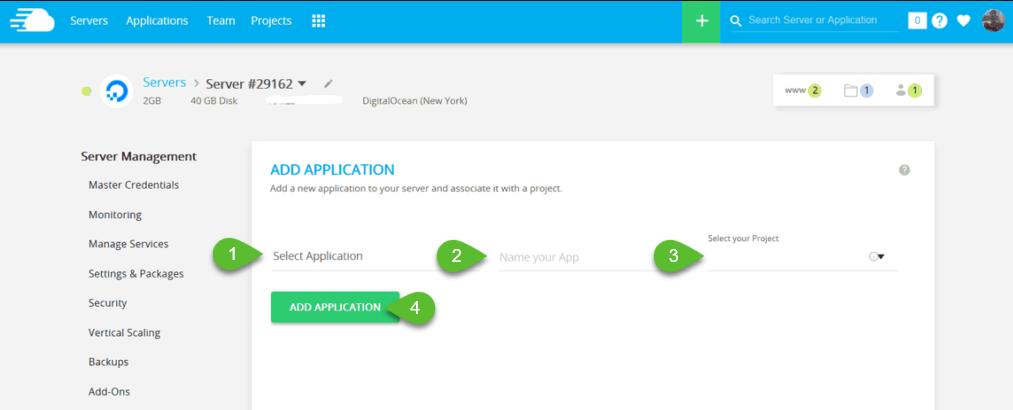
On the Applications tab, click on the +Add Application button and select the server you’ve added.
Select the latest WordPress version in the application dropdown. Enter your application name. Select your project in the dropdown. Click Add Application.
This will now start the installation.
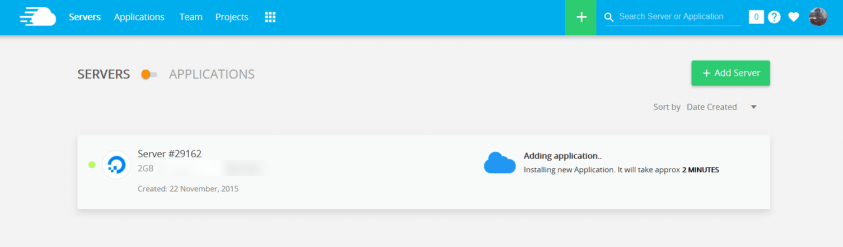
Once completed, you can now log in to your WordPress admin dashboard by clicking on the applications (www) link.

Done installing WordPress, what’s next?
So, you’ve successfully installed WordPress. Here’s the next thing that you should do. Install a WordPress theme such as Astra. It’s fast, lightweight, and very customizable. Learn more about Astra here. And, if you don’t want to stress yourself in coding your website, then build a website using a page builder like Elementor and use themes that are Elementor-ready.
Installing plugins allow you to extend the features and functionality of your WordPress website. With more than 54,000 plugins in the WordPress repository, you can build any type of website that you want.
Conclusion
Deciding which web host to use for building a WordPress website is very crucial, especially if you do not want to go through the hassle of manual installation. Most web hosting providers nowadays offer free 1-click install of WordPress and that is one thing that you should look for a web host aside from the major things like performance, security, and customer support.
Creating a website out of WordPress does not need to be a pain. Just be wise in choosing the right host, themes, and plugins that can help your business grow.