Learn how to make a website for your business using WordPress, Elementor, & Astra. These are all 100% free tools that I personally use.
In this how to make a website 2026 tutorial, I will show you more than just how to create a website, I will also teach you how to SEO optimize your website, and how to generate leads from it.
This tutorial is comprehensive, my longest how to build a website tutorial. I hope you enjoy it.
Things You Need:
- Hosting. I recommend SiteGround.
- A domain name.
- WordPress Theme. For this tutorial, we use the free Astra Theme.
- WordPress Page Builder. For this, we use the free Elementor page builder.
*Explore our curated Black Friday deals for significant savings on your dream WordPress products, available for a limited time.
Let’s get started!
- What Should a Business Website Include?
- Step 1: Buy a web hosting and domain name.
- Step 2: Install WordPress.
- Step 3: Install SSL Certificate.
- Step 4: Install Astra and the Starter Templates Plugin
- Step 5. Choosing design elements.
- Step 6. Customize your website.
- Step 7. Customizing your website with Elementor.
- Step 8. Secure your website.
- Step 9. Backup your website.
- Step 10. Optimize your website.
- Wrapping Up
What Should a Business Website Include?
A good business website informs the audience about the business and motivates them to learn more. But that's not all.
Here's what I think a business website should include if it is to deliver on its goals:
Homepage
A homepage is where people usually land when they search for your business online.
It is an essential part of your business website for two reasons. One, it informs the audience about the business, and two, it includes categories, links and menus to redirect them to what they are looking for.
A well designed home page includes high quality images, responsive elements and layouts, a call to action, an attractive header and footer and a clear purpose.
Services Page
So, how does your business benefit people? What services does it offer? Whether you provide website design services, consulting, or products, this page should clearly communicate your value proposition.
An informative service page includes the information visitors need to assess whether to work with you, buy from you or contact you.
Include as much detail as required to pique curiosity and then direct readers to dedicated service pages where you can go into much more detail.
About Us Page
How did you come up with the idea behind starting your business? Who are the employees offering these services? What are the visions and goals of your business?
The about us page is your opportunity to make a human connection. To tell your story and communicate your personality and approach to potential customers.
Testimonials Page
Are you or your business trustworthy? Do you deliver on your promises? Offer value for money? What do your previous clients have to say about you?
Testimonials are necessary to build trust and credibility and to provide social proof.
The testimonials page includes reviews and ratings by your previous clients. It helps you humanize your brand and increase conversions through (hopefully) positive responses from people who have done business with you in the past.
FAQ Page
The frequently asked question page sums up common questions and provides answers to each. It saves time by providing curated answers in response to popular doubts or queries.
FAQs are a chance to perform a little extra marketing, show you appreciate the reader’s pain points and have an answer for them.
It’s also an important opportunity for a little objection handling, addressing common barriers to purchase in an approachable format.
Contact Us Page
A contact page is where you include all your contact details. It should ideally include your phone number, social media account and business address.
If you have a physical address, it may be helpful to include a map and perhaps directions.
It’s also important to include a contact form so that visitors can contact you easily.
Blog
What better way to increase the number of visitors and have a two-way conversation than a blog?
You can tell your story, highlight products and services, offer advice, answer questions and generally engage with your audience. It’s the perfect opportunity to be seen as an expert in your field while gaining the trust you need to succeed as a business.
Step 1: Buy a web hosting and domain name.
The most important part of your business website is hosting. The hosting is going to determine how fast your website loads which is a very important factor that impacts lead generation and conversion. Google also prefers faster websites with low bounce rates, so a faster website increases your chances of ranking on Google.
For those on a budget, Cybernews highlights that cheap WordPress hosting can provide reliable performance and speed optimized for WordPress sites.
One thing I’d like to point out is to avoid EIG and GoDaddy companies as much as possible. EIG stands for Endurance International Group, and it controls over 60 hosting companies. It fires their in-house support staff and consolidates everything under one umbrella. What happens is the customer support, quality of hosting, and overall quality of service suffers.
Here are some of the well-known EIG companies:
- Hostgator
- BlueHost
- iPage
- Arvixe
- FatCow
- HostMonster Small Orange
GoDaddy also has a lot of bad reviews regarding quality and customer service, and the websites they host just load really slow.
You’re also going to want to avoid “mom and pop” hosts because they lack the resources to use advanced hosting technologies that will give your website an edge.
You also want to choose a hosting that provides free SSL certificates. Without an SSL certificate, your website will have this ugly “Not Secure” label at the top:

If you’re a business, you can practically say goodbye to potential clients with that label. If your hosting does not provide SSL certificates for free, one SSL certificate can cost you $50-$100 per year per website.
You also want a service that will allow you to upgrade to something called PHP7, which will make your website a whole lot faster.
SiteGround, My Preferred Web Hosting Service
A hosting service that I found that satisfies all these criteria is SiteGround. SiteGround offers free SSL certificate, allows you to upgrade to PHP7, has quality hosting, and amazing customer support. It really is the best out there.
Here are SiteGround’s key features:
- Free SSL Certificate
- FAST Knowledgable Support
- WordPress Staging Environment
- Free Website Migrations
- 30 Days Of Backups
I’ve made an amazing deal with them to give a 70% discount to anyone who signs up using this link. So if you want to save money on your hosting, click on this link and purchase your hosting now.
To purchase your hosting from SiteGround, click on this link. Once you land on their homepage, you’ll see four different types of hosting:
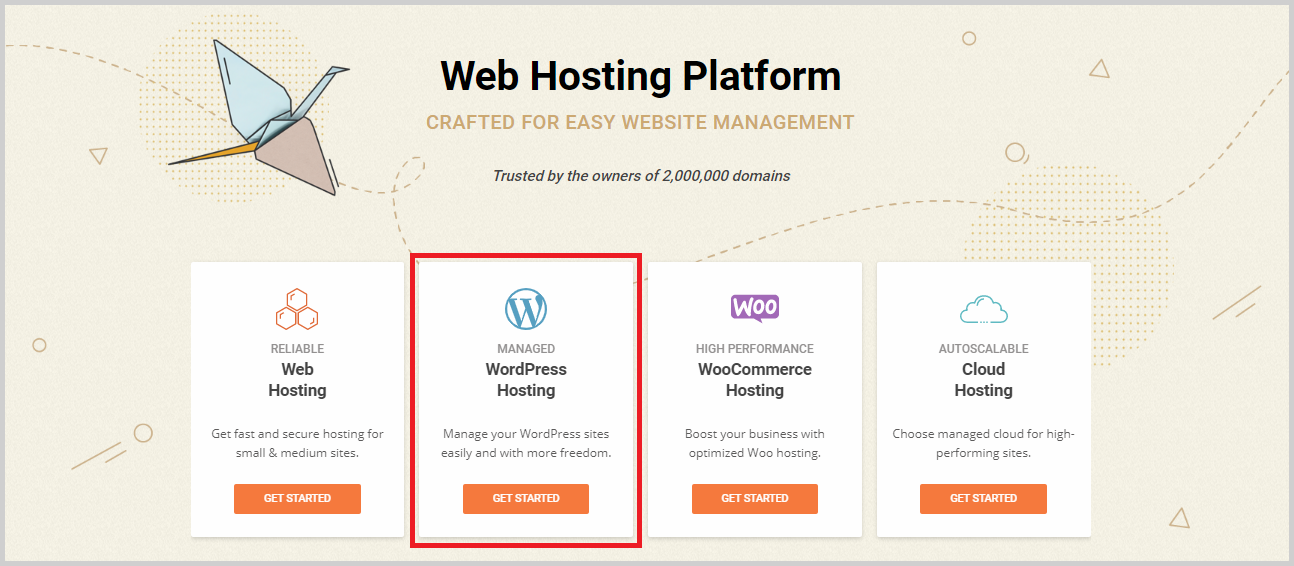
Choose WordPress hosting and click Get Started. You’ll then see three pricing plans:

Choose one according to your needs and budget. You can also check out their comparison of each hosting plan to be able to decide which one suits your business needs.
Once you’ve picked a plan, click Get Plan. You’ll then be taken to the next step which is choosing a domain. If you already have a domain name, select “I already have a Domain”. But if you don’t have one, select “Register a New Domain” so you can buy a domain right inside SiteGround. This costs $15.95 per year.
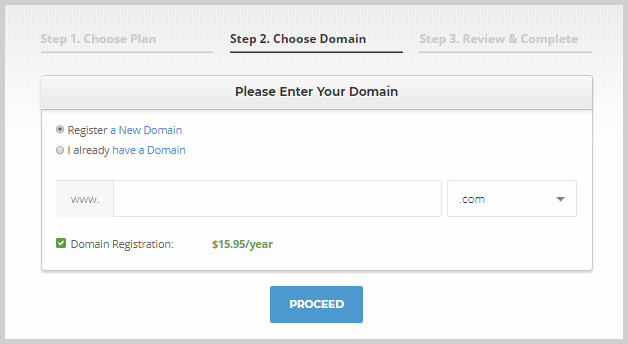
Keep in mind that if the domain name that you want to purchase is not available anymore, SiteGround will let you know and you’ll have to choose another one. Once you have a domain name, click Proceed.
The next step to complete your purchase is providing your accurate personal and billing details. Once that’s done, click Pay Now. You now have a reliable web hosting and domain name.
Step 2: Install WordPress.
WordPress is the website creation tool that we’ll use to create your business website. It’s completely free, very easy to use, yet very powerful. It comes with thousands of plugins and themes that will let you do whatever you want with your website.
SiteGround actually comes with a one-click WordPress install that will quickly install WordPress for you.
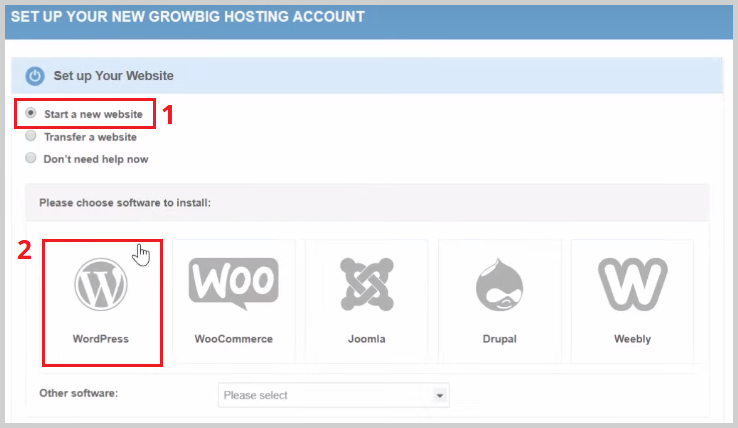
Once you have completed your hosting purchase, you’ll see a screen with a link saying “Proceed to Customer Area”. Click on that and you’ll be taken to a page where you can set up your new hosting account. Under Set Up Your Website, select Start a new website.
You will then see a list of software that you can install. Select WordPress.
To complete the process, you’ll have to provide admin login details (email address, username, and password) for your website. These are the details you’ll use to access the backend of your website, so be sure to keep them secure.
Once that’s done, click Confirm > Complete Setup. And you now have a live, self-hosted WordPress website.
Step 3: Install SSL Certificate.
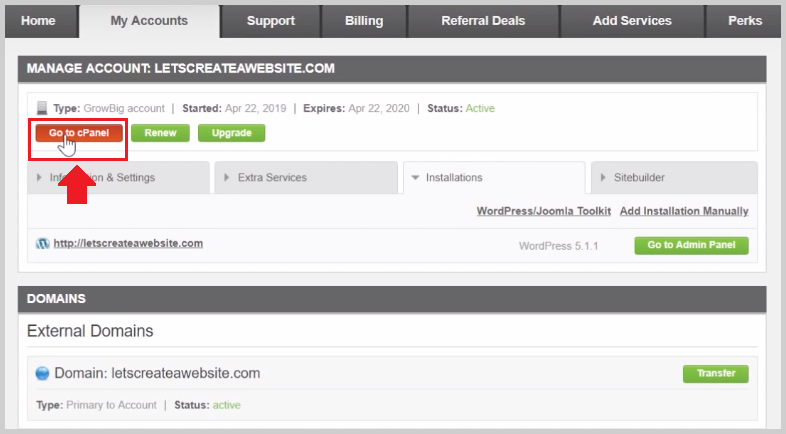
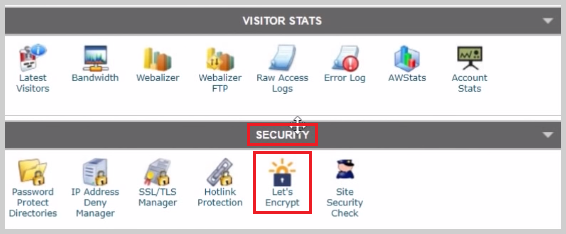
Before doing anything else, I want to first show you how to install an SSL Certificate to get rid of the Not Secure label I showed you before. Under My Accounts, click Go the cPanel.
CPanel is where you can install different software and tools for your website. If you scroll all the way down, you should see a section called Security. Under this section, click on Let’s Encrypt.
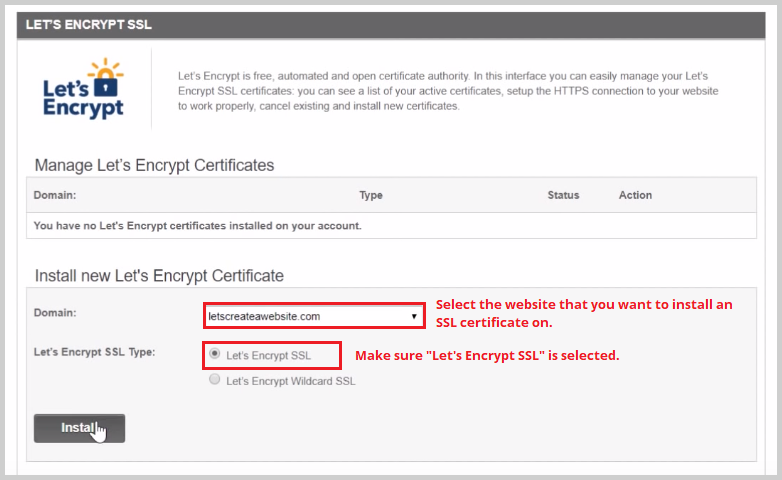
Select the domain that you want to install the SSL certificate on, select Let’s Encrypt SSL, and click Install.
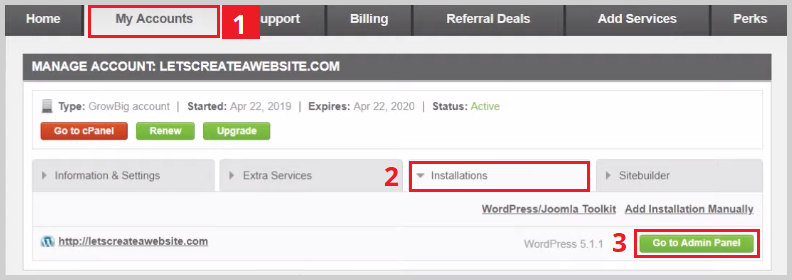
Now it’s time to log in to your new website. Click My Accounts again at the top and click the Installations tab. Here you will see the domain name that you registered. Across it is a green Go to Admin Portal button. Click on this button to go to your WordPress login page.
WordPress login pages usually follow these formats: yourdomain.com/wp-admin and yourdomain.com/wp-login. Yours might be different. But you have to remember or note your login page URL so that next time, you’ll be able to access it by directly typing the URL into your address bar and without having to log in to Siteground anymore.
The WordPress login page looks like this:
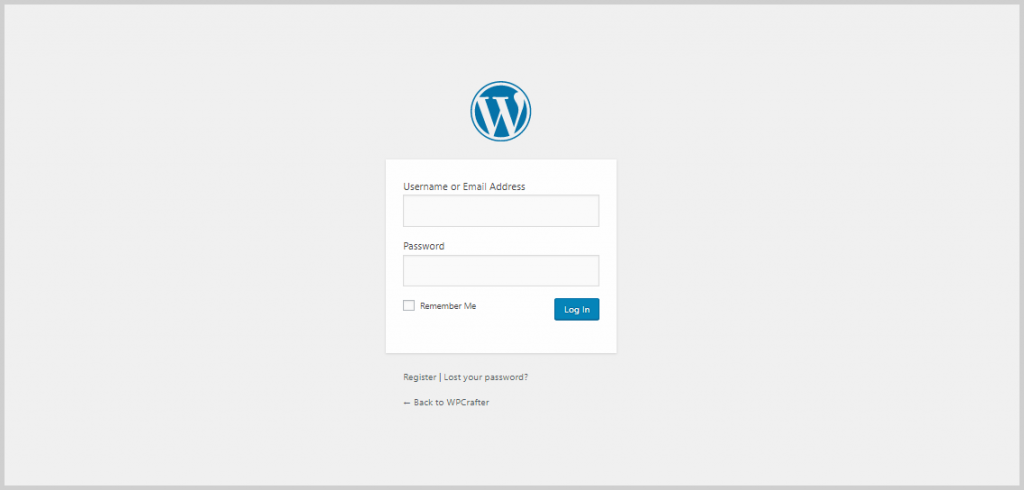
Enter your username and password here to log in to your website for the first time.
Once you’re inside, the first thing you need to do is tell WordPress that you have an SSL Certificate. This is quite simple to do.
On the left sidebar, go to Settings > General. On the screen, you’ll see two boxes with your domain name: WordPress Address (URL) and Site Address (URL). You have to type the letter “s” after “http” and before the colon “:” for both boxes.
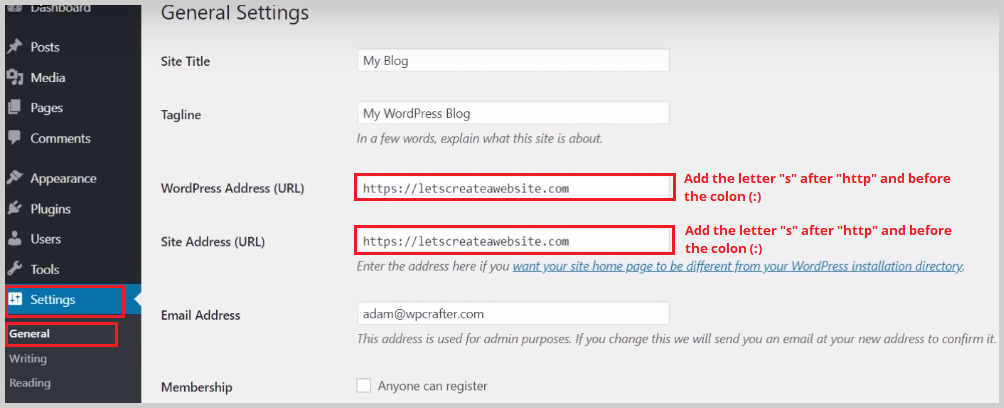
Once you’re done, click Save Changes. Your website should now have a padlock icon right next to the domain name:

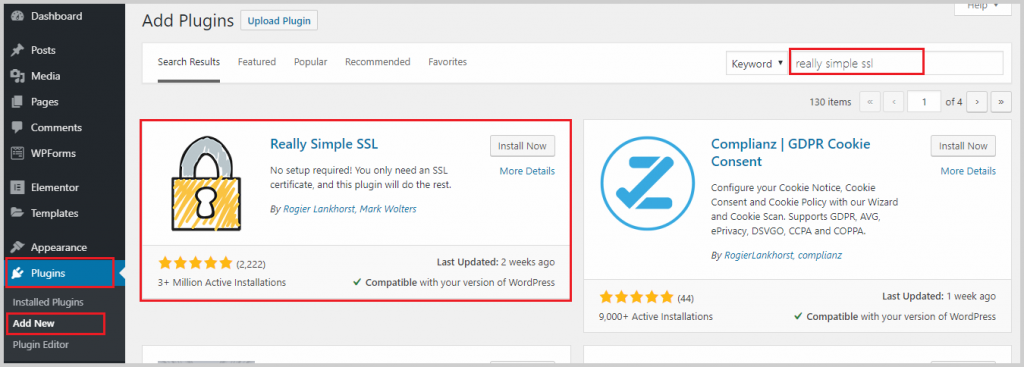
Now the last thing we need to do for the SSL Certificate is to make sure that people who type “http” into their address will be redirected to your “https” URL. We need a plugin to do that.
To install a plugin, go to Plugins > Add New. On the search bar the top right, search for the plugin Really Simple SSL. Install and activate it.
You will then see this pop-up message on your dashboard:
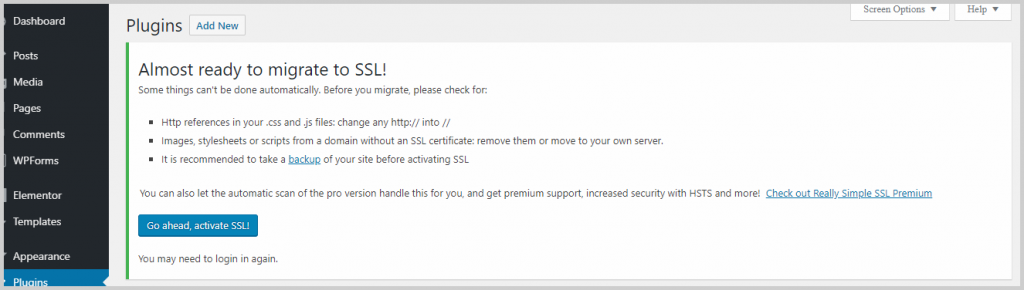
Click the blue Go ahead, activate SSL! button. You will be logged out, and once you log back in, the Really Simple SSL plugin is in full effect.
Step 4: Install Astra and the Starter Templates Plugin
Astra offers unique business Starter Templates to kickstart your website-building journey.
These templates are built with great speed, responsiveness and features and are fully compatible with the Elementor page builder.
You’re sure to find the perfect theme for your business with Astra, including one of the following.
Local Business
The Local Business template is all you need to deliver a visually appealing online presence.
The template offers a vibrant blue layout with bold white fonts and a call to action. You can showcase your services, display contact forms, and call to action. It uses white space to define your business and attract visitors.
Business Consultancy Firm
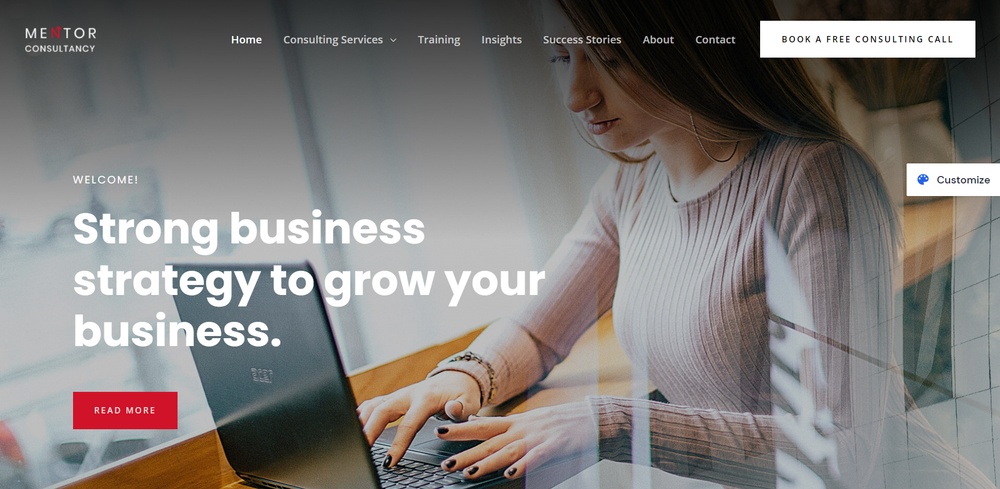
The Business Consultancy Firm Template offers a beautiful image background with parallax scrolling and a call to action button. It makes excellent use of white space and images to present your business in the best way possible.
The template offers responsive pages and a sleek black footer to showcase contact details. It’s an excellent option for any business!
Business Blog

The Business Blog template is perfect for business news. It has a minimal, boxed layout with beautiful layouts to present your website in the best way possible.
If you want to share news, reviews, or have built a business around current events, this template is all you need.
Step 5. Choosing design elements.
Your website now looks stunning, but you’ll want to make it your own. To do that, you need your own color scheme, typography, and logo.
Let’s start with your color palette. If you already have your brand color, this is going to be easier.
Choosing a Color Palette
A website normally has a set of 2-3 colors: the primary, accent, and pop color. The primary color is the dominant color of your website and most likely your brand color. This is the color that you want people to remember your brand with.
When choosing your primary color, you have to research into color psychology or how colors affect people’s perception or behavior. Certain colors make people feel something, e.g. red makes them feel apprehensive, so you need to consider these things when choosing your primary color.
The accent color is usually used to make certain elements stand out than the rest like headings or post titles.
Lastly, the pop color contrasts with the rest of the colors to make important elements of the website stand out such as call-to-action buttons or lead generation forms.
There are two tools that I like using in choosing a color palette. The first one is Coolors.co, a website where you can browse different color palettes to get ideas or inspiration. If you see something you like, you can quickly copy the Hex code to use it on WordPress.
If you click Explore on the heading, you will see this vast collection of palettes:
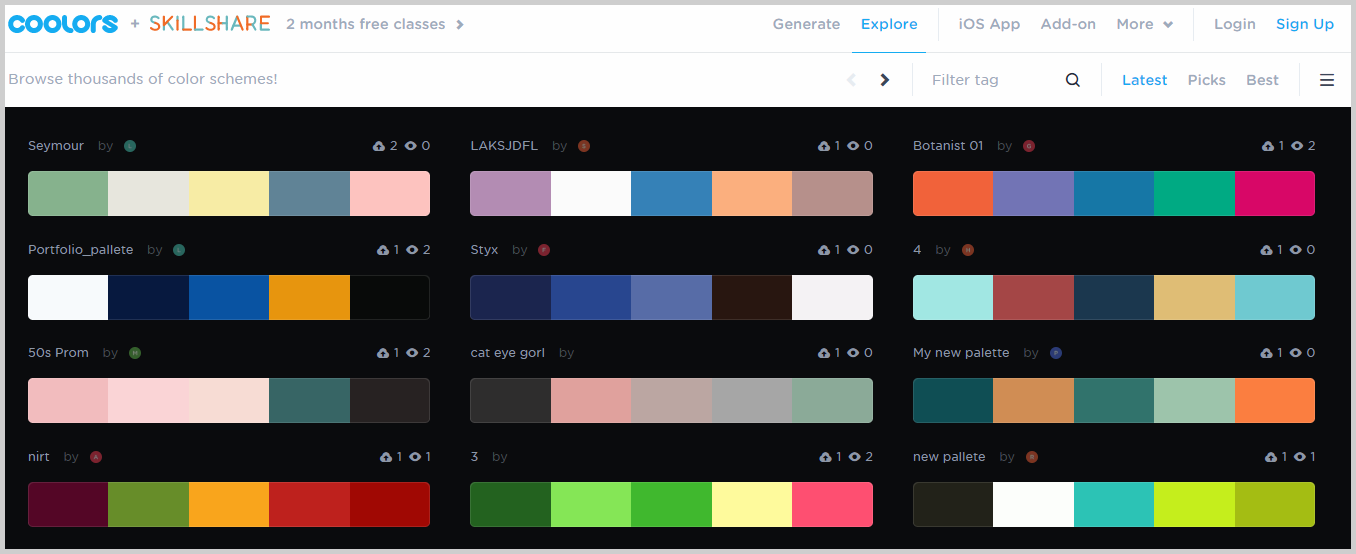
If you see a palette that you like, hover your mouse over it, click View, and you will be taken to a new window where you’ll see the Hex codes of each color.
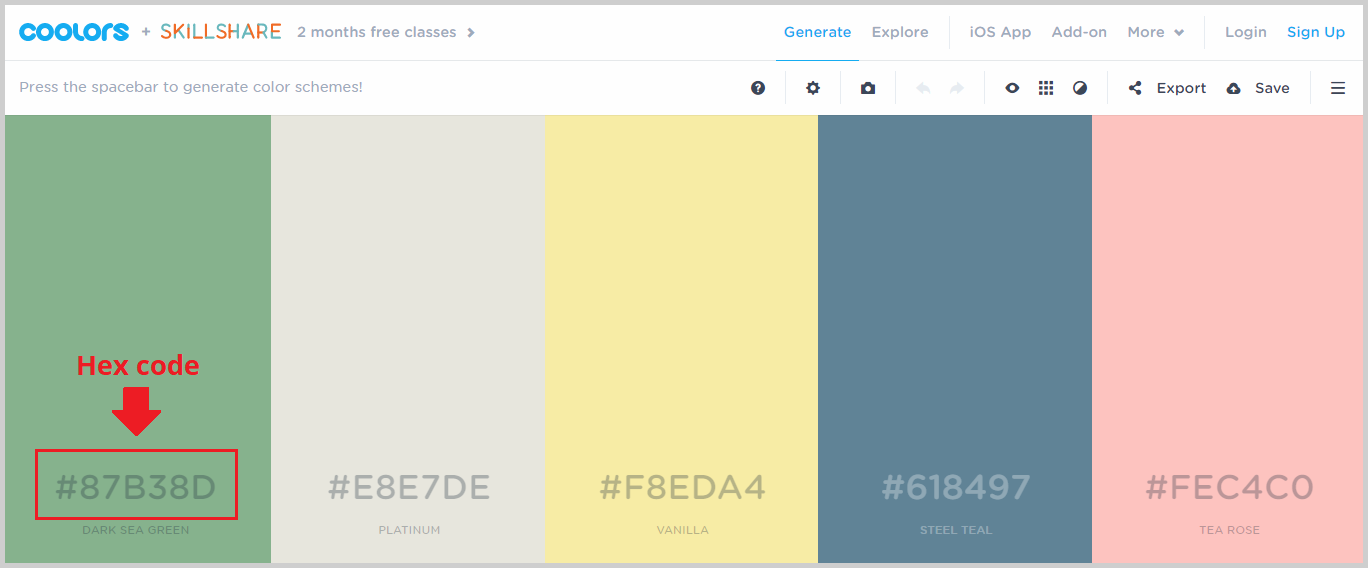
These Hex codes are what you need to use these colors on your website. Later I’m going to show you how to use these Hex codes on the WordPress backend.
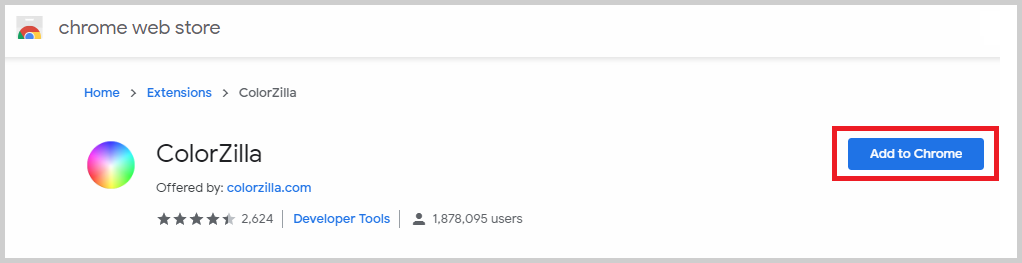
Another cool tool is Colorzilla. This is a Google Chrome extension that lets you get the Hex code of any color you see on any website just by clicking on it.
If you want to get the Colorzilla extension, click here. Then click Add to Chrome.
You’ll then see this icon on your toolbar:
So now, if you want to know the Hex code of a color you saw on a website, just click this icon then click the color that you want to copy. The Hex code will then be automatically copied. You can paste this Hex code in specific areas in WordPress.
Customizing Typography
You also want to use your own typography that matches your brand identity and helps your website stand out. Websites normally have 2-3 fonts. Just like with colors, you’ll have a primary font which are fonts for headlines or menu. You also need a body font for paragraphs of texts and also an extra “pop font” like calligraphic fonts to help some texts stand out.
Like colors, you need typography that stays true to your brand, looks pleasing to the eyes, and sends out the right message about your brand.
One of my favorite tools when choosing typography is Fontpair.co. This is a website that shows you how two different fonts look together.
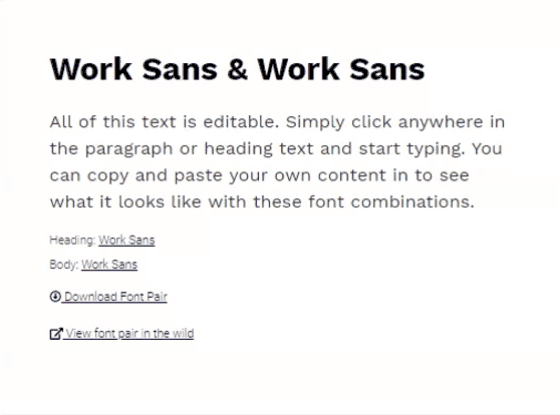
If you see something you like, note what it’s called so you can search for it inside WordPress and use it on your website.
I also like using WhatFont, a Google Chrome extension that tells you what font is used on any website just by hovering your mouse over it.
To install WhatFont, click here then click Add to Chrome. Then you’ll see this icon on your toolbar:

To know the name of a font, click this icon and hover your mouse over the text. WhatFont will tell you the name of this font, and if you click on it, you’ll also see the font size, color, family, style, weight, and more.
Getting a Logo
Lastly, your business needs a beautiful logo that speaks of what your brand is all about. You can go with three different routes here. You can create your logo by yourself using a free tool called Canva, a popular designing tool that makes designing really easy even for beginners.
You’ll be surprised with how many logo templates Canva has, and they all look amazing. You can modify these templates to make them your own.
You should know, however, that you need to upgrade to Pro if you want to export the logo with a transparent background. There’s a one-month free trial though, so what you can do is upgrade to Pro, export your transparent logo, and cancel before the trial ends.
You can also hire a logo designer to do it for you. You can try websites like Fiverr.com or 99design, but you have to be careful in choosing an artist based on their style, track record, reviews, ratings, and more.
The third route, and probably a good idea if you want a strong brand logo is to hire a design strategist/consultant. People like these are professionals who take the time to understand what your brand is about, where your business is going, and what your core values are so they can incorporate that into the logo.
Step 6. Customize your website.
Once you have a color palette, fonts, and logo for your website, it’s now time to use them on your website. If you’re in the WordPress backend dashboard, go to Appearance > Customize to open the theme customizer.
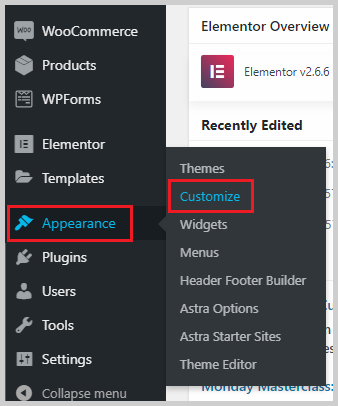
You can also go here if you’re on the frontend of your website. There should be a black bar at the top of your screen, which is only visible to those who are logged in to your website. Click Customize to open the theme customizer.
Once you’re inside the theme customizer, you’ll be able to add your logo, change colors, change the site layout, and much more.
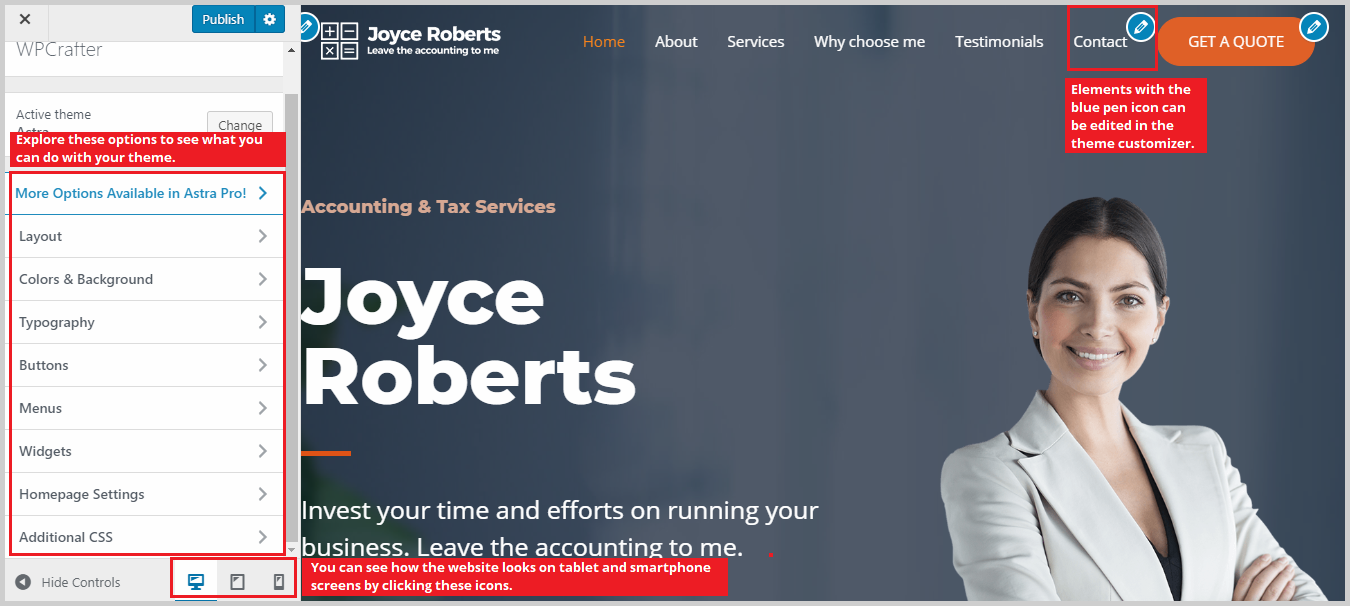
On the left sidebar, you’ll see various options to modify your website. Each theme has different customization options, so if you’re using a different theme, what you see here might be a little different from mine. All the changes you make here are shown real-time on your website.
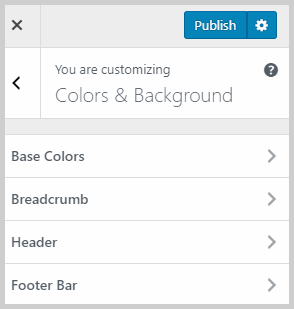
In this theme, to change your site colors, go to Colors & Background. You’ll have the option to change base colors, breadcrumb, header, and footer bar.
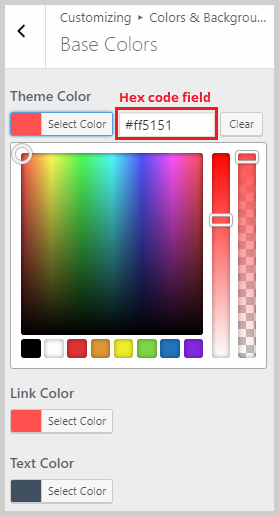
The Base Colors are the theme color, link color, text color, and link hover color of your website. To change the base colors, click Base Colors. Inside, you’ll see buttons that say Select Color. Click on these buttons to change a specific color.
For example, to change the Theme Color, click Select Color beside it. You’ll then see two ways to select a color. First, you can paste a Hex code in a box. If you remember what we talked about regarding Hex codes in the previous step, it is in fields like these that you can enter those Hex codes.
So if you found a color in Coolors.co or any other places, you can paste the Hex code here. You can also select a color in a built-in color selection tool.
Next is changing your typography. Go back to the customizer by clicking the back arrow at the top of the sidebar and click Typography. You’ll be able to change base, breadcrumb, content, and blog typography.
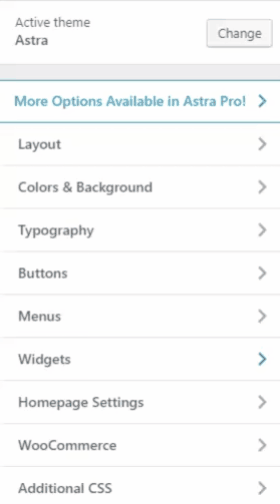
Lastly, to upload your logo, go to Layout > Header > Site Identity. Under the Logo section, click the Change Logo button and upload your logo.
Astra also lets you use a different logo for retina or high-resolution devices, as well as for mobile devices. You can also adjust the width of the logo. If you scroll down, you’ll also be able to change your site title, add a site tagline, and a site icon or favicon.
I suggest that you explore the theme customizer to see the different things you can do here. Astra Theme lets you do more like change the layout of your header and footer, change blog post structure, change how wide your site is going to be, and many more.
Once you’re done customizing, don’t forget to click Publish to make your changes go live on your site.
Step 7. Customizing your website with Elementor.
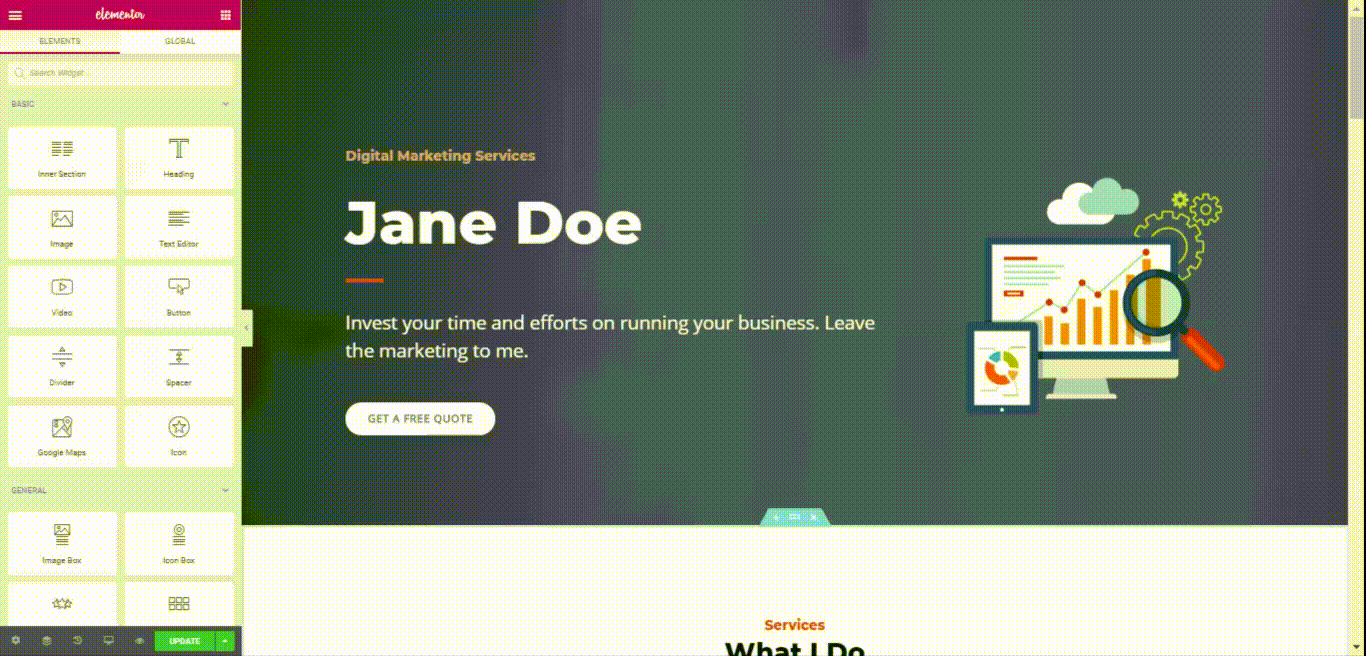
Now that your website colors, typography, and logo are all set, it’s time to jump into Elementor and completely change how the website looks to make it match your brand. We’re going to change the images, texts, buttons, layout, and much more.
There are two ways to edit a page with Elementor. First, if you’re in the backend, go to Pages and you should see a list of all the pages of your website. This includes the pages that Astra Site automatically created. Pages that were made with a specific page builder (e.g. Elementor) will be labeled as such:
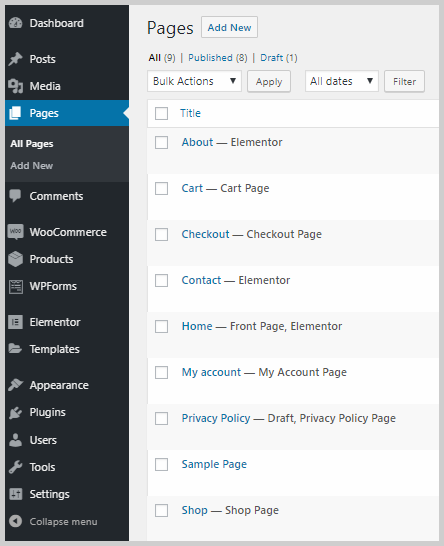
Hover your mouse over the page that you want to edit with Elementor and click Edit with Elementor.

That’s going to take you inside Elementor.
If you’re on the frontend of your website, you can enter Elementor by going to the page that you want to edit and click Edit with Elementor on the black bar at the top:

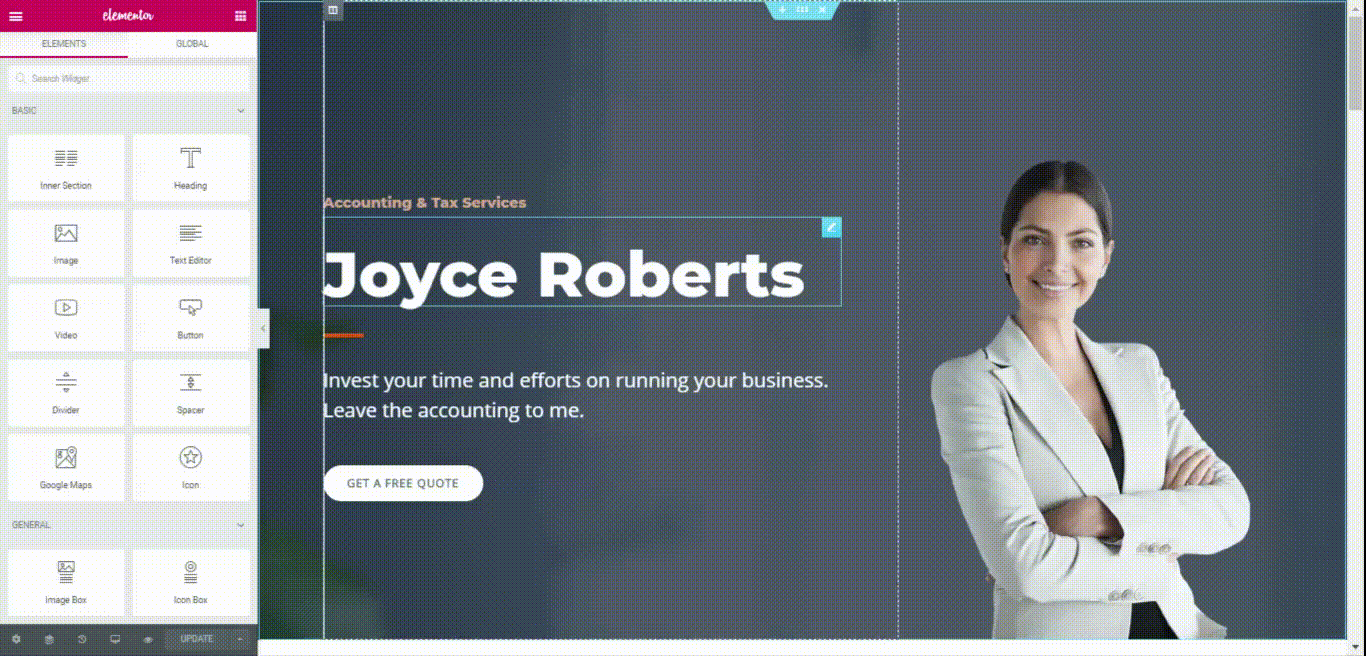
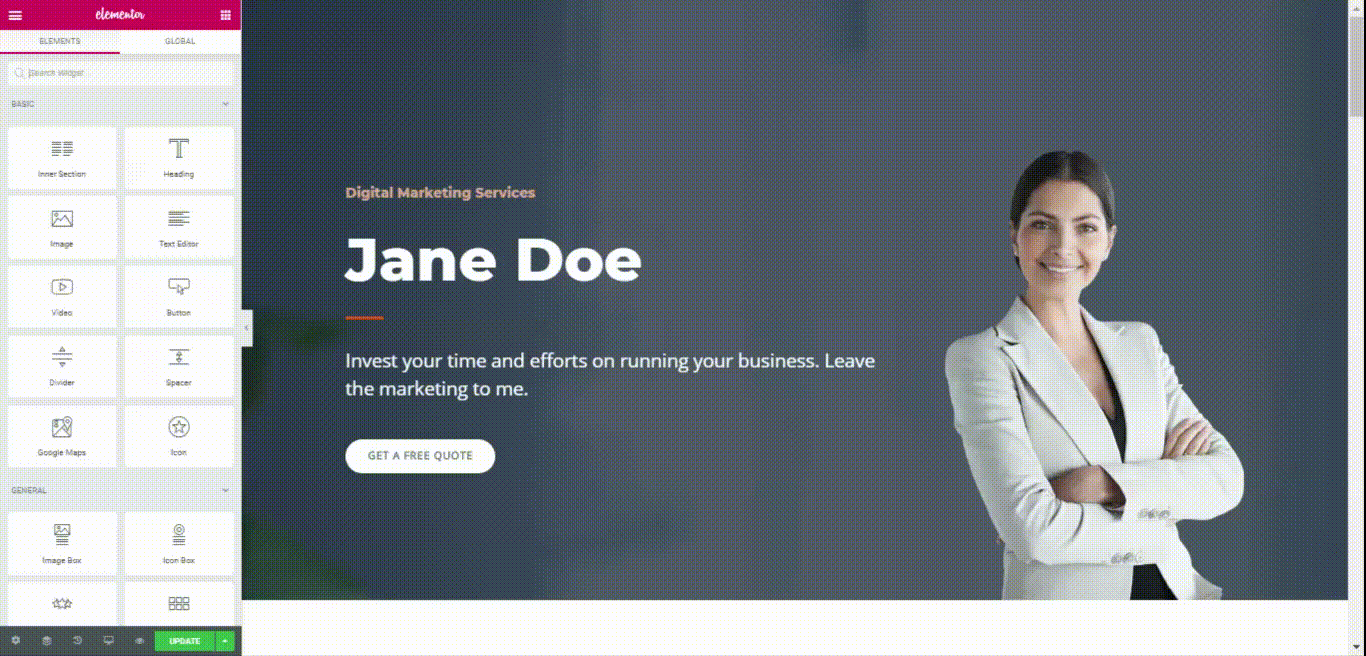
The Elementor interface is simple to understand and get used to because it’s pretty similar to the theme customizer. The majority of the screen shows the page that you’re editing while on the left is a sidebar with the controls and options.

If you noticed, the header can’t be seen inside Elementor. The reason is the free version of Elementor is not able to edit headers and footers. This feature is only available to Elementor Pro.
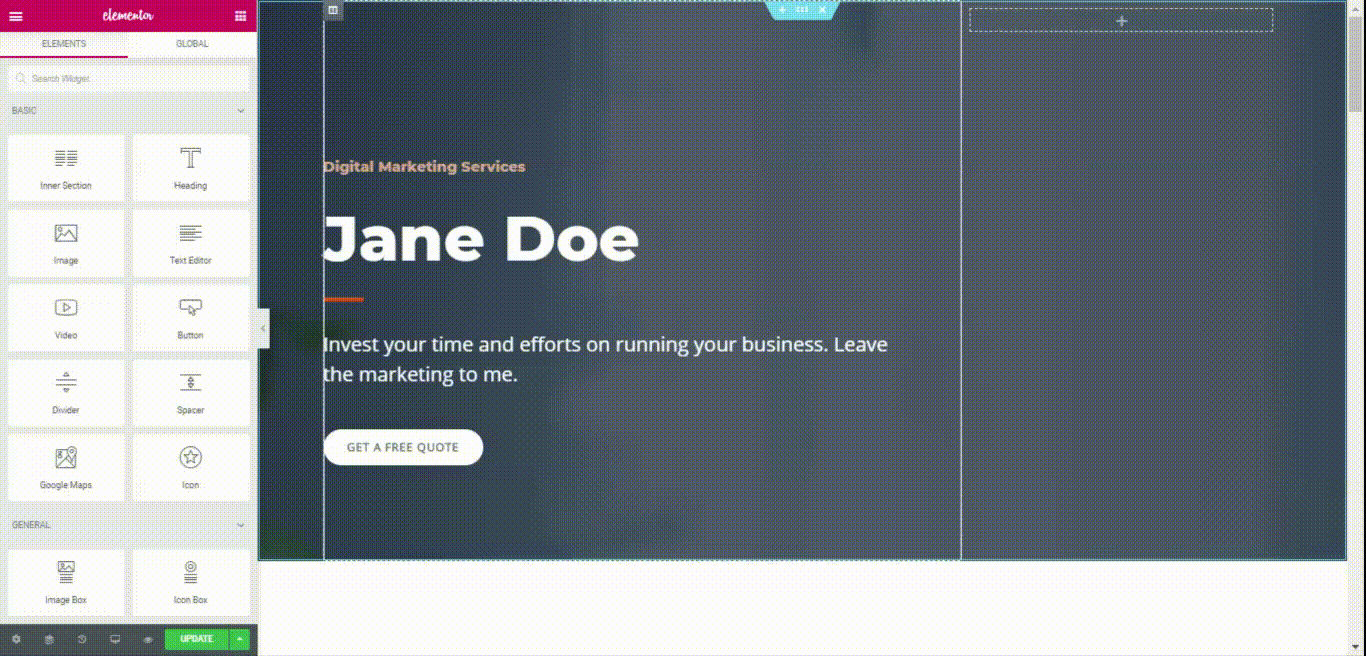
The left sidebar is where you can find the elements that you can add to your page. As you can see, you can add a heading, image, video, button, divider, and more. You can add these elements by dragging and dropping them in your desired area.
Elementor also allows inline text editing which means that you can change the text on the content area itself. Here are some of the things that you can do with texts inside Elementor:
As you can see, you can edit or delete the text right on the content area which makes it so much easier. You’ll find more customization options on the sidebar such as changing the size, color, weight, typography family, and shadow. You can also add animations like simple fades, zooming, bouncing, and more.
You would also want to use your own images to fully make this website your own. You can easily replace or remove an image if that’s what you want. To customize an image, just click on it and the options will appear on the left sidebar. You can upload a new image, change its size, add a border or shadow, add an animation, and more.
For my website, I want to remove this image altogether and just use a different background image. To delete an image, hover your mouse over it and right-click the blue pen icon on the upper right corner. A pop-up menu will appear. Click Delete to remove the image.
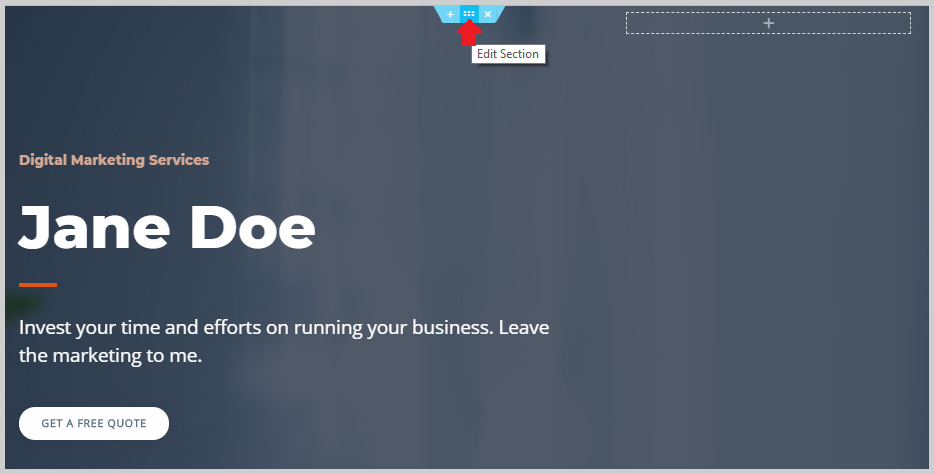
To customize the heading, hover your mouse over it and click the dotted icon at the top:
The customization options for the heading will then appear on the left sidebar. To change the background image of your heading, click Style and go to Background. This is where you can upload a new background.
As you can see, after uploading the image, I adjusted the background overlay to make sure the image is clearly seen. I did this by going to Background overlay and adjusting the opacity.
I also adjusted the color of the text to make sure it can be seen, and I adjusted the width of the text so that it doesn’t overlap with the image. I did this by going to Advanced > Custom Positioning and selecting Custom for the width.
Building a stunning webpage is so easy with Elementor. There are just so many options available, so it’s just a matter of exploring every nook and cranny. You can explore it at your own pace, and if there’s something you don’t understand, you can reach out to me via the comment section below or even search Elementor’s comprehensive knowledge base.
I also have an Elementor tutorial where I show you how to get started with Elementor fast. You can watch it here.
Step 8. Secure your website.
It’s also crucial for a business website to be as secure as possible from possible hacking and identity theft schemes. The fact of the matter is some of you might be vulnerable to cyberattacks due to weak passwords, plugin vulnerabilities, and outdated software. These things leave a hole to your website, and you need to find a way to block these holes.
One smart step is to use a secure password manager to generate and store strong, unique passwords—this helps eliminate one of the most common entry points for attackers.
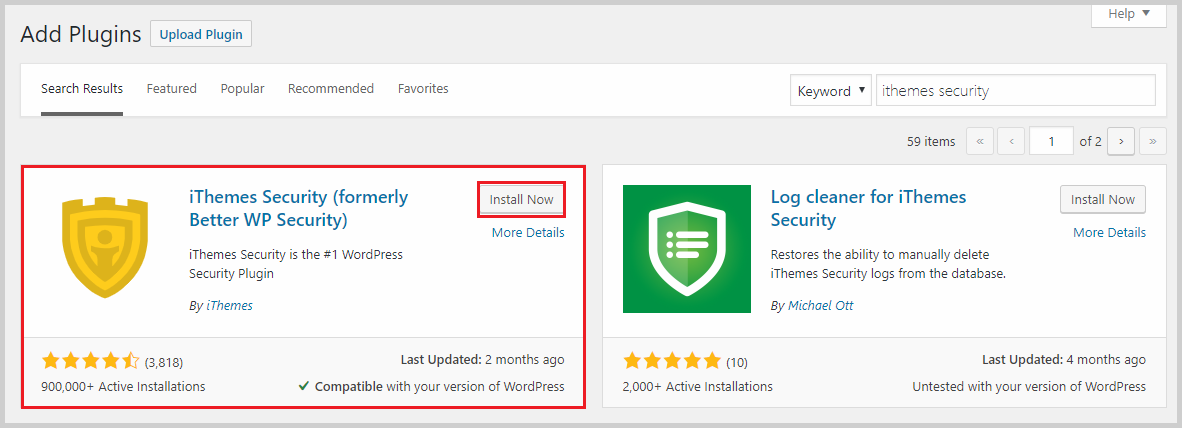
The best WordPress plugin I’ve found so far that does this is iThemes Security. The free version of this plugin already offers you strong security features, and you can activate it just one click.
To install iThemes Security, head over to Plugins > Add New then search for iThemes Security.
Once it’s activated, you will see a new option in the sidebar called Security. Go to Security > Settings and you should see a message about the different features that iThemes can do for you.
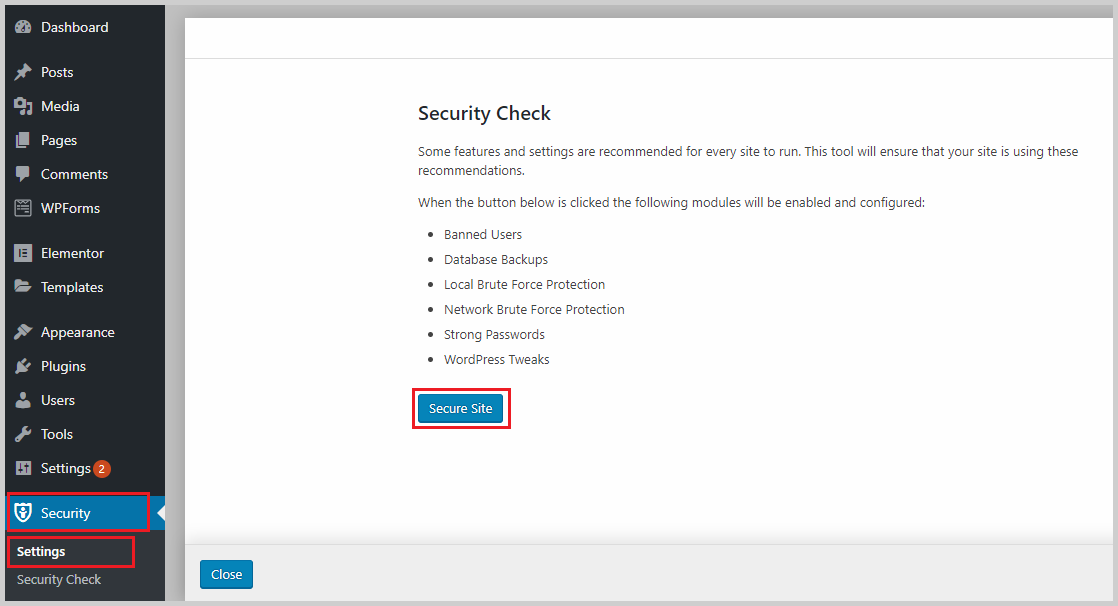
Enabling all of these features takes just one click of the blue Secure Site button. Once you click that button, you will see this message:

The Network Brute Force Protection is a feature where users who tried breaking into other sites that are members of this network are automatically banned from breaking into yours. This is a pretty good feature that only iThemes has, so to activate this just provide your email address and click Activate Network Brute Force Protection.
In just a few clicks, your website is now secure. You can do so much more with this plugin, and if you want to learn more about it, you can watch my iThemes Security review and setup tutorial here.
Step 9. Backup your website.
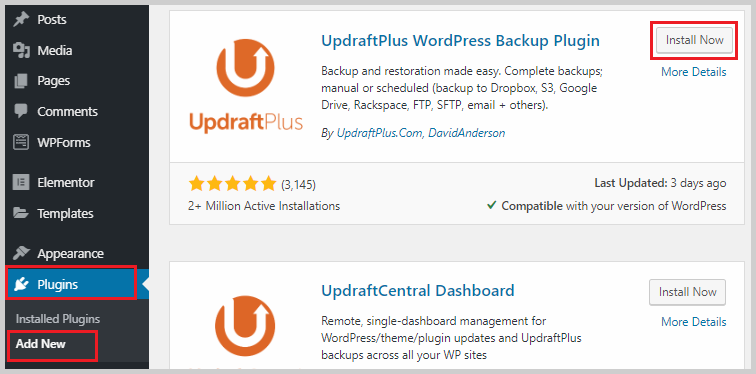
You also have to back up your website to save yourself from the possible unfortunate event of losing any of your data. For this, we’re going to use UpdraftPlus Backup.
To install this plugin, go to Plugins > Add New and search for UpdraftPlus Backup. Install and activate it.
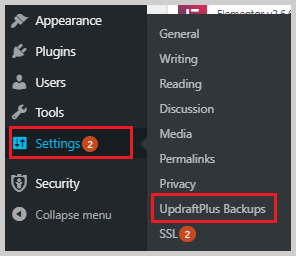
Once it’s activated, it will create a new option under Settings called UpdraftPlus Backups. Click on it to start configuring your backup settings.
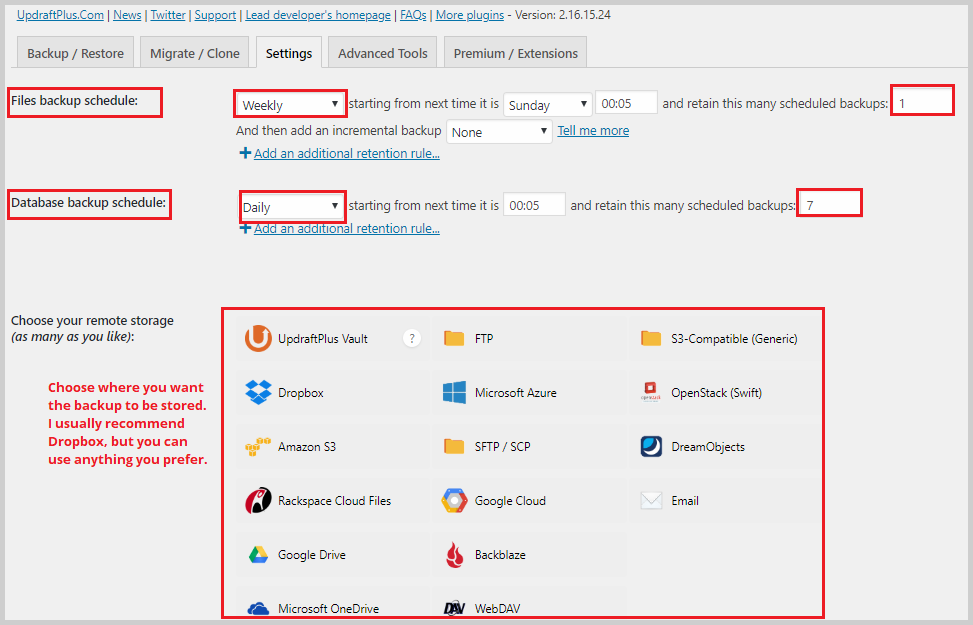
Once you’re inside, click Settings. Here, we will set it up so that offsite automatic backups are being made regularly. For the Files backup schedule, I recommend setting it to weekly and retaining one backup. Files don’t change often so that’s good enough.
As for the Database backup schedule, since this changes often, set it to daily and retain 7 backups.
Once you’ve set the schedules, scroll down and hit Save Changes. Then scroll back up again to choose where you want to store your backups. I usually recommend Dropbox because it’s very easy to use, but you can use anything and as many as you like.
Click your preferred remote storage and click Save Changes again. You will then see this message:

You have to click this link to authorize UpdraftPlus Backups to store backups to your selected storage. In this example, since I chose Dropbox, clicking this link will lead me to the Dropbox sign-in page. Once I sign in, I will see this message:
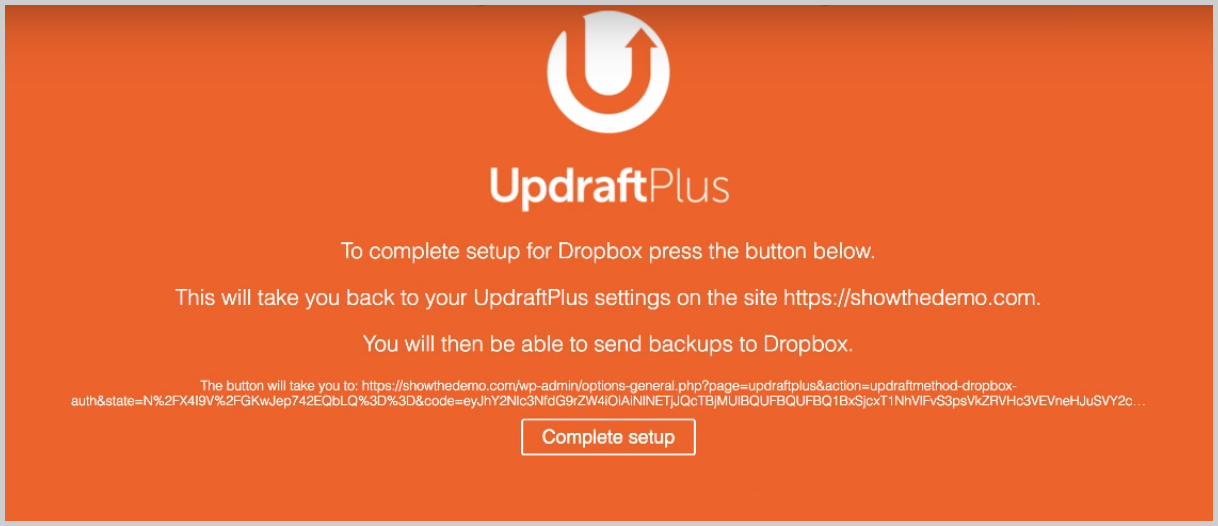
I just have to click Complete setup, and I will be taken back to UpdraftsPlus backend in WordPress with this confirmation message at the top:
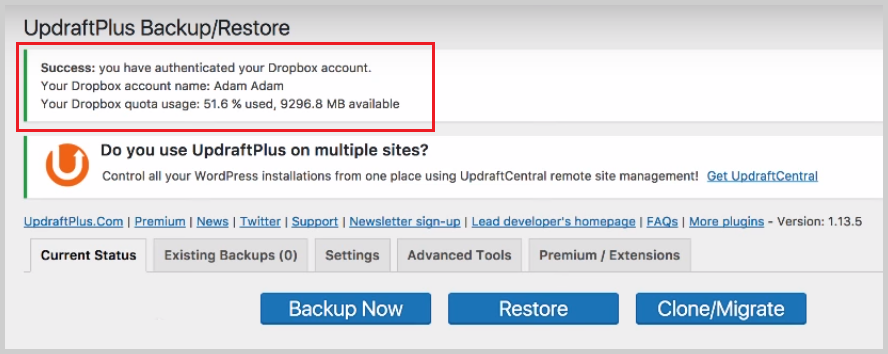
If I wanted to make a backup, all I have to do is click the blue Backup Now button. UpdraftPlus will also create backups according to the schedule I made earlier and push those into DropBox.
If you want to restore a backup, just click on Existing backups and click the Restore.
Step 10. Optimize your website.
We’re down to the last step, and in this step, we’re going to see how to optimize your website for search engines like Google. I’m sure most of you have already heard of SEO or search engine optimization. In a nutshell, it’s the practice of making sure your website is optimized the right way to make it easier for search engines to find your pages and show you on the results pages.
SEO has an aspect called on-page SEO, and these are practices that you can implement on your website right inside WordPress to clearly communicate to search engines what your website and content are about.
These are some on-page SEO best practices that you need to implement:
- Write a meta title and meta description for every page and post.
- Add keywords or key phrases and use them throughout the content.
- Add ALT TXT for every image on your page/post.
Now if you’re not familiar with what these things are, that’s okay. They’re pretty easy to learn. The meta title is the title that shows up on Google Results and the meta description is the short description below the title. Here’s an example:
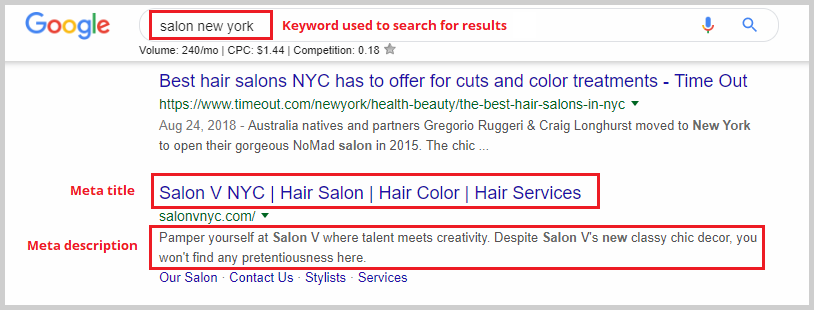
The keyword is what users type in the search engine to search for something. The meta-title is the title of the result, and the meta description is the short description below. These are important details because they tell Google what the page is all about and that it’s relevant to the key phrase “salon new York”.
This is a short list of on-page SEO techniques because there’s literally so much you do here. But for now, we’re going to focus on these.
To do these things, we need a plugin. One of the best on-page SEO WordPress plugins is Yoast SEO, and we’re going to use that in this tutorial. To install this plugin, just go to Plugins > Add New and search for Yoast SEO. Click Install Now and Activate.

Now, when you go to any page or post, you’re going to see this new box below the editor area:

This is where you can add your meta title, meta description, and keywords. To add a keyword, type it in the box below Focus keyphrase:

To add a meta title and description, click the Edit snippet button.

Under SEO title is where you should add your meta title. It’s a good practice to include your focus keyphrase here. In the meta description field, you should give a clear idea of what the page is about and also include the keyphrase here.
As you type something in the SEO title and meta description field, you will see an orange progress bar running below it. This means that the text is still too short. Once it turns green, that means that the length of your text is just right. If it turns red, it’s too long and you should shorten it. Lengthy titles and descriptions get cut off in results so it’s better to stay in the green area.
Another thing that you want to do is to make sure that your sitemap is enabled and actually working. To do that, go to Yoast SEO > General > Features. Scroll down until you see XML sitemaps. Make sure this is enabled, and then click the blue question mark icon. You will then see a link that says See the XML sitemap. Click on this to view your sitemap.

For many of you, this may lead you to a 404 page. But don’t fret. The fix is quite simple. All you have to do is go to Settings > Permalinks. Select Post name and hit Save Changes.

Now, when you try to access the XML sitemap again, you’ll see something like this:

Wrapping Up
And that wraps up this tutorial on how to create a business website with WordPress. I’d like to give you a tap on the shoulders because you’ve done so much and achieved so much by following this tutorial. If you have any questions, just drop them below in the comments section and I’ll be happy to help.
Thank you for this awesome tutorial, Adam! I have used it to help build 2 basic websites. It is a great resource!
how to hide title of a page using elementor page builder ?
Choose the page template named Elementor Full Width.
I have a question ! how to hide title of elementor page ? I have tried a lot but can get assist.
Choose the page template Elementor Fullwidth.
Hi Adam,
I am new to Astra and Elementor.
I made a mistake on importing a Astra template with another on going theme. So, the template appeared on the Astra theme and when I opened up the 2010 theme the template was on the 2010 theme. So, I started to panic and I deleted the Astra theme, the Astra Sites and Elementor. This did not solve the situation, the template is still on the 2010 theme.
Can you tell me what can I do now?
Should I just close everything?
My student website is with another instructor, I am asking you because you are an expert on Astra and Elementor. Thank you
Thank you, Gail
You can simply also delete any create pages and media.
Great articles Adam! I’m currently using squarespace to host my site but the mobile performance is not good and the flexibility is too limited. I have heard that Divi is a good theme/visual builder and wanted your thoughts on it. Also, I need a wordpress host and from what I’ve read InMotion is the fastest but SiteGround might be easier for a newbie with more support? Lastly, to maximize SEO does it make sense to go with the fastest host because what i’ve read is that all else being equal the faster site for a search will rank higher? Thanks so much for all the great thoughtful content!
Divi is good, I personally prefer Elementor. And yes SiteGround has the best support I have come across. For SEO you do want a fast loading website. It’s not the biggest ranking factor but you do want it more for user experience.
Hi Adam,
For some reason my wordpress site is crushing whenever I activate elementor? HTTP ERROR 500
Maybe there is some conflict with something else on your site or your hosting.
I need a help, I have install wordpress under a folder like maindomain.com/folder, now i want to move to maindomain.com folder not needed, how to mode this
That’s an easy one. Here is the tutorial https://www.youtube.com/watch?v=9pn7BaKqG-E
Adam
You have an extensive knowledge on page builders
which is easy to use and has easy learning curve
Elementor by far.
How about google ranking and SEO. Is WordPress as good as a HTML WP?
It’s better then HTML because of all the SEO tools that are available to automate many things like, adding schema, interlinking content, creating meta descriptions, generating a sitemap.
When I go to https://coloors.co my antivirus stops it saying that it has a trojan.
It’s a safe website. Those website antivirus plugins have too many false positives.
Hi Adam! thank you for this perfect tutorial without this one i couldnt make the starter phase and the main construction! I am desperately searching for a tutorial or a suggestion on how to make a corporate business website without using a demo/template/ready to import website for showcasing products(10 products actually) that every one of the products has their own page with downloadble files, could u suggest me something to lead me to a direction?
p.s:like u suggested i choose siteground hosting with astra theme and elementor pagebuilder but i realy dont like what demos templates suggest me
I have a full tutorial on how to make an e-commerce website.
Great video Adam, thank you! I would like to ask you if setting the colors in the customizer when working with a page builder like elementor is a must? I work with astra pro theme + elementor pro, by the way.
That’s completely up to you. It’s certainly convenient, but not essential.
Hey Adam,
Great video as always. I have watched a few and find them very helpful. I only had one issue when I was assigning the XXL sitemap. When I clicked on the link to see the XXL sitemap it just brought me to my homepage. It didn’t follow your video so I was wondering if this is how Yoast SEO works now or is there something I didn’t do correctly? Any help would be greatly appreciated. Thank you!
There is a simple fix here, just go and reset your permanent links and I’m sure it will work as expected.
Hello.
when using a theme that wordpress says that: That theme is not compatible with the header plugin footer buider elementor, then how can edit the header, or footer?
Thanks
Unfortunately, you need to use a supported theme if you want to use Elementor to make custom header and footers. My favorite is Astra which is free, but there are several others.
Hi, I can’t visit your flatsome & elementor articles, as they all give an 404 error. I wandered if you can use Elementor with Flatsome to style some pages like single post.
Also, It’s unclear what theme you need to use elementor. Since it can style almost everything, what difference does it make wich theme you choose?
Yea I don’t have any posts or review on Flatsome. I have a bunch on Elementor and I would be surprised to hear that you got a 404 page on them.
I regret not having come across your tutorial video’s before making my website. I am still finding it hard to to navigate or even how to use it correctly. I want to take the website down and start again it would be a mammoth task for me.
Oh sorry to hear. You can make a website on your local computer then migrate it to your live website.
Best tutorials I’ve seen. Thank you. God bless you
Thank you for your awesome tutorial.
You rock!
i have a problem with elementor.
There is an error called as “The preview could not be loaded”.Will you please make a video on how to fix it
Here is a video that goes through the process of fixing WordPress issues like this https://www.wpcrafter.com/how-to-fix-wordpress-problems/
sir i am your you tube subscriber i want to ask you how you make that moving text on your homepage on your http://www.wpcrafter.com website side of confidently and how the youtube video upon this page is coming side while scrolling down please tell me i want to become a web developer
I made the homepage with Elementor Pro, it’s a feature called Animated Text.
Many thanks for doing this video Adam, most appreciated. A question if I may: after the site is up and running, looking and functioning the way I’d like it to; do I deactivate or remove Elementor?
Thank you
Dale
Hey Dale, you need to leave Elementor active if you used it to create any pages on your website.
Hi Adam, I have copied your examples and tried to research but on the Contact mail, additional Headers I have typed Reply-To: [your-email] and I keep getting the invalid mailbox syntax is used in the Reply-To Field. Any ideas? Thanks, Nick I’m one of your clients.
You are saying that Contact Form 7 if giving you validation errors?
Adam, Kudos and Thank you for a great how to video. I have Elementor Pro, but I have been on overwhelm about choosing a theme. You have made sense and direction for me with Astra and Elementor. Now I have a path to follow. I’m sure that I will watch it again (and again) and DO IT step by step. Ed
Yea it can be a tough choice because you want to get it right in the beginning. Astra is a great choice!
Great video thank you! I can’t seem to find how to change the text in the bottom contact form that requests information about the electrical project.
The text from the email? The site most likely is using Contact Form 7. When you log into your website you should see the settings for it.