
There are over a billion websites on the internet. That means yours is one voice among many and you’re going to need to work incredibly hard to attract an audience.
One way to do that is to utilize search engines.
As most of us use them to find stuff online, getting our own website ranked in search engines is essential. Billions of people across the world use search engines, so the higher you appear in them, the more visitors you’ll get.
SEO is a time consuming and often complicated business. It can also be very expensive.
Fortunately, if you use WordPress, there are a number of SEO plugins that can give you a head start.
One of those plugins is Yoast.
Why Use Yoast?
Yoast is one of a number of WordPress SEO plugins. It is incredibly popular, with over 5 million downloads and thousands of five star reviews.
There are other SEO plugins available, but we like the look and feel of Yoast. It has been designed to be powerful and easy to use.
It also has a great free version, which allows it to stand out in a crowded marketplace full of premium plugins.
We also recommend Yoast because of the features it has, including:
SEO analysis – Yoast has tools to help optimize content for SEO best practices including readability, keywords and more.
Simple controls – Straightforward dashboard with logical tabs, straightforward menus and plain English explanations.
Control post and page titles and meta description – Optimize post and page titles according to your target keywords
Compatibility with other services – Integrates your website with Google Search Console, Bing, Schema Pro and other SEO and marketing tools.
Intuitive setup wizard – Even if you have never set up a website before, you’ll find Yoast simple to use and easy to get going.
Feature-rich free version – Yoast has one of the most comprehensive free versions of any SEO plugin. All the basic tools are included at no cost.
Those are just some of the many reasons to try this WordPress SEO plugin.
How to set up Yoast in WordPress – Actionable tips to optimize your website like a pro for search
How To Set Up Yoast in WordPress – Optimize Your Website Like a Pro
Yoast is a standard WordPress plugin and will install within minutes.
Step 1. Select Plugins from the WordPress admin dashboard.
Step 2. Select Add New and type ‘Yoast’ into the search box at the top right.
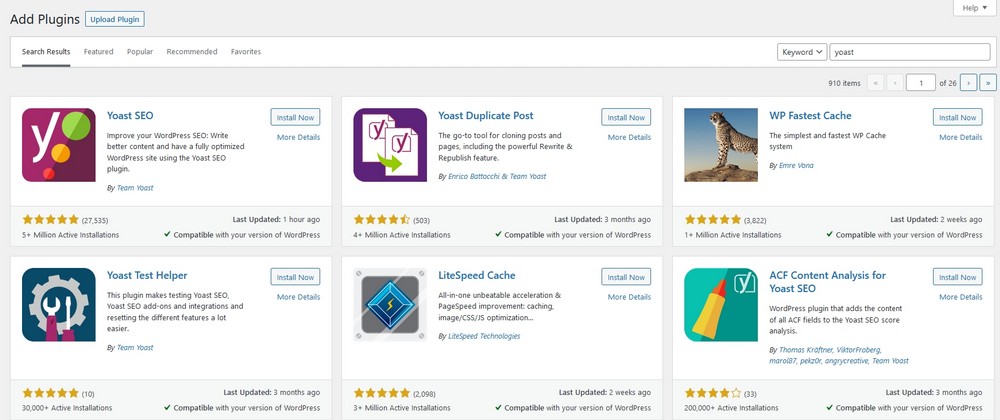
Step 3. Select Install Now and Activate to install Yoast.
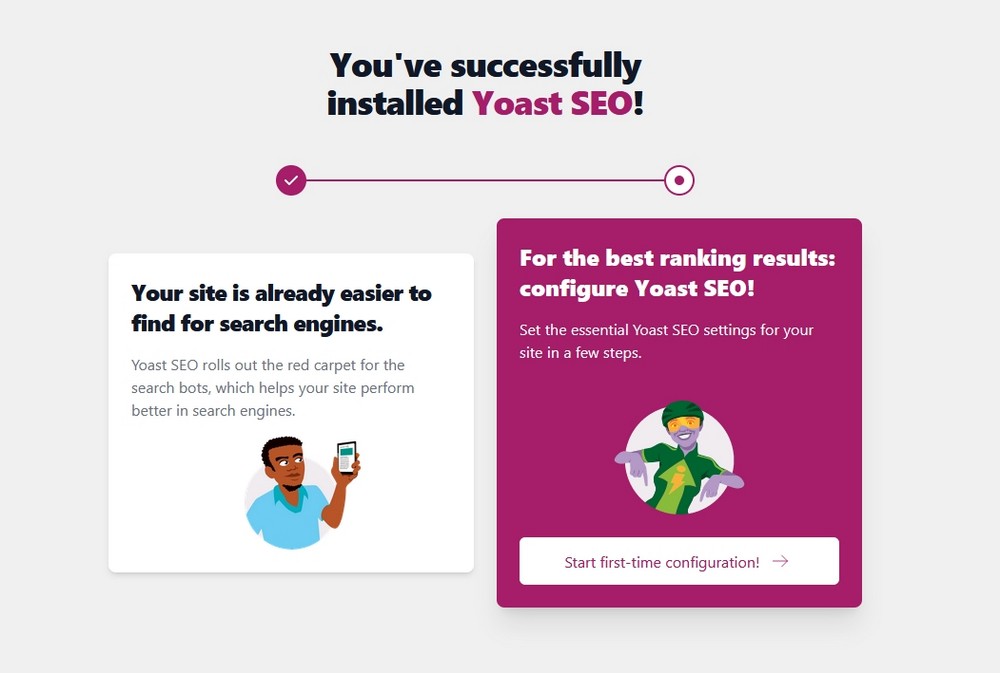
If successful, you’ll see a message with the option to select the setup wizard.
Step 4. Select Start first-time configuration to begin.
You’ll see a setup window called General – Yoast that will walk you through the process.
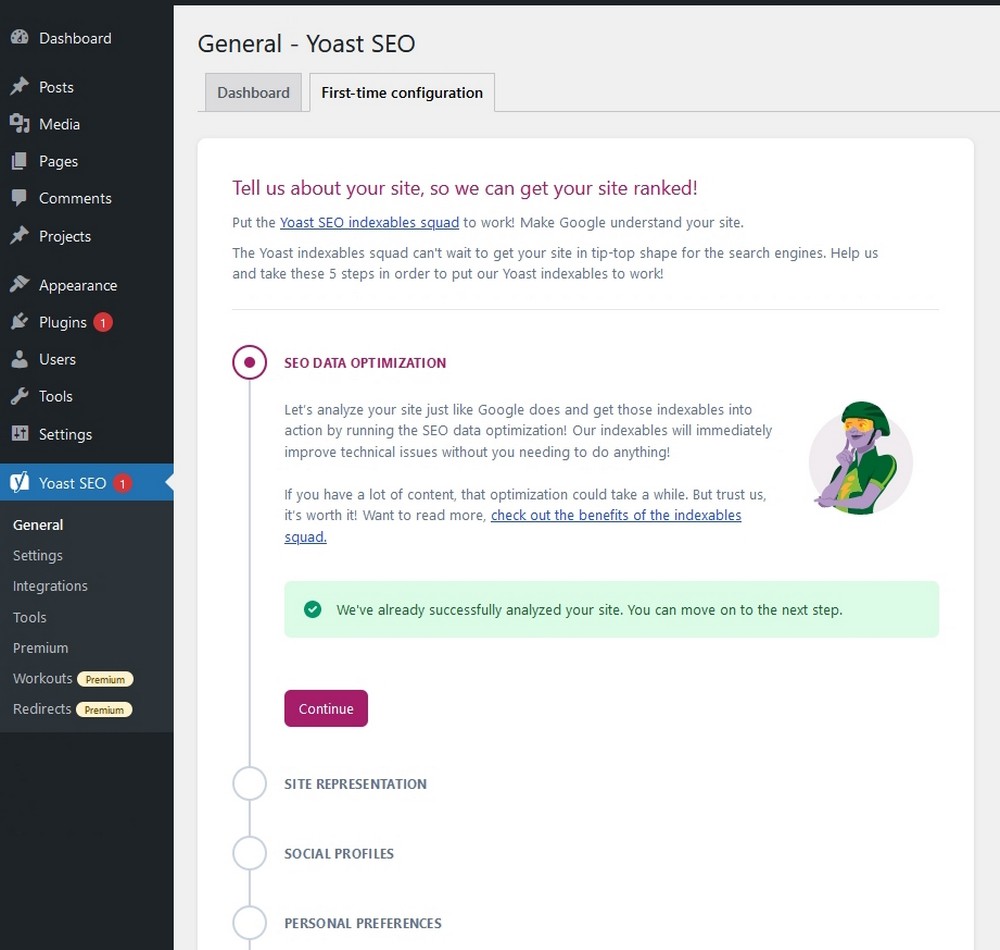
Step 5. If you see the successful analysis message, select the purple Continue button.
Answer the questions throughout the setup wizard to help the plugin understand what your website is about, its name, your organization, and upload a logo if you have one.
Step 6. Once complete, select Save and continue to move on to the next step.
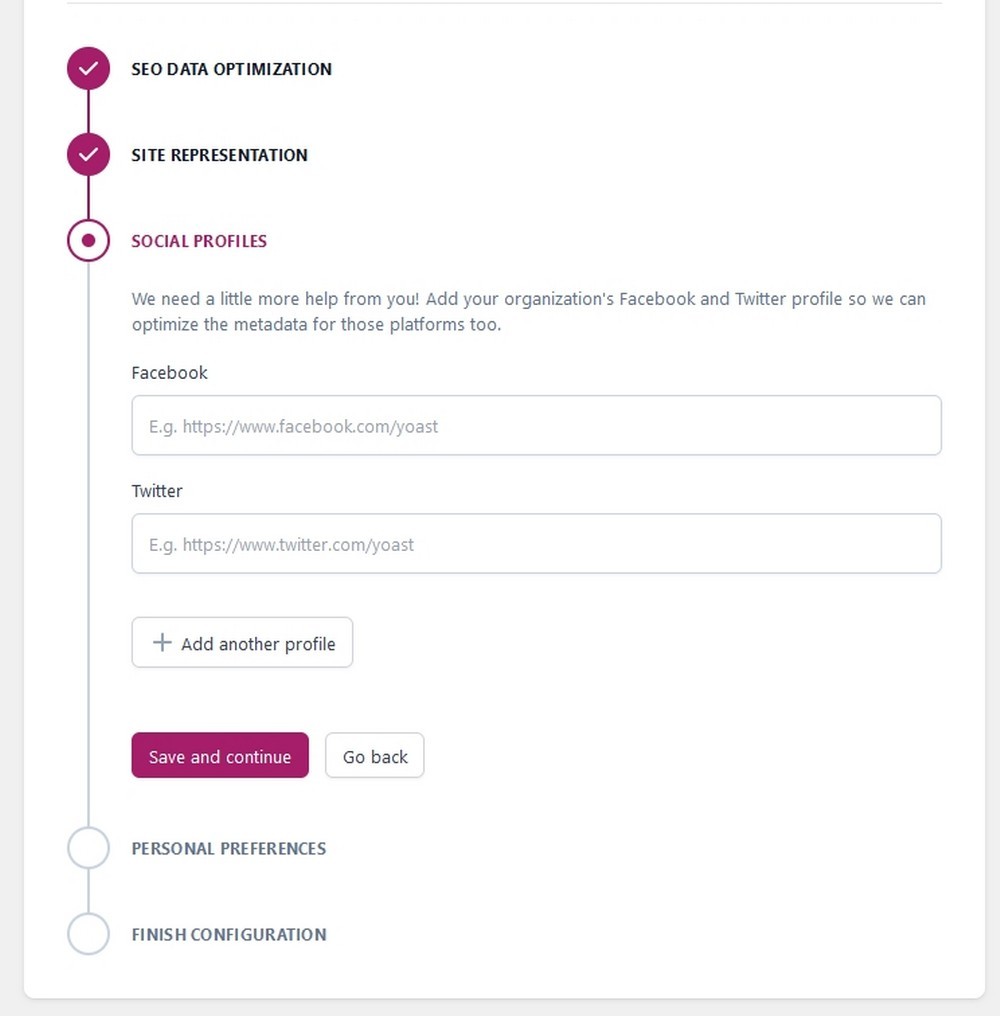
Add your social accounts in the next section if you want Yoast to optimize content for social.
This is an optional step you can revisit later if you prefer.
The next setup screen is about usage tracking. Read the description and decide whether to help Yoast or not. Then sign up to the newsletter, or not as you see fit.
The final window gives you the option to register with Yoast or visit the SEO dashboard.
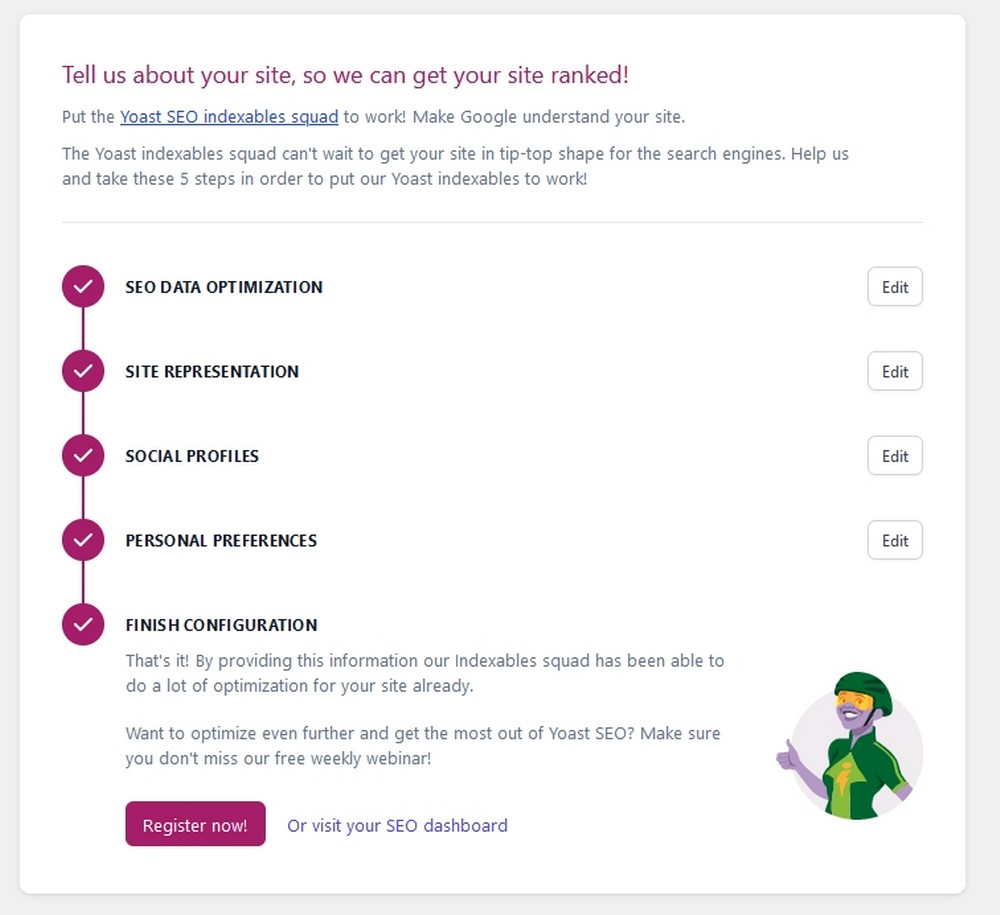
That’s all there is to setting up Yoast !
The Best Yoast Settings To Optimize Your Website
Let’s now cover the Yoast options and the menus and tabs. We’ll work our way through the core options within Yoast so you know everything that’s going on.
Yoast General
Many of the general settings will have been taken care of when you used the setup wizard but there are a few extras to take care of.
Select Yoast > General from the WordPress admin dashboard menu.
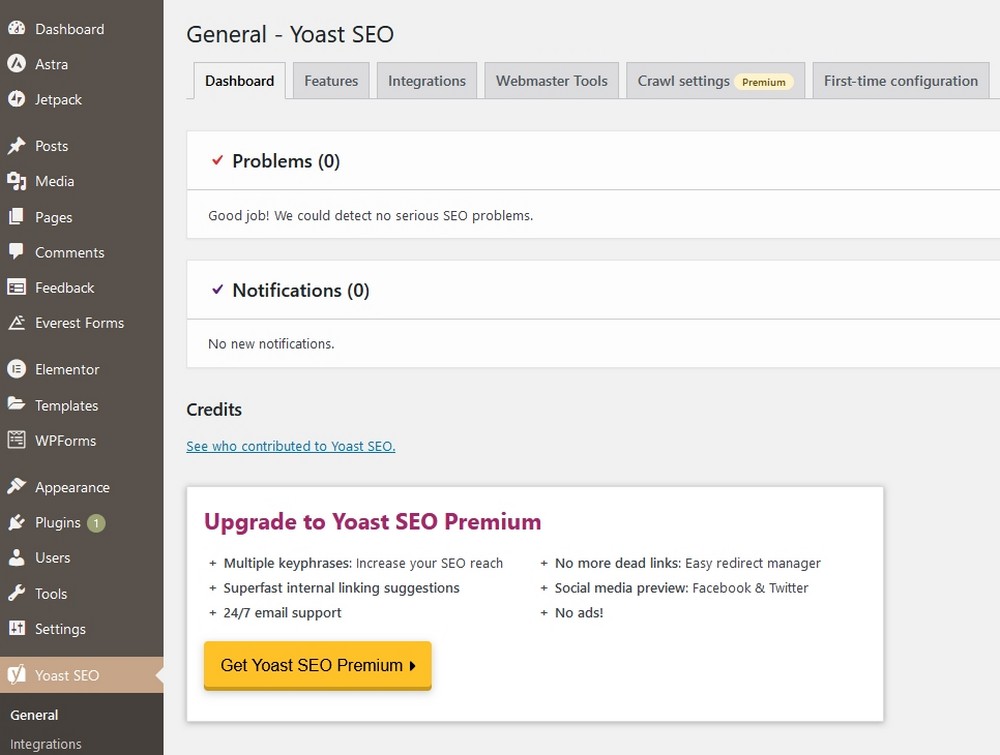
The Dashboard tab is where the plugin will highlight any issues it detects. It’s a good idea to keep an eye on this section so you can ensure it’s always working as it should.
Select the Features tab. You’ll see a list of features you can toggle on or off here. There are tooltips by each one to explain what they all mean.
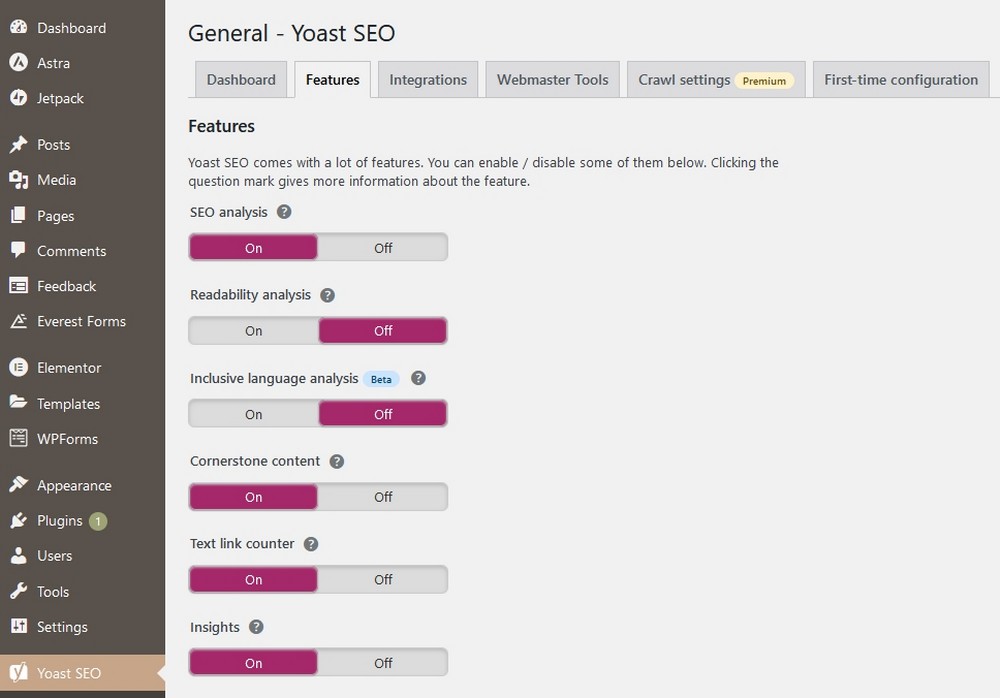
Save all changes if you made any.
Work your way down the page enabling or disabling features as you see fit.
Skip Integrations as that’s now a blank section. Also skip Webmaster Tools as we’ll cover that in more detail shortly.
If you have premium, select the Crawl settings tab and make your choices in the same way as you did with the features tab.
Save your changes if you made any.
The First-time configuration tab is the setup wizard we completed earlier so you can skip that.
Integrations
The next option you see on the left menu is Integrations.
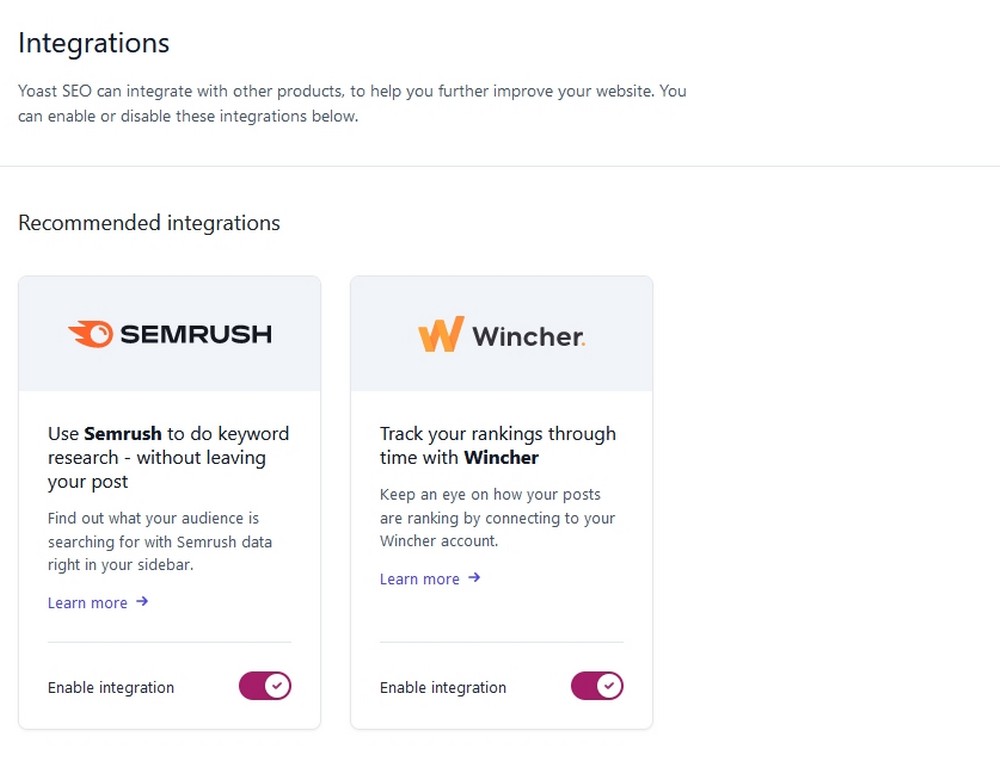
This setting enables you to link Yoast with any other product you might use.
They include:
- SEMRush
- Wincher
- The Events Calendar
- Seriously Simple Podcasting
- WP Recipe Maker
- WooCommerce
- Elementor
- Jetpack
- Algolia
- ACF
- WordProof
- Zapier
If you use any of these services, the plugin will have picked them up. Toggle them on or off here if they aren’t already enabled.
Search Appearance
Search Appearance is next in the Yoast menu. For most websites, the defaults configured during setup will suffice but you can control everything from here.
The General tab covers many of the options we have already set up, including the website name, whether you’re an organization or not, the title separator and your logo.
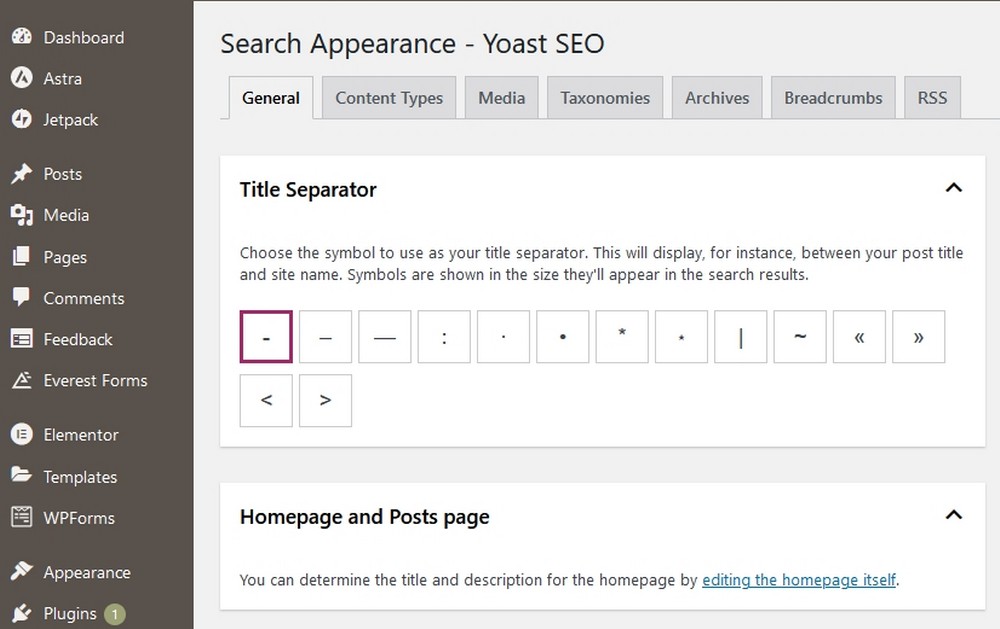
Remember to save changes if you make any.
Select the Content Types tab to choose more advanced settings, including whether to show posts in search results, the default SEO title arrangement for search, a meta description box and schema settings.
The SEO title and meta description box appear in the post and page editor. We recommend tweaking each individual post or page to optimize it for the target keywords.
The other options, Pages, Landing pages, My Templates, Elementor Header & Footer Builder and Custom Layouts can usually be left with their default settings.
You can customize them if you like though.
The Media tab is very straightforward to set up. This tells Yoast to redirect anyone who clicks on media to the file itself rather than the default empty page WordPress creates.
By default, WordPress creates an empty page containing the media and not much else. Redirecting users avoids indexing a low value page, which is a marginal SEO gain.
This should be set to yes already. If not, change it to yes and save the change.
The Taxonomies tab is where you can configure categories, tags and category URLs.
Like other areas of setup, the defaults should do very nicely. Although you can, of course, tweak them as you wish.
The Archives tab is where you control how archive pages, author biographies, 404 and other pages appear in search.
Defaults are usually fine unless you run your website yourself. Then you should turn off author archives to prevent WordPress creating duplicate content.
The Breadcrumbs tab is another where the defaults tend to be ideal for most types of website.
As long as that final setting, Enable Breadcrumbs for your theme, is enabled, it’s all good.
The final RSS tab controls how a website links back to you if it scrapes content using an RSS feed.
The defaults should be fine here as long as they say The post %%POSTLINK%% appeared first on %%BLOGLINK%%.
Yoast Social
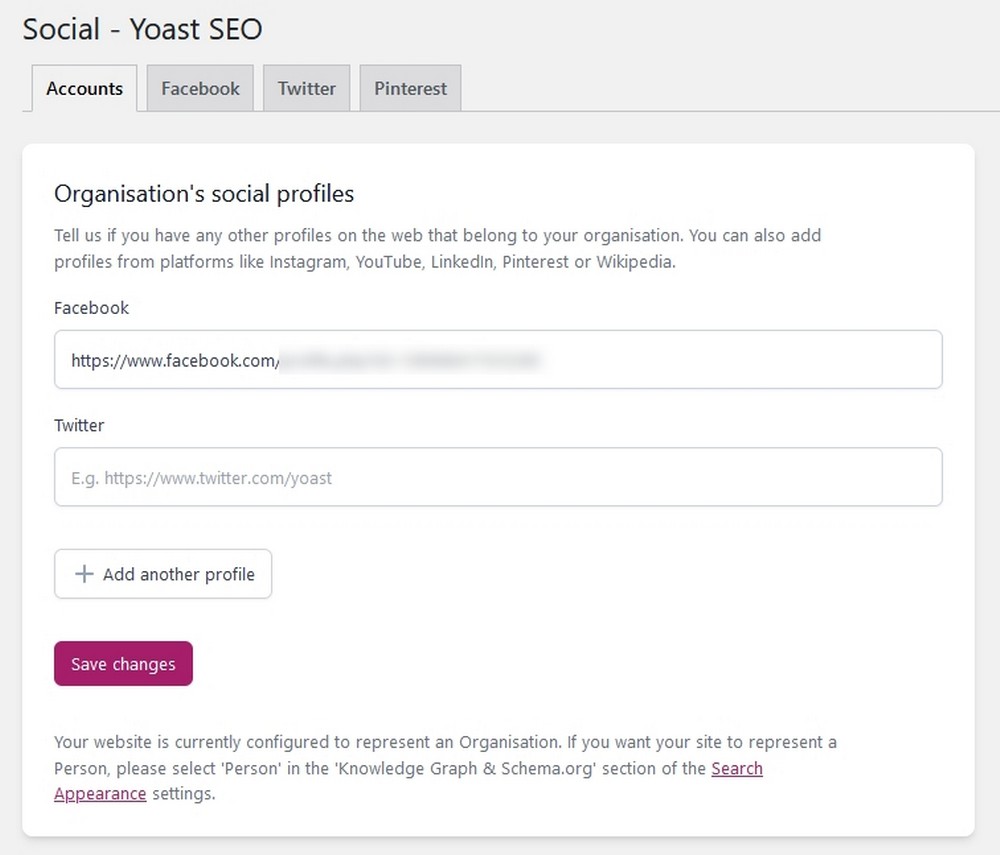
The next menu option within Yoast is Social. This is where you control how the plugin interacts with your socials.
The Accounts tab should already be populated with any social accounts you added during setup.
You can add more now if you like and then save your changes.
The Facebook tab allows you to use open graph metadata, which should be enabled.
The Twitter tab is where you enable adding Twitter cards which is another setting that should be enabled.
You can change the card type if you like but the default summary with a large image should work fine.
The Pinterest tab is where you can verify your website with Pinterest so you can use open graph metadata with that too.
Follow the text link on the page, log into Pinterest, get the code, paste it into the tab and save the change.
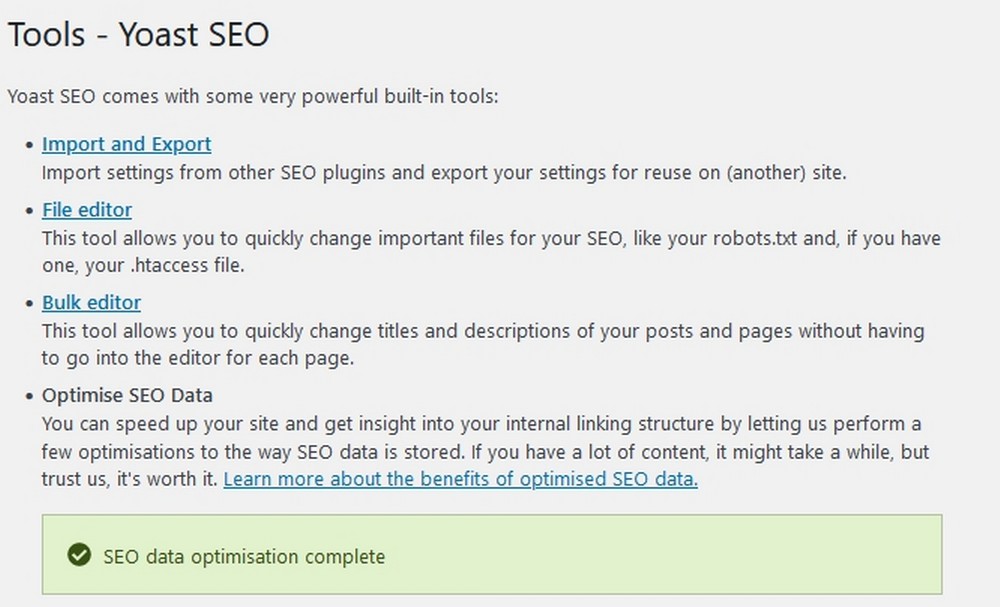
Yoast Tools
The next option in the Yoast menu is Tools. You will rarely use this section but it’s useful to know it’s there should you need it.
It’s where you’ll find the import from other SEO tools feature, file editor, bulk editor and SEO optimizer.
The final two menu options are Workouts and Redirects which are both premium options.
Workouts help you define cornerstone content so it can stand out in search engines and identify orphaned content so you can tidy up your links.
Redirects provides tools to temporarily or permanently redirect links to pages and manage them all.
That’s all the Yoast menus and tabs identified and demystified.
Now let’s show you how to perform some key optimization tasks.
How To Optimize Your Website with the Yoast Plugin
Many of the following features are available with the free version of Yoast . A couple are premium only, so feel free to skip those if you haven’t yet signed up for premium.
Import SEO Data
If you’re building a new website, you can skip this step.
If you’re running an established website and are using Yoast Premium, importing data can save time by utilizing existing data from another SEO plugin.
Step 1. Select Tools from the Yoast menu in your dashboard.
Step 2. Select the Import and Export links in the next window.

Step 3. Select the Import from other SEO plugins tab at the top of the window.
If you have had an SEO plugin before, you should see it listed on this page. As we have always used Yoast, you don’t see any in our example.
Step 4. Select the plugin and follow the import wizard to transfer your SEO data into Yoast.
Set Up Webmaster Tools
Go back to the Webmaster Tools tab in the General menu. Now we’ll set everything up so you can verify the website and utilize the combined power of Yoast and your tool of choice.
Enter your details into the relevant line to verify it. Past your verification code into the box and select Save changes.
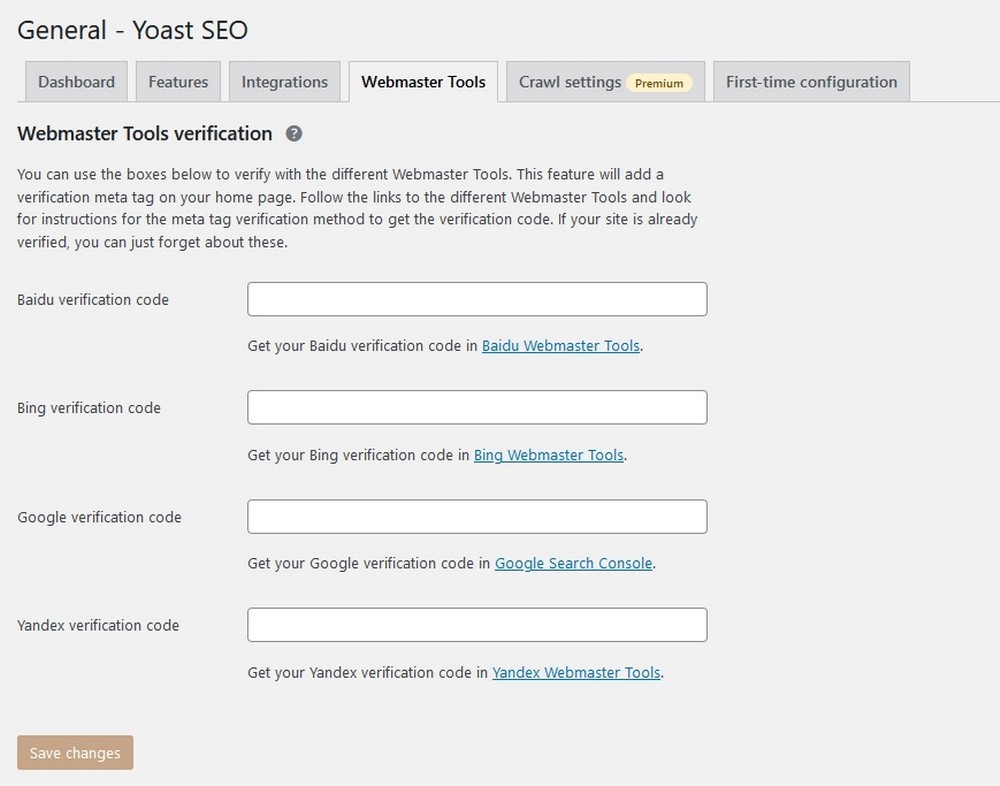
There are several options here but you will need Google Search Console as a minimum. If you don’t already have an account, sign up for one so you can use it to optimize your site.
Once you have an account, you’ll need to verify your website to make sure you own it.
Integrate an XML Sitemap
An XML sitemap acts as a roadmap that lets Google find and crawl all your posts and pages. It’s a simple but very important part of SEO and every website should have one
Yoast automatically sets one up when you install it but you can check it whenever you like.
Select Settings from the dashboard menu and scroll down to the APIs section.
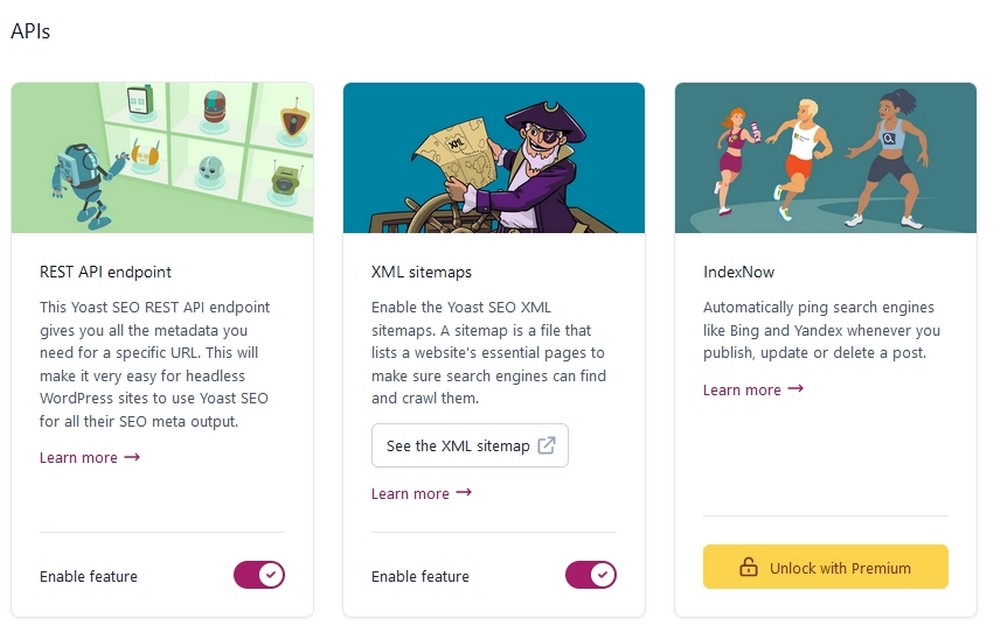
Check XML sitemaps and make sure it’s enabled.
If it’s set to On, there’s nothing for you to do.
You can check your sitemap by navigating to
https://yourwebsiteURL.com/sitemap_index.xmlOptimize On-page SEO
Now the basics are taken care of, let’s move on to optimizing posts and pages.
On-page SEO is where you optimize the content on the page to appeal to search engines. That includes configuring an SEO title, meta description and image alt-text among others.
Yoast can help with most of those things.
Let’s walk you through basic on-page SEO optimization using Yoast.
Open a new page or post within WordPress and add your title, content and images. Once your page is ready to publish, scroll down to the Yoast section below the editor.
You’ll see the main window where you’ll be making your optimizations.
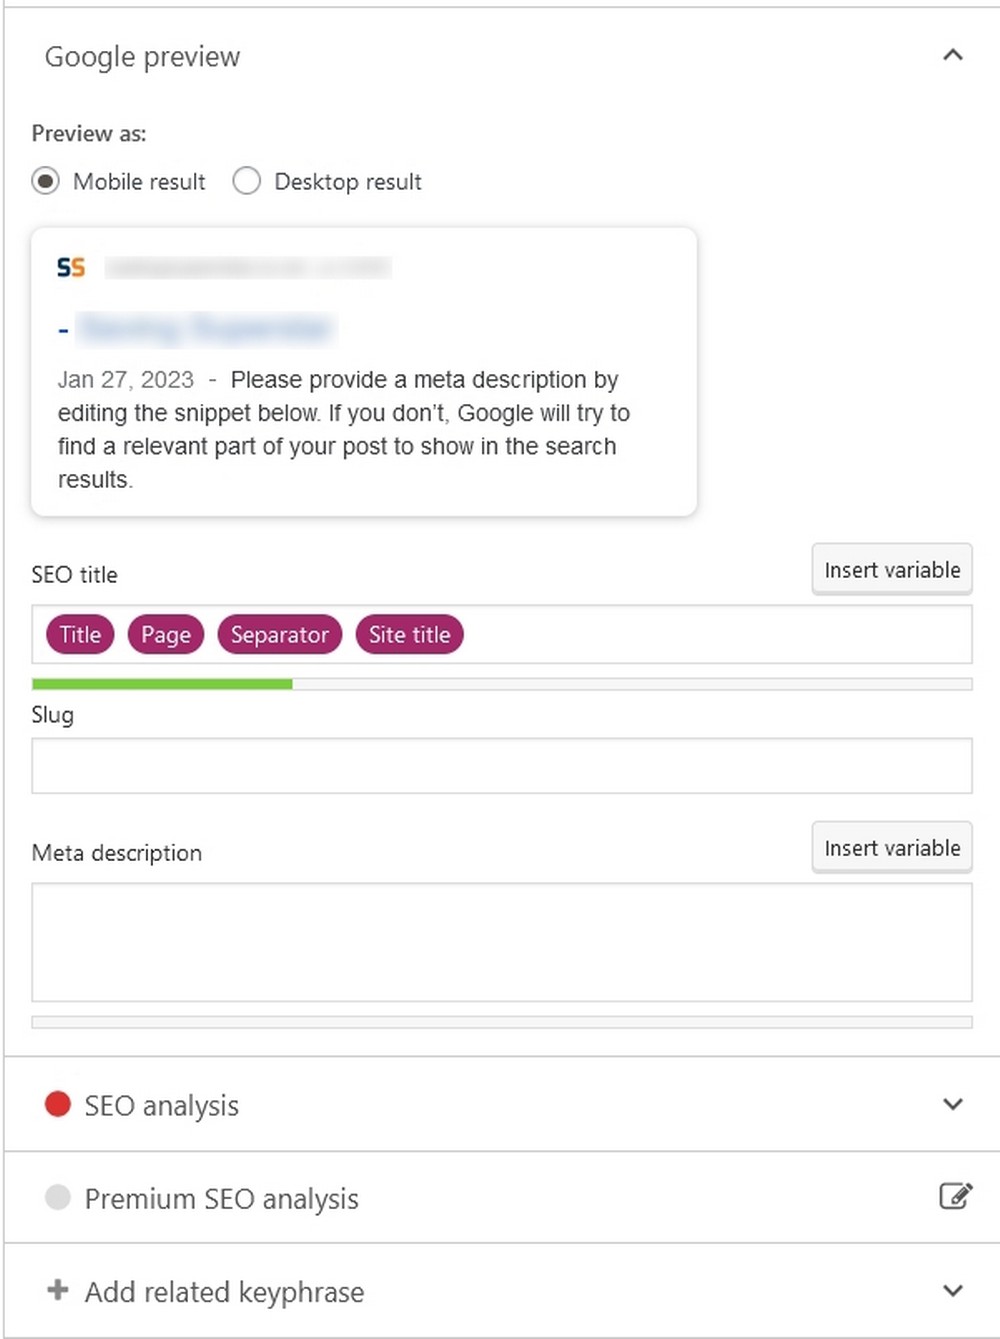
Start with Focus keyphrase.
This is where you put the main keyword you’re targeting for that content. Adding the keyphrase enables Yoast to analyze your content and offer suggestions on how to improve it to target that keyphrase.
Learn more about keyword research here.
You’ll then see an SEO analysis section appear with some suggestions on how to optimize the content.
Make any changes you like from the suggestions and save them.
The SEO title should have some purple bubbles inside. This will populate the title of the page with what’s contained within.
You can leave them as is or add a custom title.
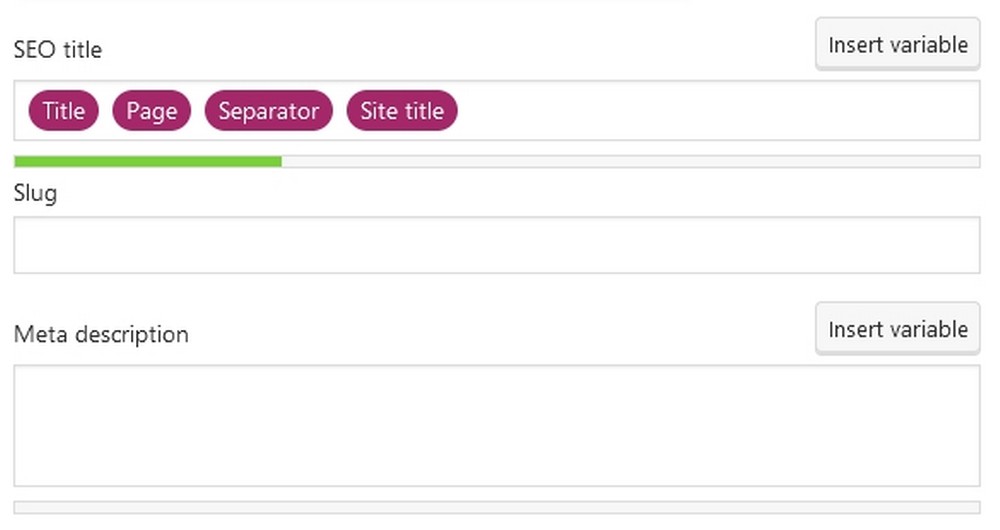
The Meta description element should describe what the post or page is about in a few words for Google to use in the description.
Write a description with your focus keyphrase within it.
You can leave the meta description blank if you prefer but Google will then just add its own description.
We would strongly recommend adding your own so you have full control over how the page looks in search results.
There are other options underneath that allow you to add secondary keywords, track performance, mark content as cornerstone content, block search indexing and see how the page is performing.
You can ignore those for now as your basic optimization is now complete.
Don’t leave this part of your page just yet as we haven’t quite finished with it.
Optimize for Social Media
Yoast can also help optimize your content for social media. If you stay with the box at the bottom of the editor, you’ll see a Social tab next to SEO and Schema.
This is purely optional and is only available with premium but it’s a useful extra step to get the most out of your content.
The default settings are usually pretty good, but if you want to control exactly how a post looks on socials, do it here.

Select the appropriate social network from the list and select an image from the image library.
You can also change the title and description just like you did with the post.
Hit Publish to save your changes when you’re done.
Redirection (Pro feature)
Redirects are used to point a URL to a new page, either temporarily or permanently.
For example, you change domain and have a new URL but have a lot of high ranking pages on your old domain.
You can use redirects to point those pages to your new domain and retain all the SEO goodness you have earned.
There are lots of reasons to use redirects, but you get the idea.
You can create redirects manually using your .htaccess file or you can use Yoast to do it.
If you have Yoast premium, select the Redirect menu item to access all the tools.
Select the redirect type from the main page, add the old URL and the new URL in the corresponding boxes.
Select the Add Redirect button to save the change and you’re done!
How To Use Yoast FAQ
We hope we have answered all the questions you might have for Yoast. In case we didn’t cover everything, here are some common questions we see online.
What Are the Alternatives to Yoast ?
There are many alternatives to Yoast . They include Schema Pro, All in One SEO Pack, WordPress SEO Plugin by Rank Math, The SEO Framework, SEOPress, Platinum SEO, Slim SEO, Premium SEO Pack, BoldGrid Easy SEO and a number of others. Some are free, some premium and some a mixture of both. Check out these Yoast alternatives in detail.
Can I Use Yoast for WordPress for Free?
Yes, you can use Yoast for WordPress for free. One of the reasons we rate it so highly is because it includes so many useful features within the free version. Premium is still worth paying for of course but it’s an option rather than necessity. That’s just one reason we like it so much.
Can I Switch to Yoast from Another SEO Plugin?
Yes, you can switch to Yoast from another SEO plugin. Yoast even includes a tool that can import SEO data from your existing plugin to speed things up and avoid duplicating files.
How do I activate Yoast ?
Activating Yoast is easy. Install it in the usual way and activate it using the blue button. If you’re using the free version, that’s all you need to do. If you’re using premium, you’ll need to sign up for an account and use the key to unlock premium features.
Using Yoast to Optimize Your WordPress Website
So that’s it for our guide on using Yoast to optimize your website for search.
We covered plugin features, setting up and how to use the plugin features to boost your SEO.
The plugin has been designed to be easy to use but there’s a lot to learn and plenty to cover. Hopefully, this guide gives you the information you need to fully optimize your website.
SEO is about much more than using a plugin but it provides a firm foundation to build upon once your website is more established.
Do you use Yoast ? Have any tips to help new users? Tell us about them below if you do!