Variety is the spice of life! And If you’re an eCommerce shop owner, product variation is a recipe to spice up your sales. This is true when you’re selling gadgets, furniture, clothes, or any products that need to display multiple options.
I'll show you what WooCommerce variations are and how they work. Plus, I'm going to teach you how to set them up in your store. Looking to build your first WooCommerce shop? Head over to How to Setup WooCommerce in WordPress.
WooCommerce Variations and Attributes Explained
You may have a product that comes with different options. A dress can come in different colors and sizes. A piece of furniture can come in different material options. A food item may have different flavors.
Luckily, WooCommerce has a built-in way to add many options for the sellers to put on their products. But, the system has two essential features, which are Attributes and Variations.
Attributes
Attributes are the descriptive definition of the product that you are selling. For example, for a mobile phone, the color, and the OS “silver, iOS 12”, or for a dress, “Yellow, Cotton.”
Attributes are used to let the customers know about the key facts about the products that you are selling. Most common descriptions are color, sizes, and the material used.
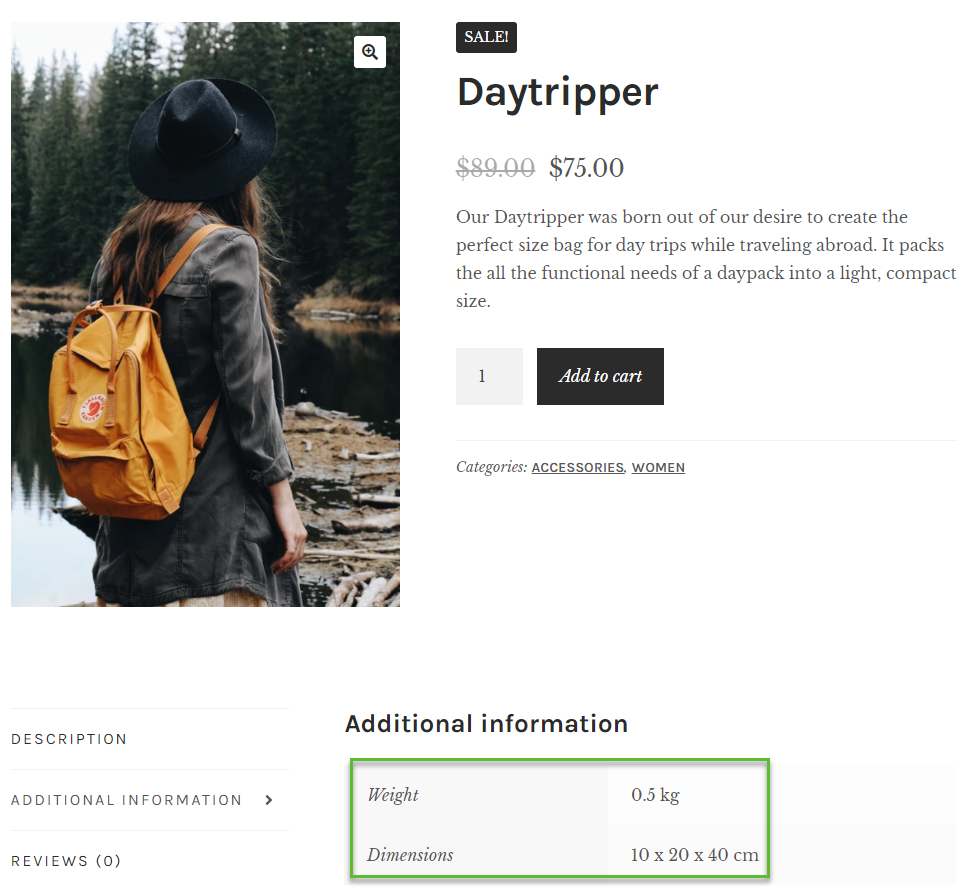
With WooCommerce, attributes are mostly descriptive and cannot be changed by the customer.
Variations
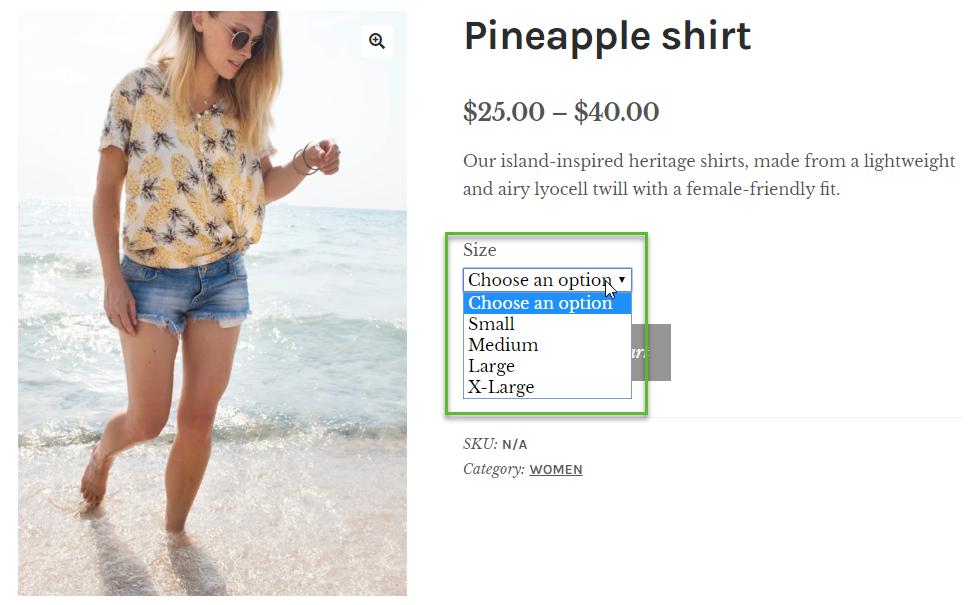
Variations are the actual options that the customers can decide. For example, the choice of color on the garments, the sizes.
To allow your customers to choose which variations they want, you have to add “variations” on your website.
You can use attributes even without variations. But, if you want to use WooCommerce variations, you have to set up the attributes first before proceeding.
Creating and displaying product variations with WooCommerce
1. Set Up Attributes for your WooCommerce Products
As I've mentioned, you have to set up the attributes first before adding the modifications on your website.
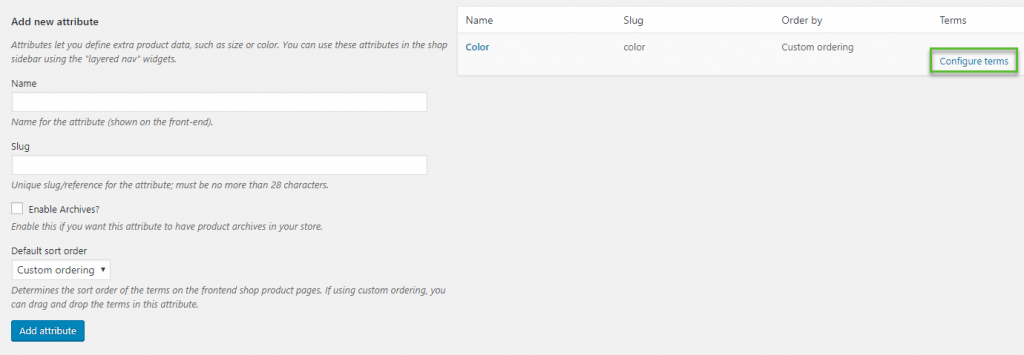
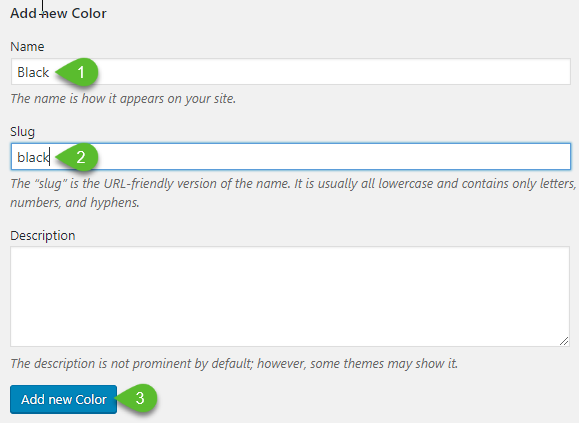
On your WordPress dashboard, go to the Products menu and select Attributes. Add an attribute name and its slug. In this example, let's add Color. Once you're done, just click the “Add Attribute” button.

The newly added attribute will now display on the right side menu. Click on Configure terms link.
You can now add a new entry for that specific attribute. In this case, let's add Black. You can add as many listings as you like depending on your products.
2. Assign attributes to a single product
Once you're done adding entries to your attributes, you can now assign attributes to each of your product.
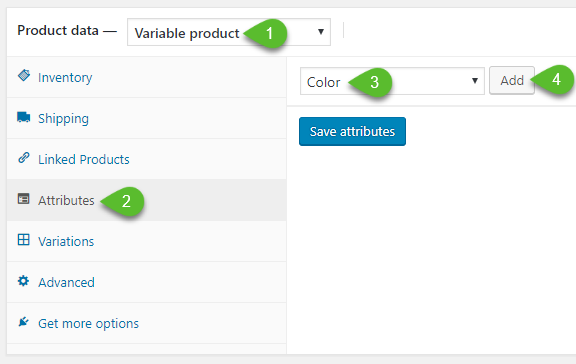
Head on to your WooCommerce product and scroll down to the Product data section — select Variable product from the dropdown menu. And, in the Attributes tab, select an attribute and click “Add” button.
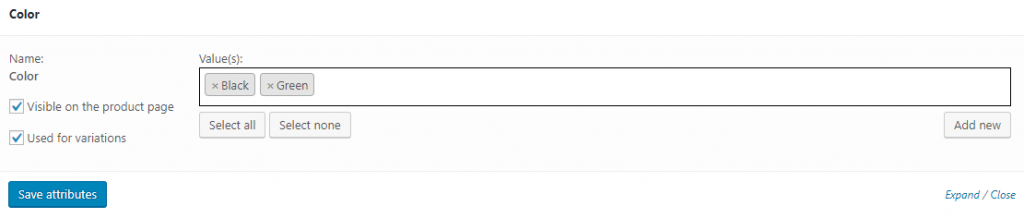
Select any attribute that describes your product. You can select more than one option if your product comes in both options.
If you need to add another value for your attribute, you can do so by clicking on the “Add new” button.
Tick the “Visible on the product page” and “Used for variations” checkboxes. Then, click on the “Save attributes” button.
3. Add variations to your product
Now, let’s proceed on adding WooCommerce Variations to your products.
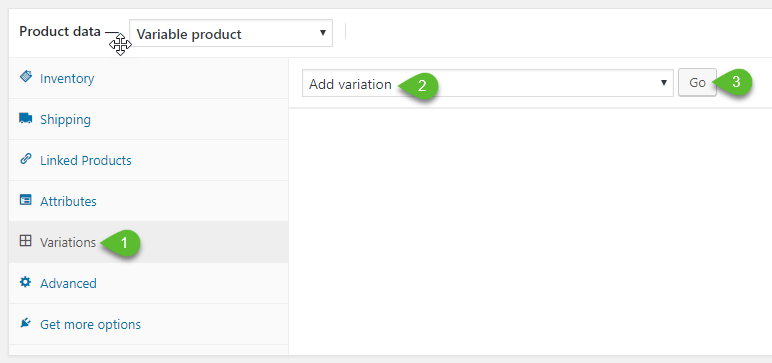
In the Variations tab, select Add variation and click “Go.”
Select an attribute that applies to your product. Click on “Save Changes”.

You can go ahead and select the new attribute. Just don't forget always to save your changes.
Click on the “Update” button at the upper right side of your product page.
Conclusion
WooCommerce has multitudes of benefits, especially for the eCommerce shop owners, since it is very flexible and almost without limitations. It means that you can offer products with a wide array and different variations that attract the customers. You can even set it into a dropshipping site, like what we suggested in our WooCommerce Dropshipping guide.
To recap, you have learned to create variations in three steps:
- Adding Attributes
- Assigning Attributes per product that you are offering
- Adding WooCommerce Variations
Keep the ball rolling and implement Variations in your eCommerce store now.
Hi Adam, this can’t be managed by Elementor yet, isn’t it ?
I mean, once setted, variation layout can’t be fully customized on elementor?
Elementor has limited options so you have to go with what they give you or not use Elementor for your product pages.