
If done correctly, modal popups can significantly boost your website’s conversion rate, collect qualified leads and ramp up your sales volume.
In this tutorial, I’m going to explain what a modal popup is, its benefits and the difference between a modal popup and a regular popup.
Then I’ll show you the way to create a modal popup for an Elementor powered website. Finally, I’ll guide you through creating one for a non-Elementor powered website.
So, let’s build some popups!
What Is a Modal Popup?
A modal popup or dialog box is a window that appears on top of a web page after clicking on a button, image or other CTA. It takes over the page and you actively have to close it to access the contents.
You can use modal popups to display discount offers, daily specials, seasonal offers or to provide extra information about a product or service that can drive a sale.
You can also use them to ask a question, deploy an email opt-in, or request feedback on your products.
Modal popups are typically easy to use and can be closed by clicking the close button, hitting the ESC key, or simply clicking the outside area of the popup.
You have probably seen hundreds of modal popups over the past few days, we know we have!
Here are a couple of examples…

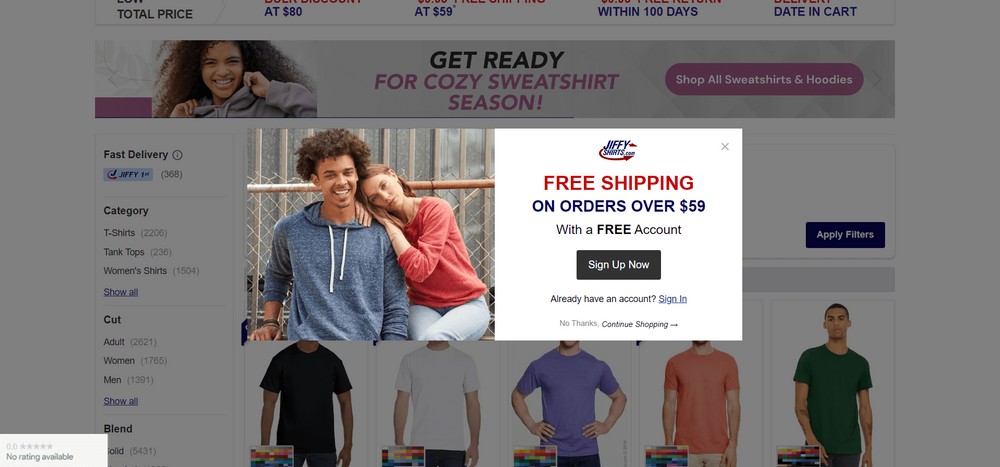
Here is a real-life example. If you have ever visited JiffyShirts, you may find the following modal popup.
Why Should You Use a Modal Popup on Your Website?
Using a modal popup for your website is a great way to convert your visitors into paying customers.
For example, you can display a form inside the popup to collect user data without having to clutter up your page with too many fields.
Later, you can use the user data in your email campaign or other retargeting ads. If you collect user first name and email address, you can even send personalized emails for extra engagement
How to Add a Modal Popup in WordPress Using Elementor
If you are using an Elementor-powered WordPress website, I suggest using Ultimate Addons for Elementor.
The tool comes with a modal popup widget along with other useful tools.
Currently, it has 40+ widgets and 300+ creative responsive templates.
Not only will it allow you to create modal popups for your Elementor-powered website, but it will also give you a bunch of other features.
To add a modal popup with the Ultimate Addons for Elementor, follow these steps:
Step 1: Install and Activate the Ultimate Addons for Elementor Plugin
Go to the official website of Ultimate Addons for Elementor and get the plugin from there. Once you get the ZIP file, you are ready to install it.
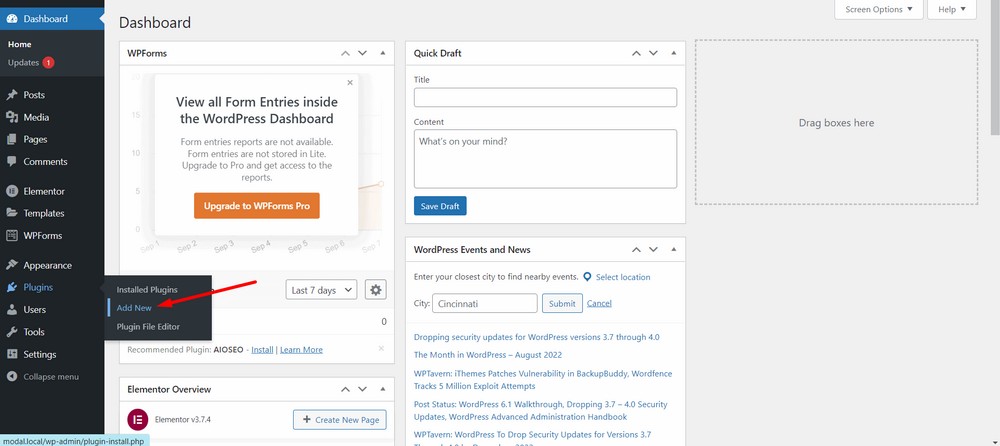
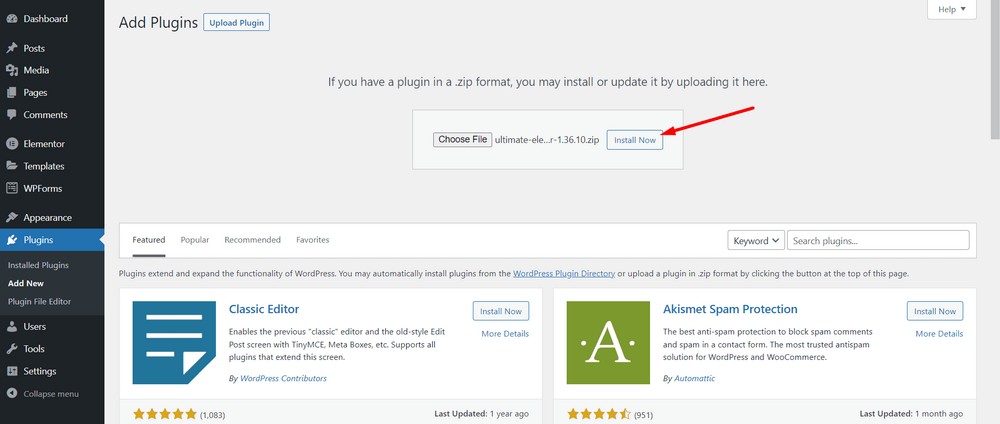
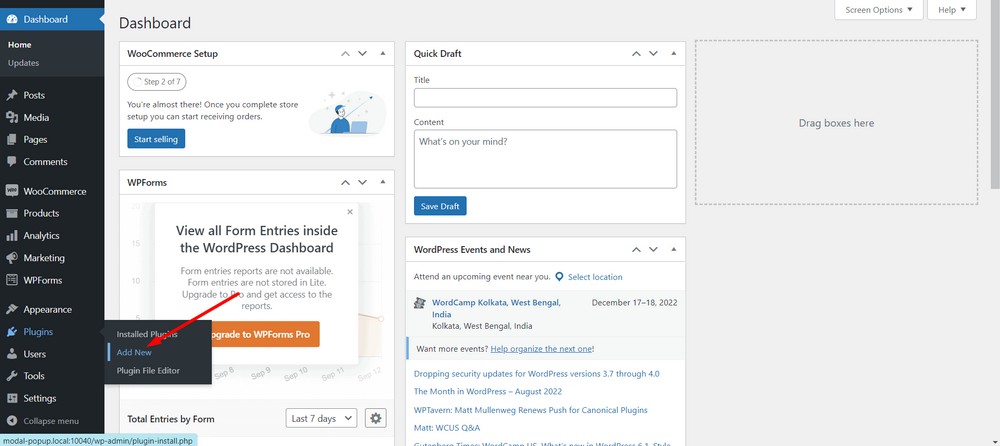
To install the plugin, head to your WordPress admin dashboard and then go to the Plugins > Add New section.
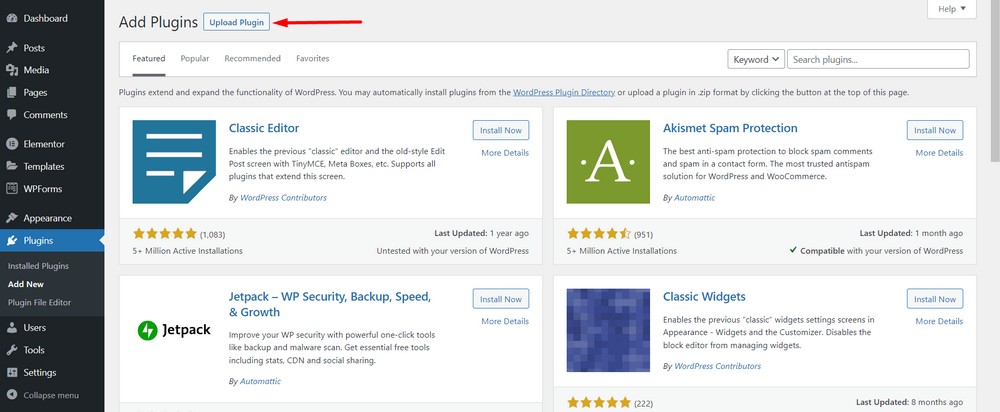
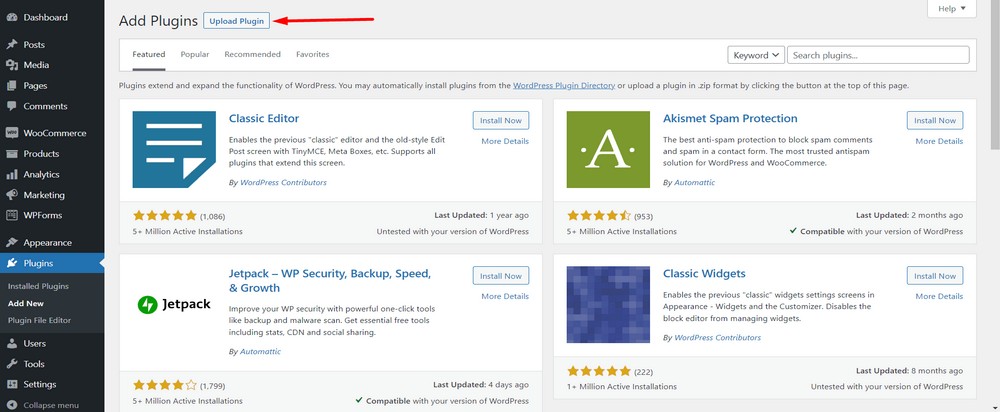
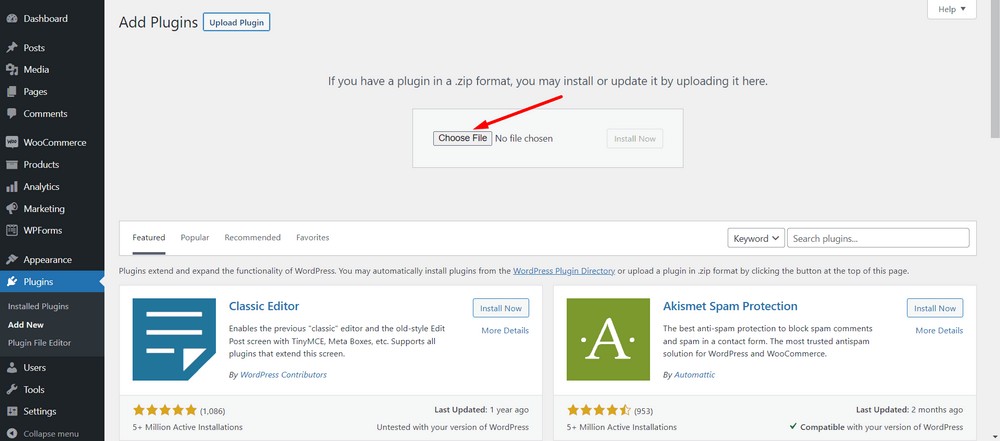
Now, upload the plugin using the Upload Plugin button.
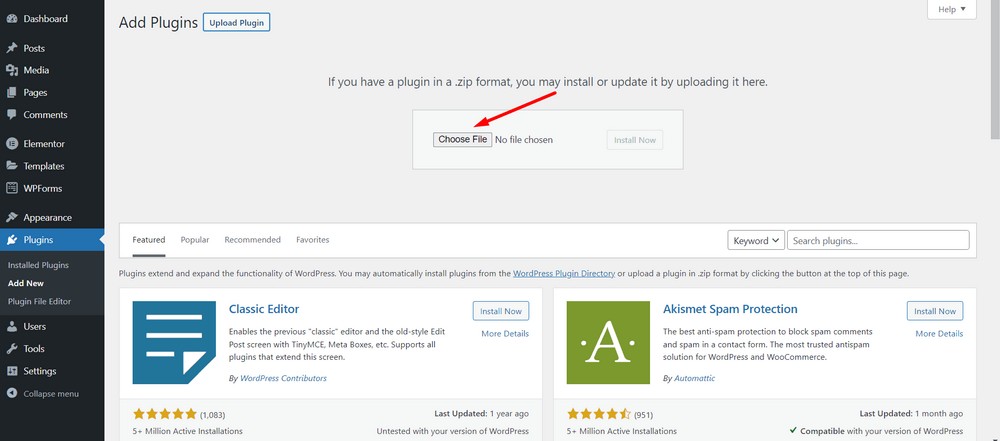
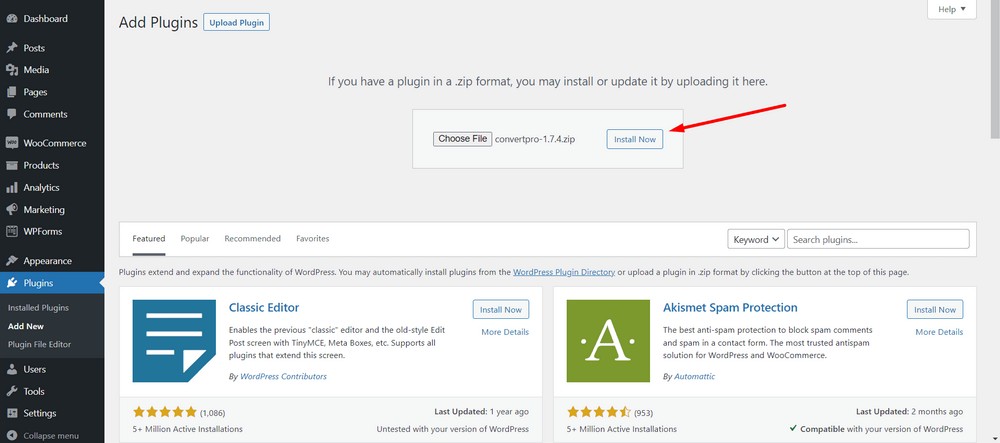
Now, select Choose File to upload the zip file you downloaded.
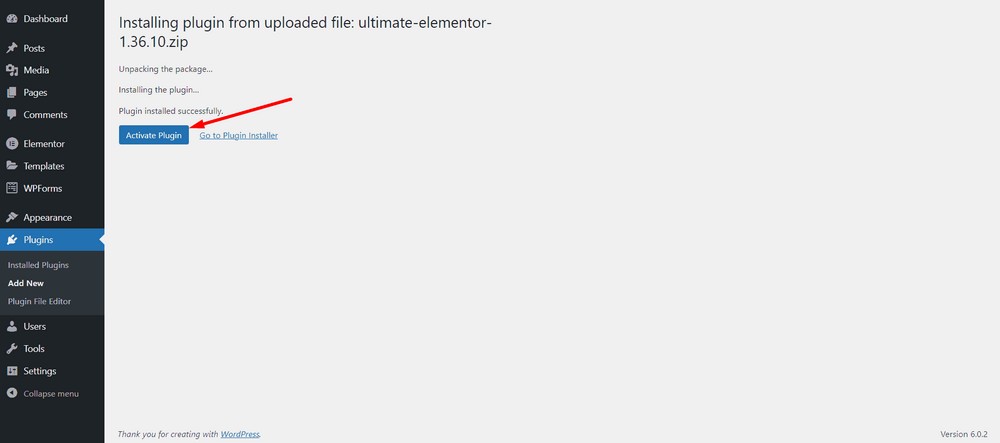
Click on the Install Now button.
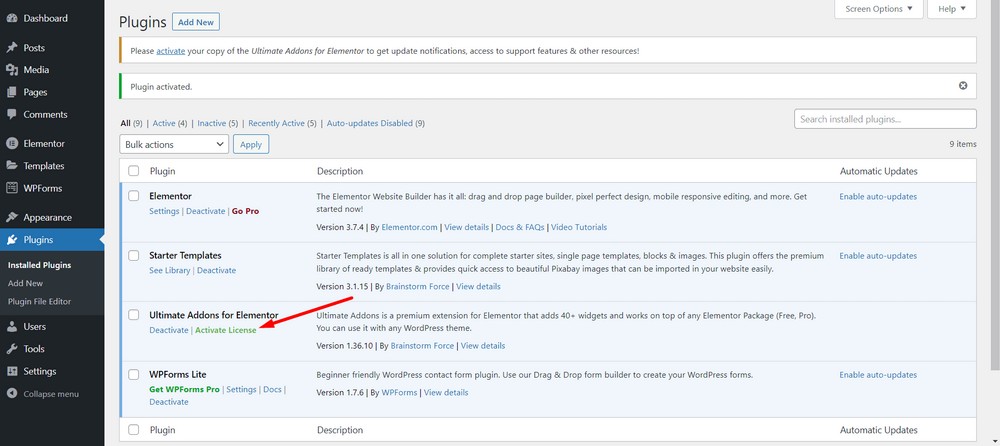
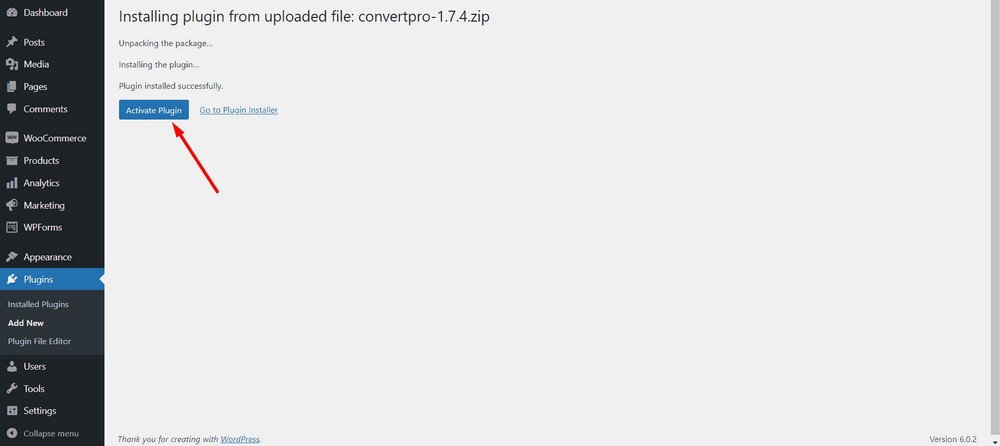
Now Activate the plugin.
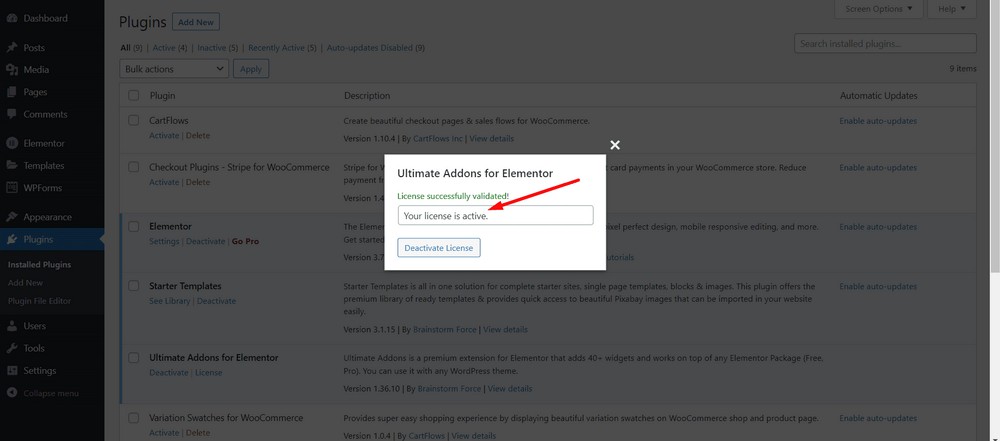
Now, select the Activate License option to insert the license key.
After you enter the license key, hit the Activate License button.
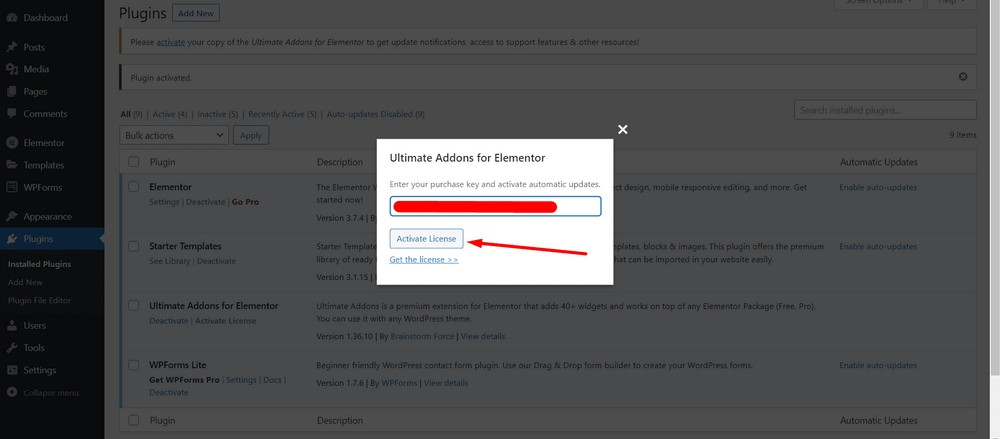
Now, you will be able to see the success message provided you enter the valid license key.
Congratulations! You have successfully installed and activated the Ultimate Addons for Elementor plugin.
Step 2: Adding a Modal Popup
To add a modal popup, you need to edit a page with Elementor. Let’s add one on the home page.
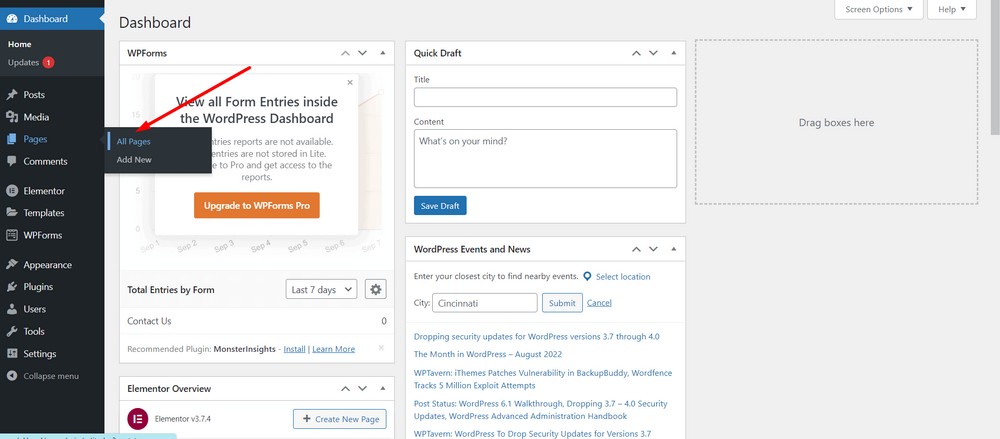
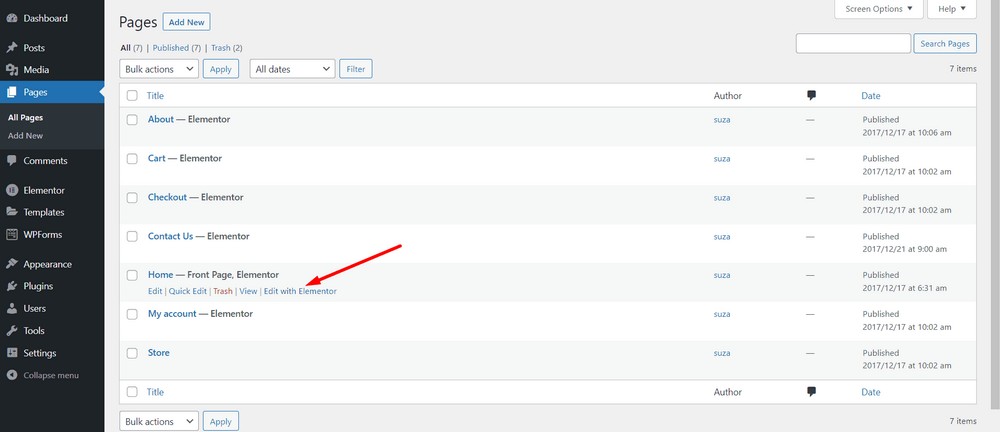
Navigate to the WordPress admin dashboard and then go to Pages > All Pages.
Select Edit with Elementor for the page you want to edit.
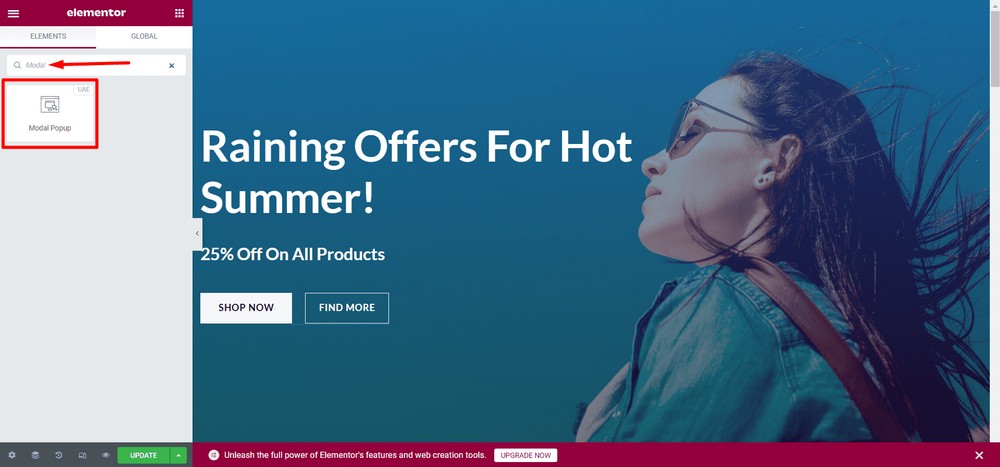
Next up, you’ll find the Elementor widget area as marked with the red rectangle below.
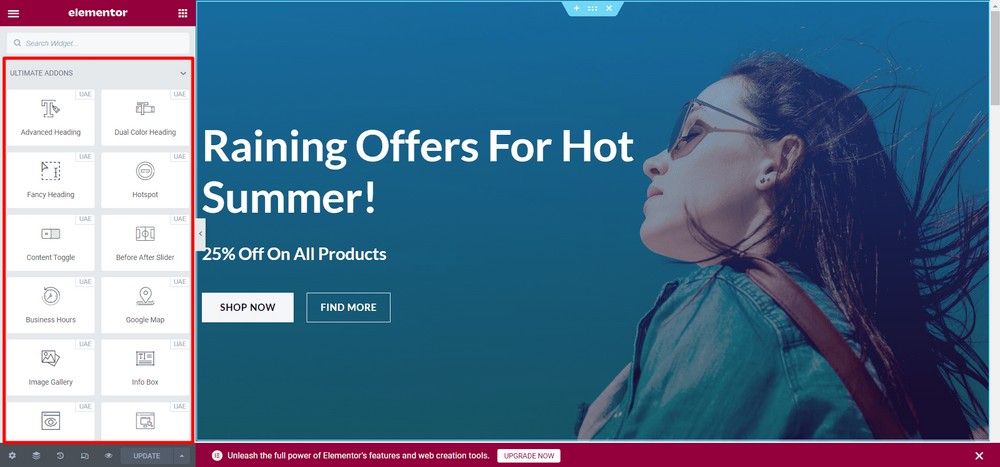
Now search for the keyword, “modal” in the search bar. After that, you’ll get the Modal Popup widget.
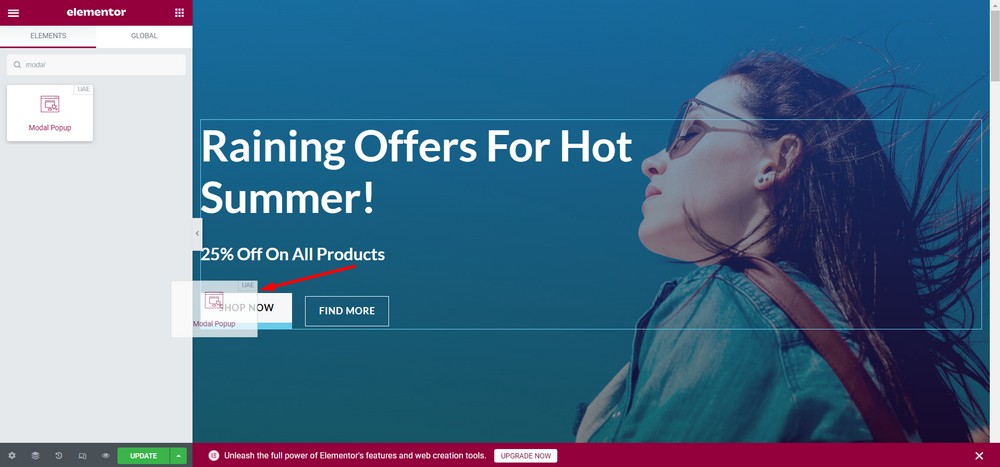
Now drag and drop the Modal Popup widget to the place where you want. In this case, I’m going to replace the FIND MORE button with the Modal Popup widget’s button.
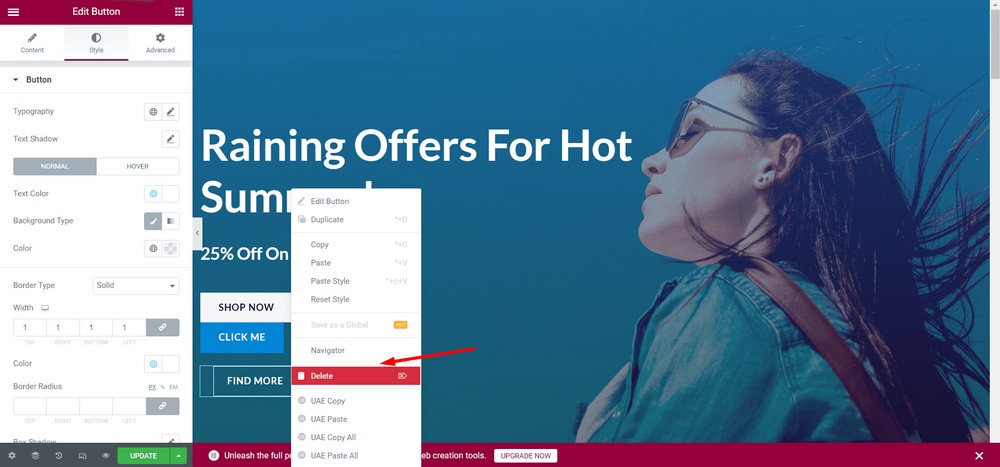
Now, I’m going to delete the FIND MORE button. To do so, hover over the button and click on the pencil icon.
Click the Delete option.
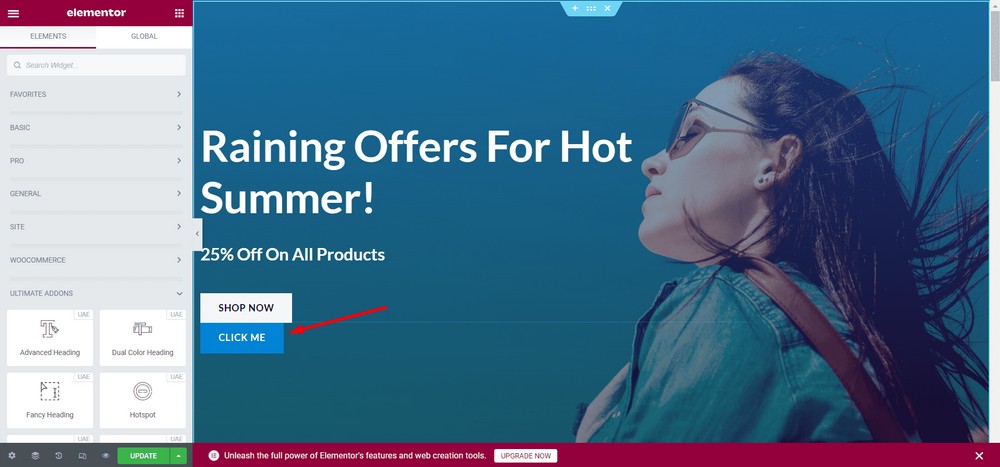
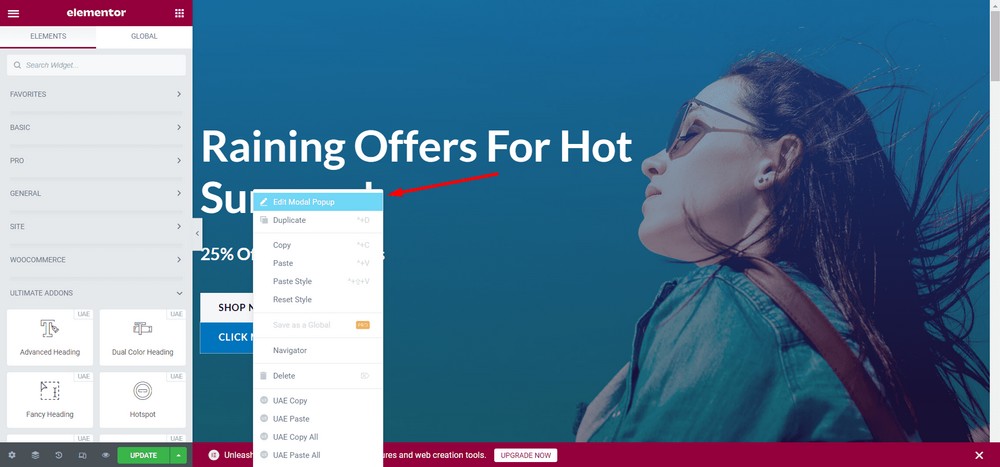
Now, let’s place the button on the right side of the SHOP NOW button.
To do so, right-click on the new button, CLICK ME.
Select the “Edit Modal Popup” button.
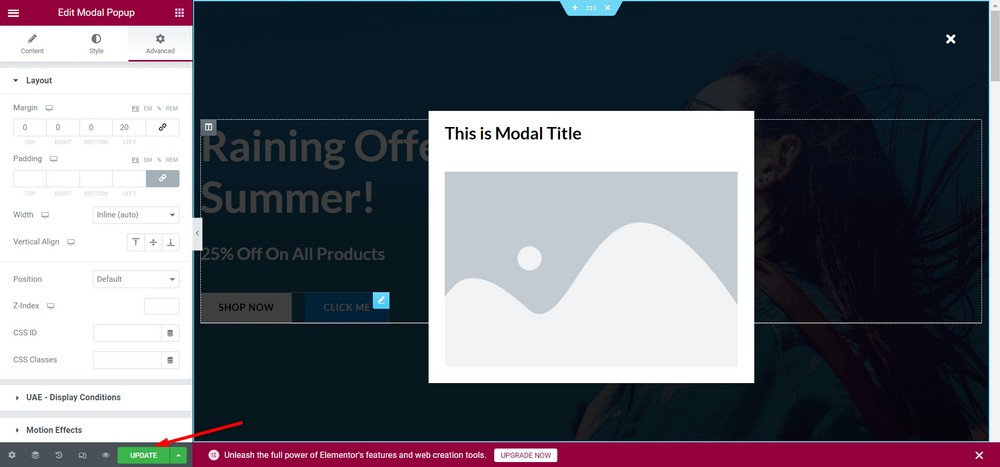
Now, select the “Advanced” tab.
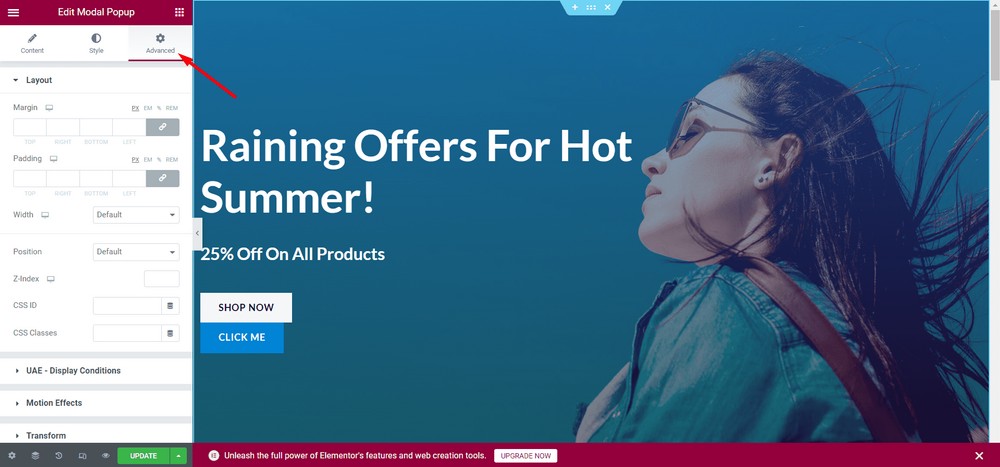
Select the Width dropdown menu.

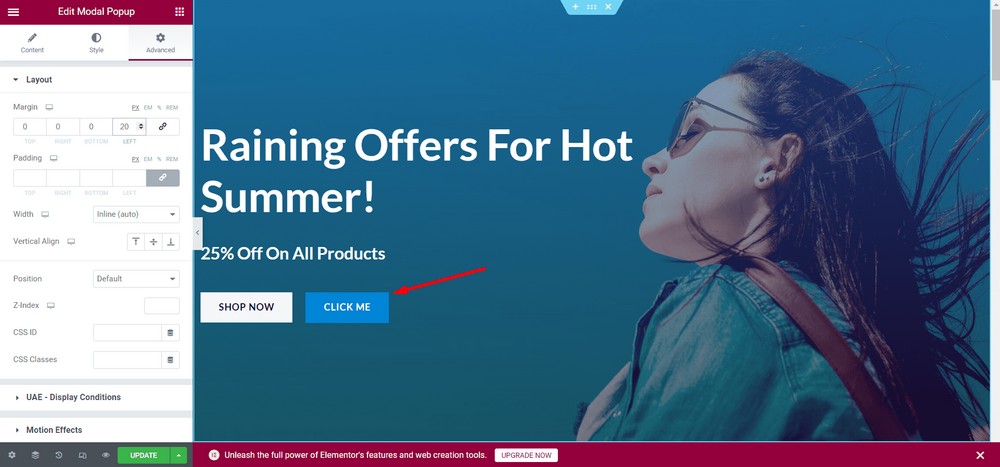
Now, click the link icon to unlink the values.
Give padding of 20px to the left.

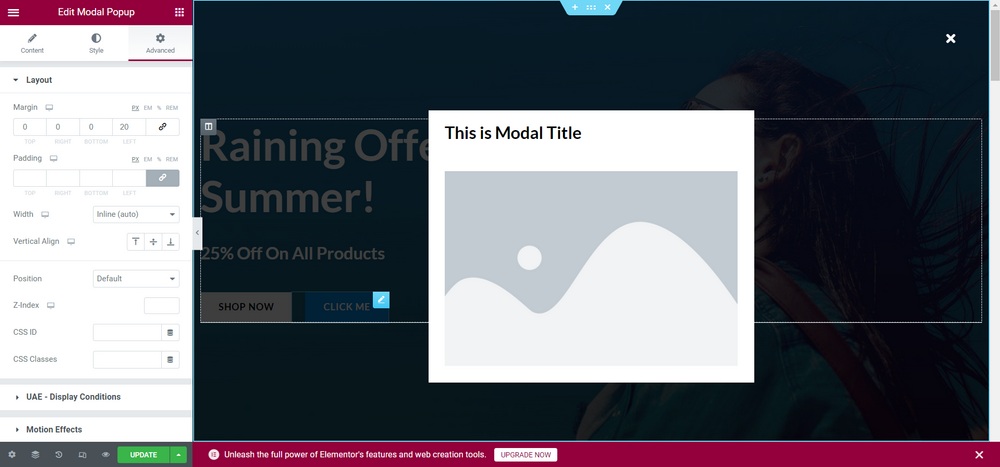
Now, let’s see how the modal popup appears. Click on the button to see how the users see it.
Here’s the preview of the modal popup:
Update the changes.
Congratulations! You have successfully configured the modal popup.
Please note that you can insert any type of content on the modal popup. Feel free to experiment to discover all the functionalities.
Use a Functional and Beautiful Modal Popup With the Ultimate Addons for Elementor
If you want to use more attractive custom designs for your modal popup, you can use the Saved Section option.
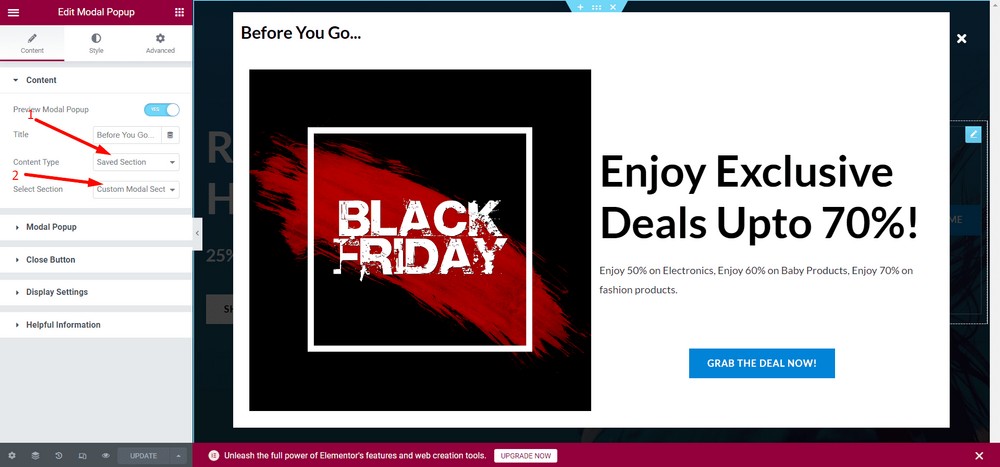
However, to use the feature you need to have sections already created with Elementor.
Here’s an example of a modal popup using the Saved Section option.
How to Add a Modal Popup in WordPress for Non-Elementor Websites
Now, let’s see how you can add a modal popup for a WordPress website that does not use Elementor.
Step 1: Install and Activate Convert Pro
First, you’ll need to install a plugin called Convert Pro. It’s a premium popup plugin that helps create sales funnels as well as modal popups.
Aside from creating modal popups, this plugin can help you create email opt-ins and increase leads.
This is a paid plugin and you can get the plugin from the official website.
Upon downloading the pro version, head to the WordPress admin dashboard and navigate to the Plugins > Add New.
Now, upload the plugin using the Upload Plugin button.
Now, select Choose File to upload the zip file.
Click the Install Now button.
Hit the Activate Plugin button.
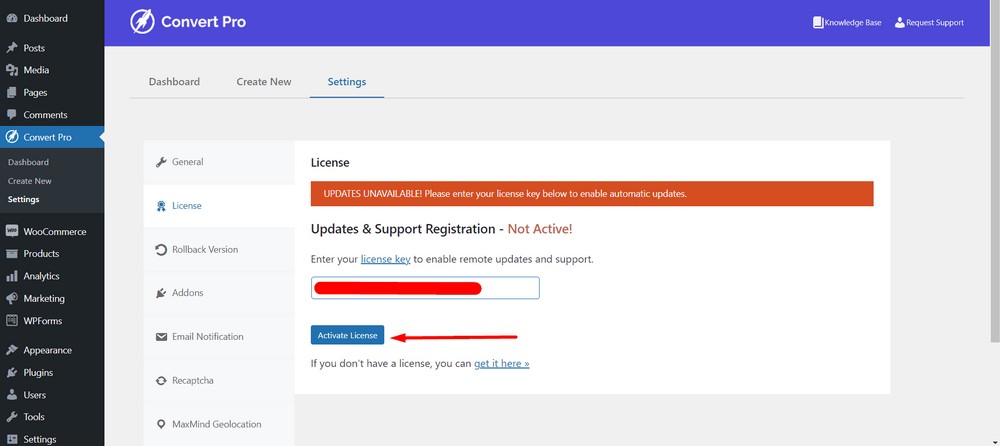
On the next page, you can enter your license by clicking the Activate option.

Now, enter your license key in the input field.
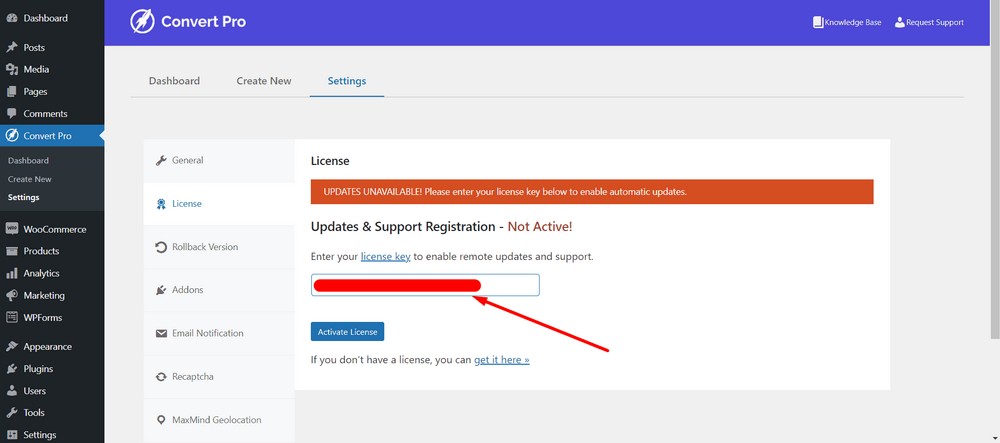
After that, hit the Activate License button.
You should see a success message.
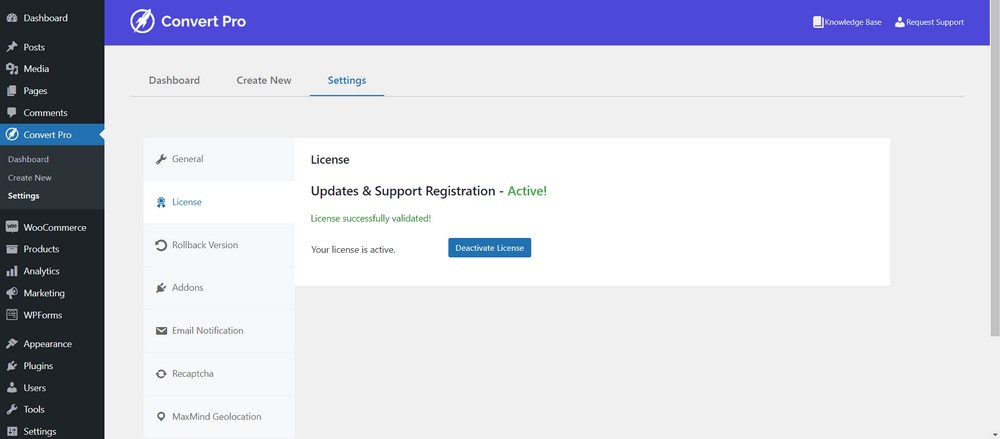
That’s it! You’re done with installing and activating Convert Pro.
Step 2: Create and Configure the Modal Popup With Convert Pro
To create a modal popup using Convert Pro, navigate to the WordPress admin dashboard.
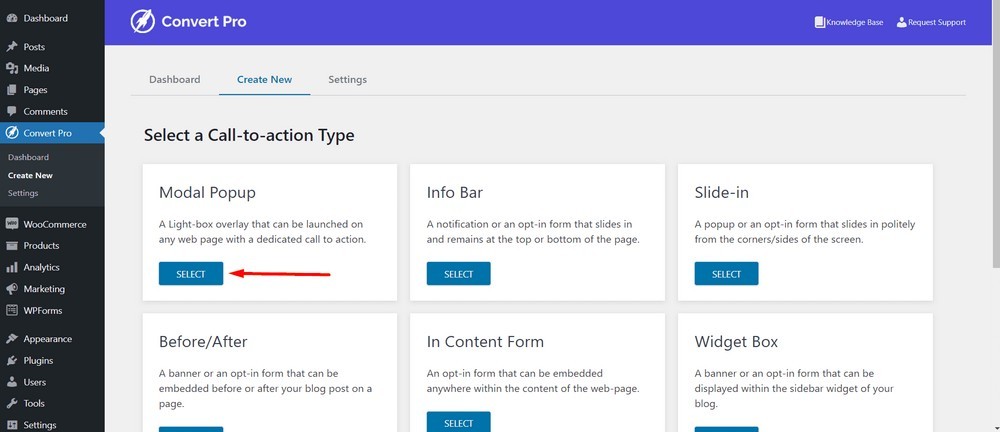
After that navigate to Convert Pro > Create New.

At this stage, you’ll be able to see a bunch of Call to Action types.
Select Modal Popup by hitting the SELECT button.
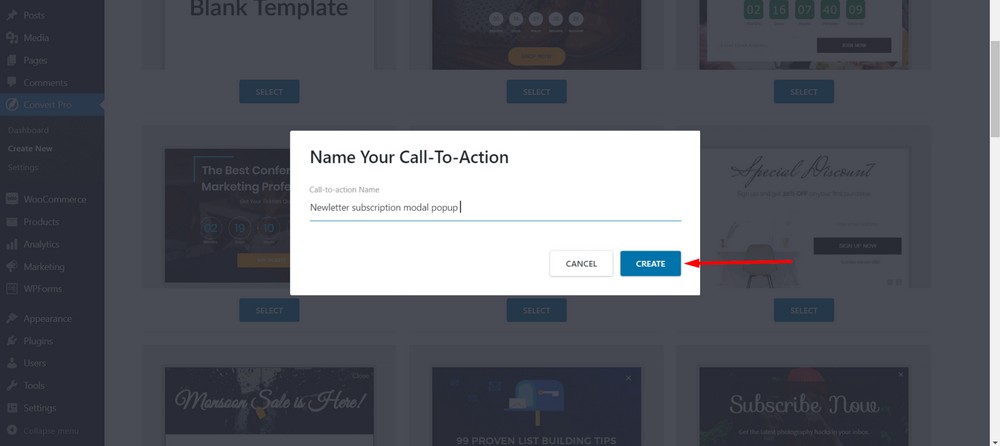
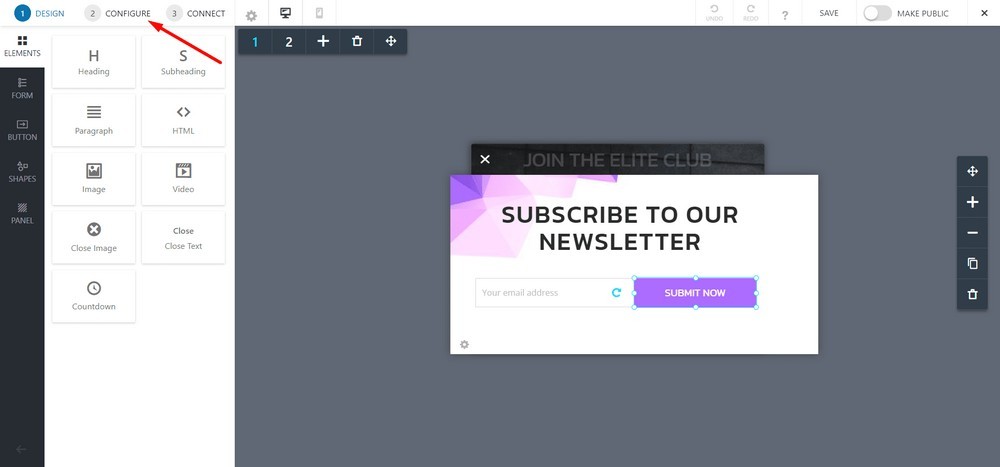
Select a modal popup template. I’m selecting this one (SUBSCRIBE TO OUR NEWSLETTER) for this tutorial:

Next, name your call to action or modal popup. I’m naming mine “Newsletter subscription modal popup”.

Select the Create button.
Now, you’ll see an editor panel where you can design, configure and publish your modal popup.
Initially, you’ll land on the design section where you can build your modal popup much like a page builder. So, feel free to play around with the buttons, texts and images.
But I’m going with the default design.
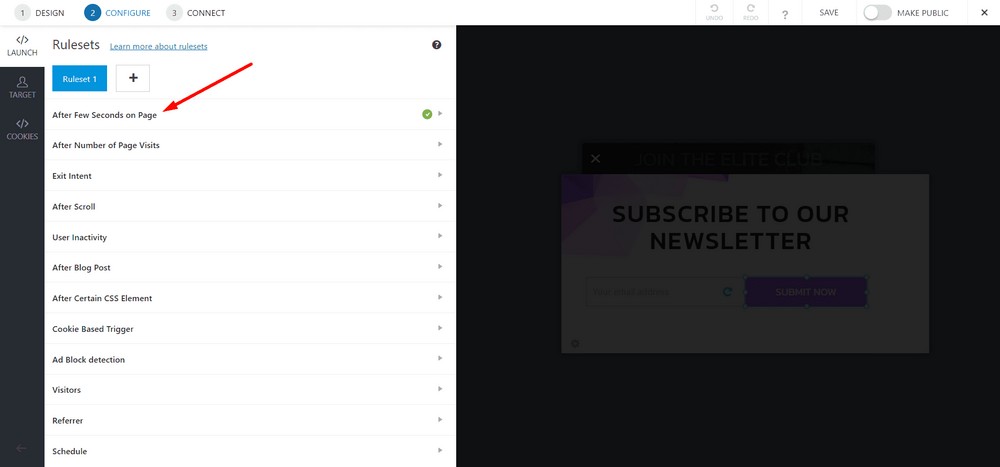
Click the Configure tab.
By default, it is set to trigger in the event of a certain period of a session. Meaning, a popup will appear 1 second after a visitor lands on the page.
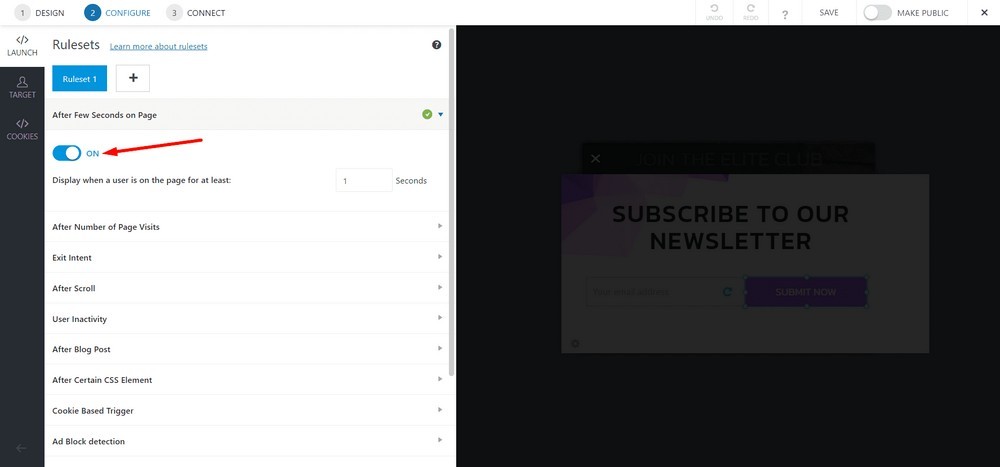
But we don’t want that automatic trigger option. So, we’re going to turn it off as we’ll use a button or image to trigger the modal popup.
To do so, click the “After Few Seconds on Page” option.
Click the toggle button to turn it off.
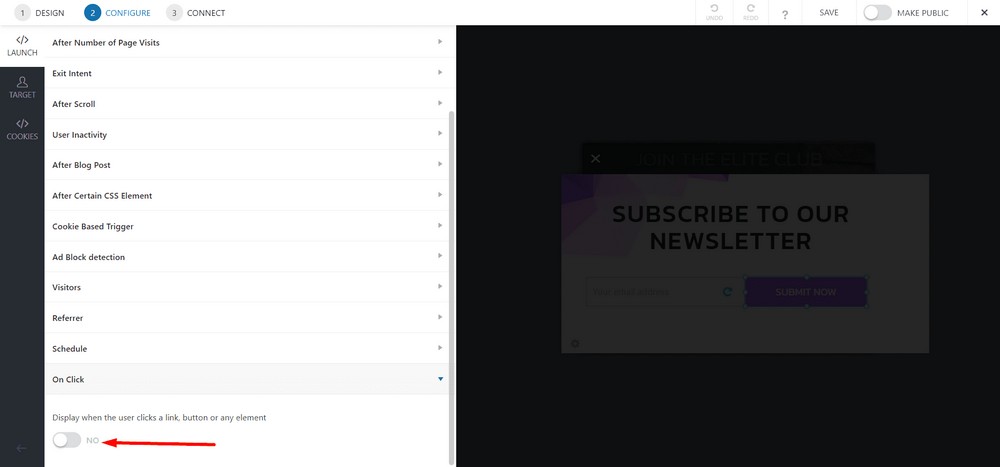
Now, select On Click.
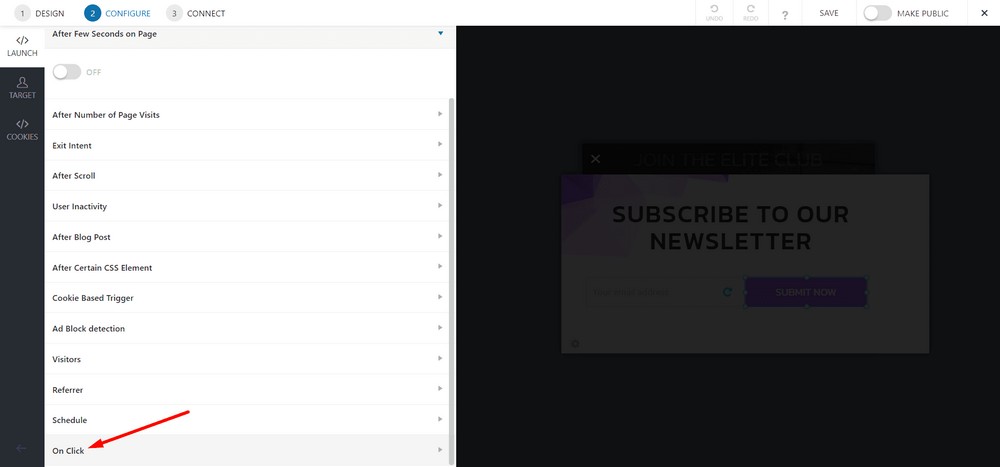
Click the toggle button to turn it on.
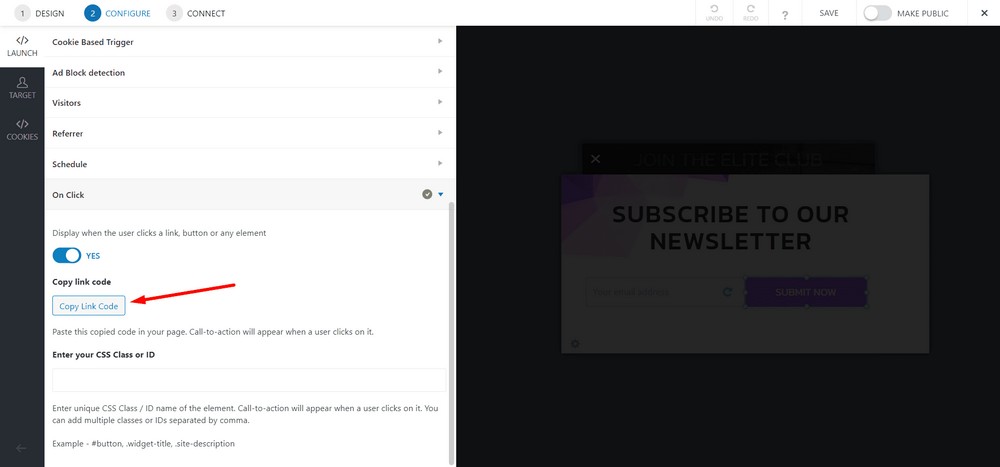
Now, select the Copy Link Code button so that you can use the code on any page.
Click Save.
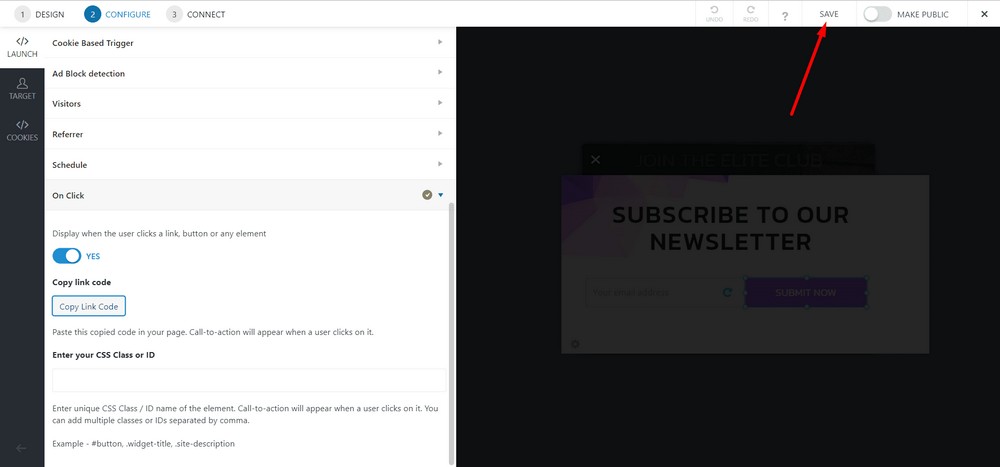
Make it public by switching on the toggle bar.

Step 3: Placing the Modal Popup on a Page
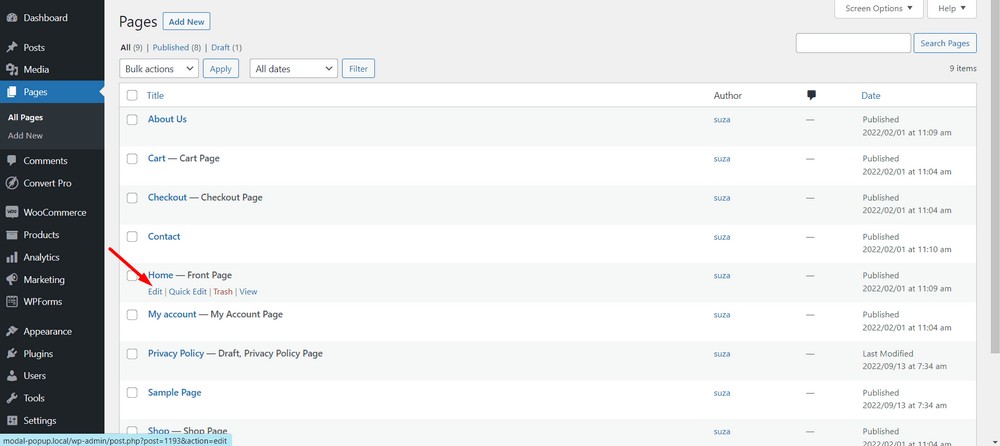
Navigate to the WordPress admin dashboard and then select Pages > All Pages.
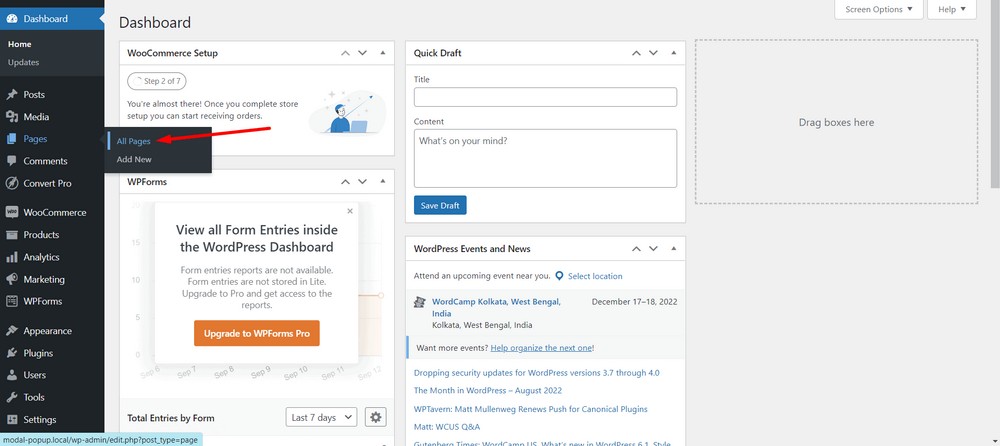
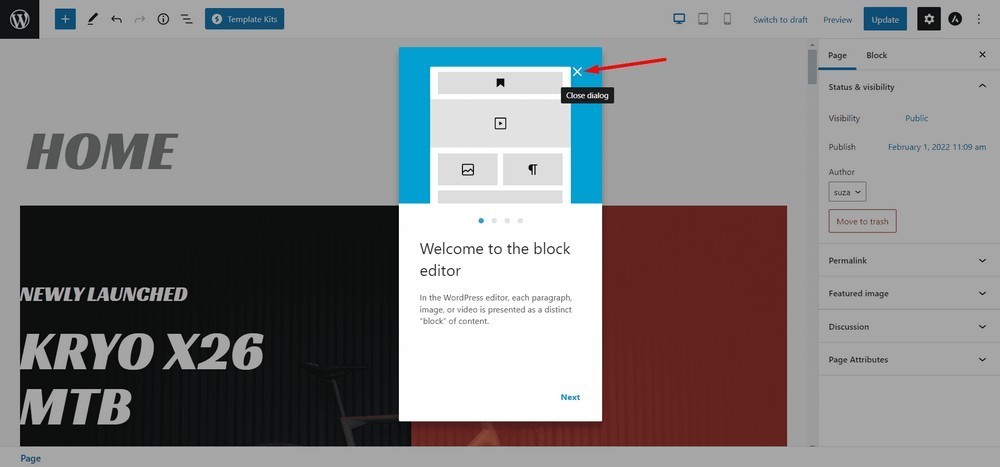
Now, select the page that you want to implement the modal popup. In this case, I’m selecting the Home page.
If you get the dialog box, close it using the (X) button.
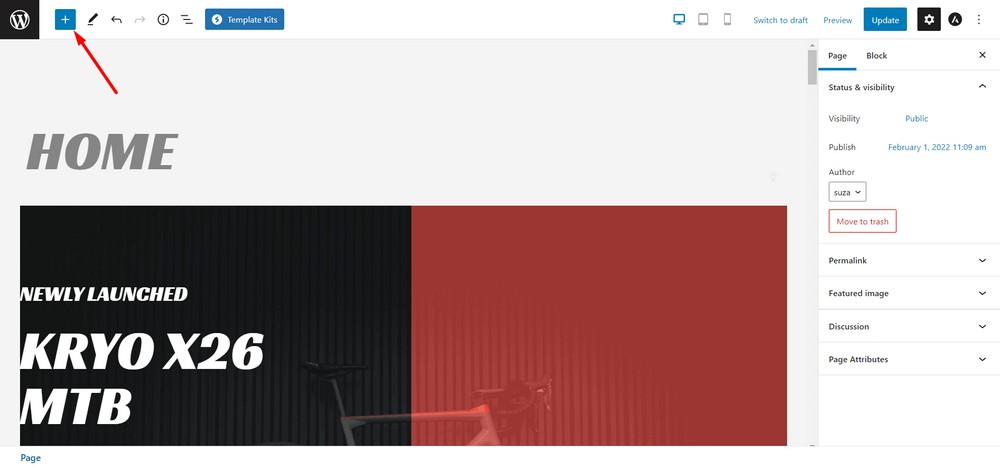
Now, click on the plus icon at the top of the page to see the available blocks.
Now drag and drop the Custom HTML block onto the page.
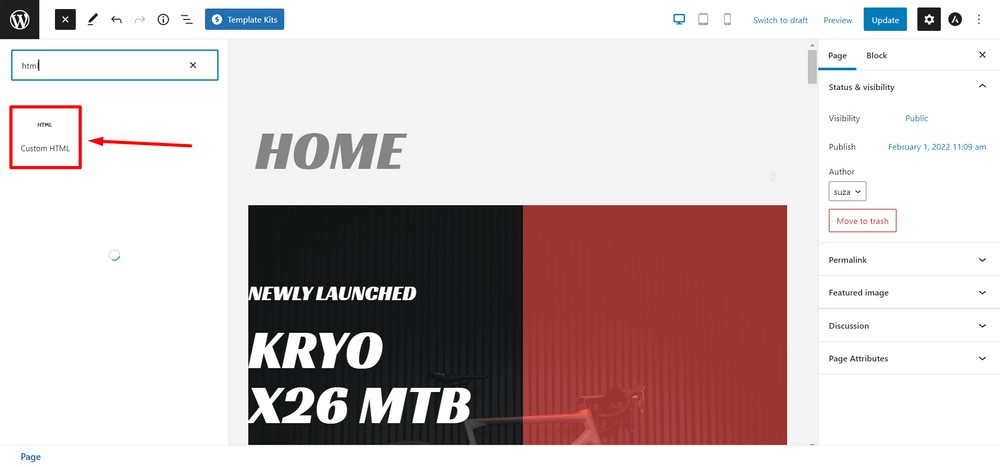
Paste the code that you copied in step 2 into the HTML block.
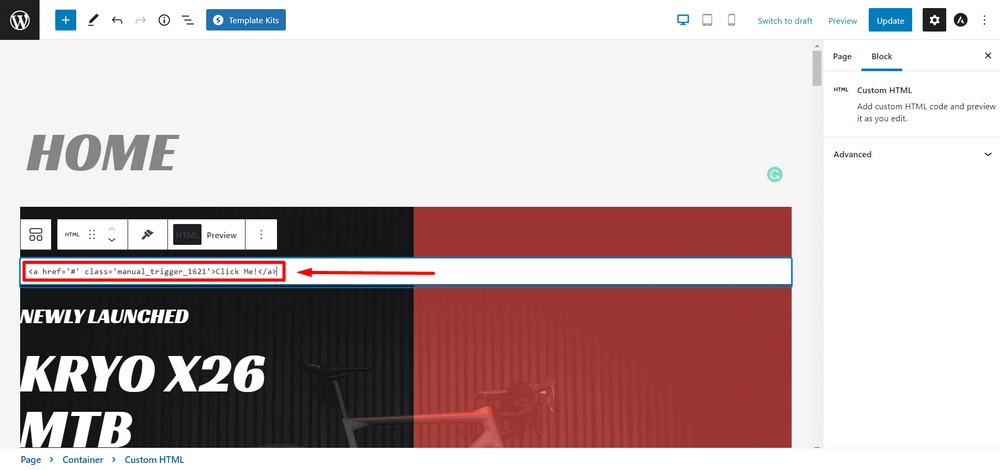
You can change the text or use other elements like button tags or image tags if you want.
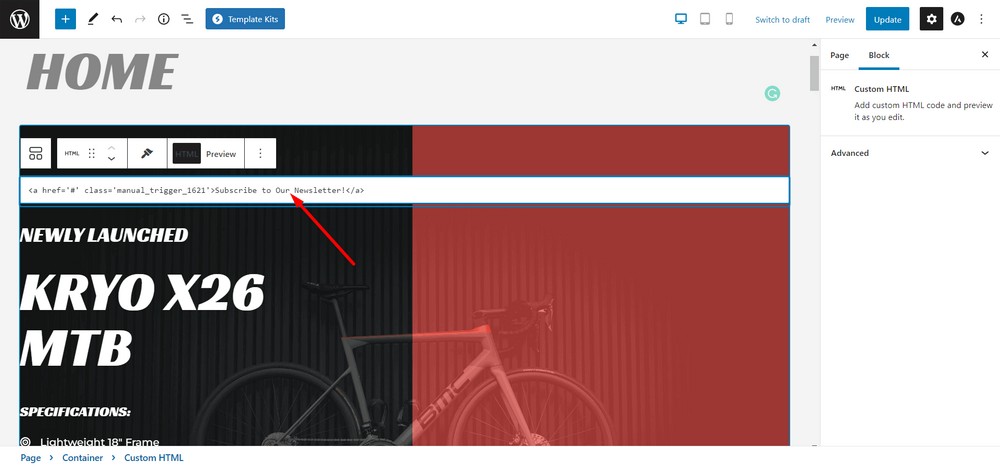
Update the page when you’re done.

Congratulations, you just created a modal popup!
Here is the preview of the modal popup when a visitor comes on your website and clicks on the CTA.
Bonus Tip: Using a Button or Image as the Trigger
With Convert Pro, you can also use a button or image as the trigger.
I made a video that shows you how to create a button as the trigger for the modal popup.
Now, It’s Your Turn
Now that you know how to create modal popups on a WordPress website, it’s your turn to give it a try.
If you’re already using one of these tools to create and configure the modal popup for your WordPress website, feel free to share your thoughts below.
If you liked the post, don’t forget to subscribe to my website so that you can get more exciting tips, offers and newsletters directly in your inbox.