Webflow makes it very easy to create a website without the need for code thanks to its drag and drop editor and predesigned templates.
But as your needs grow you’ll probably face limitations.
The capability to create online memberships are still in beta, whereas this has been available in WordPress for years using plugins like SureMembers.
Need a stunning eCommerce website? Build a high-conversion store with SureCart.
Powerful plugins like Spectra will give you design blocks, wireframes and templates to create beautiful web pages easily.
We could go on…
The point is that you don’t need to be tied to proprietary software. You can achieve more and better results with WordPress.
That’s why in this guide you’ll see how to migrate from Webflow to WordPress step by step.
A new way of creating and managing websites is waiting for you.
Let’s jump into it!
Flow into a new era of flexibility and control by migrating your site from #Webflow to #WordPress.
What Do You Need For Moving From Webflow to WordPress?
You’ll need just a couple of essentials when migrating from Webflow to WordPress.
Webflow provides all the elements you need to create and maintain a functional website.
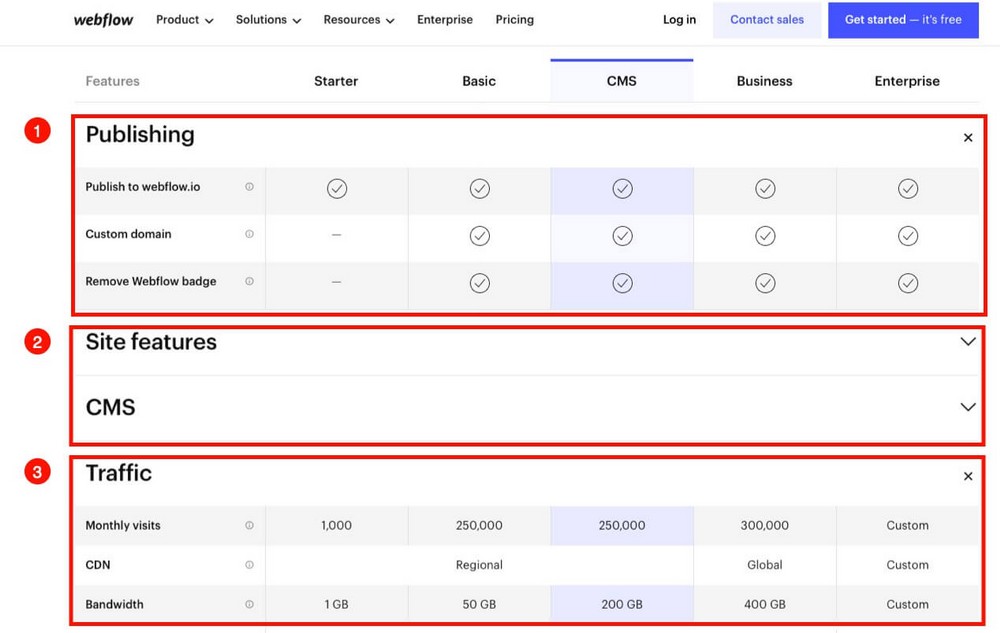
- A subdomain on webflow.io or the possibility to connect a custom domain.
- The software to create your website.
- Hosting to accommodate all the site elements.
To migrate to a WordPress website you’ll need first to replicate those resources on your own.
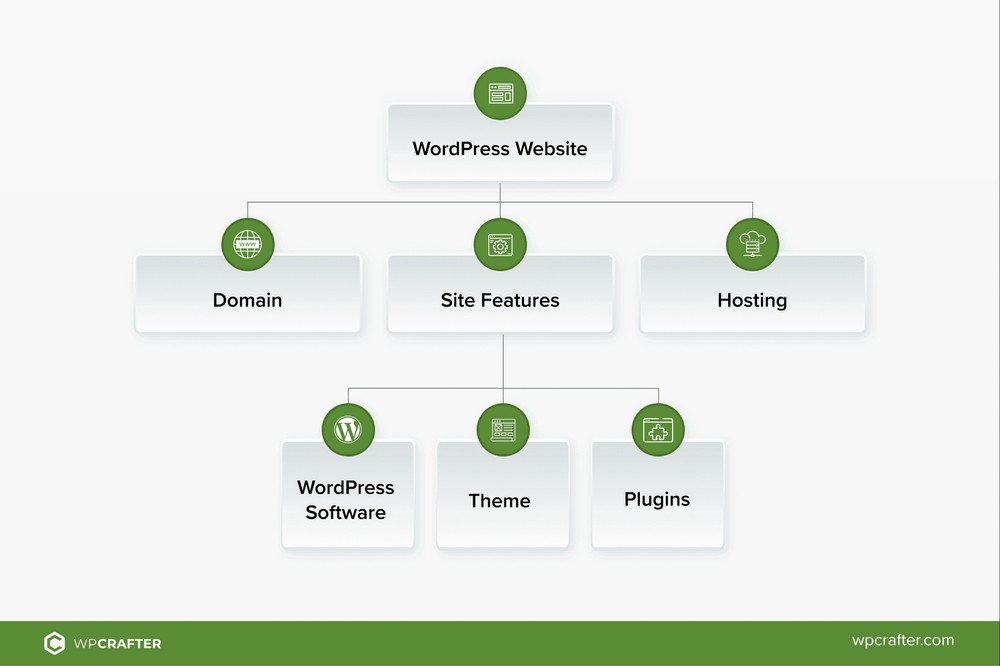
- Domain name. If you already have a custom domain at Webflow you’ll need to point it to your new host.
- Site features. You’ll need to install WordPress. A professional theme and some plugins to replicate some Webflow features will also be required.
- Hosting. This is the place where you’ll store everything for your website.
That may sound a lot but you’ll see that it’s a very straightforward process.
How to Migrate From Webflow to WordPress Step by Step
The migration consists of creating a new platform with WordPress and then moving the content from Webflow to your new site.
Let’s see how to achieve this step by step.
Step 1. Get the Hosting
First of all you’ll need WordPress hosting where you’ll install and store everything.
We recommend using Hostinger or CloudWays as they provide a range of reliable plans at reasonable prices.
For this example we’ll use Cloudways.
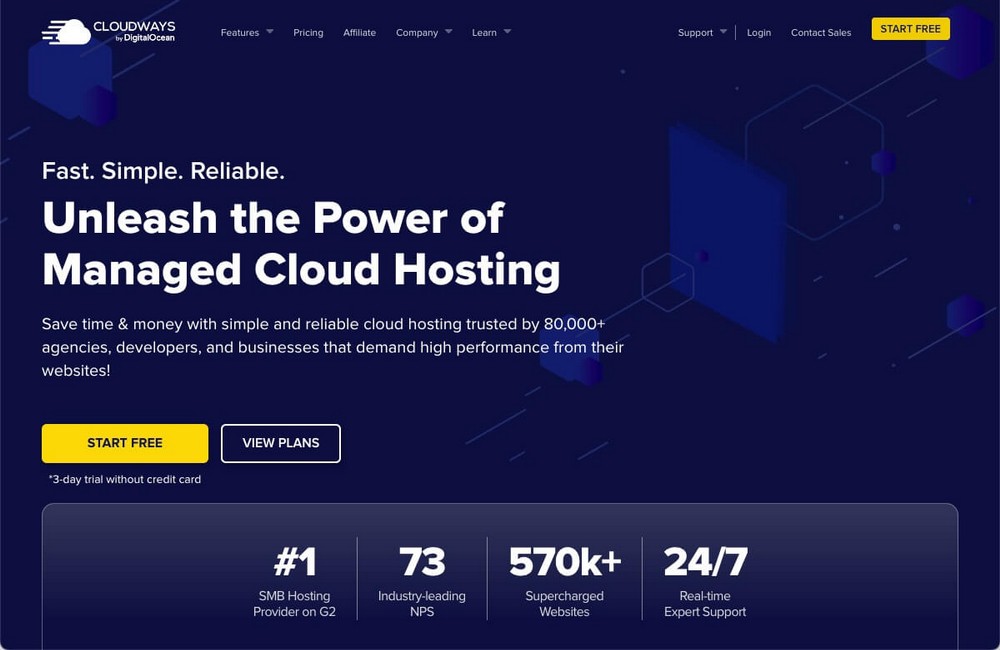
But you can follow the steps with Hostinger or any other host provider since the process will be quite similar.
Cloudways offers a range of hosting options from the basic to most advanced. We think the Digital Ocean basic plan should be enough to begin with.
.
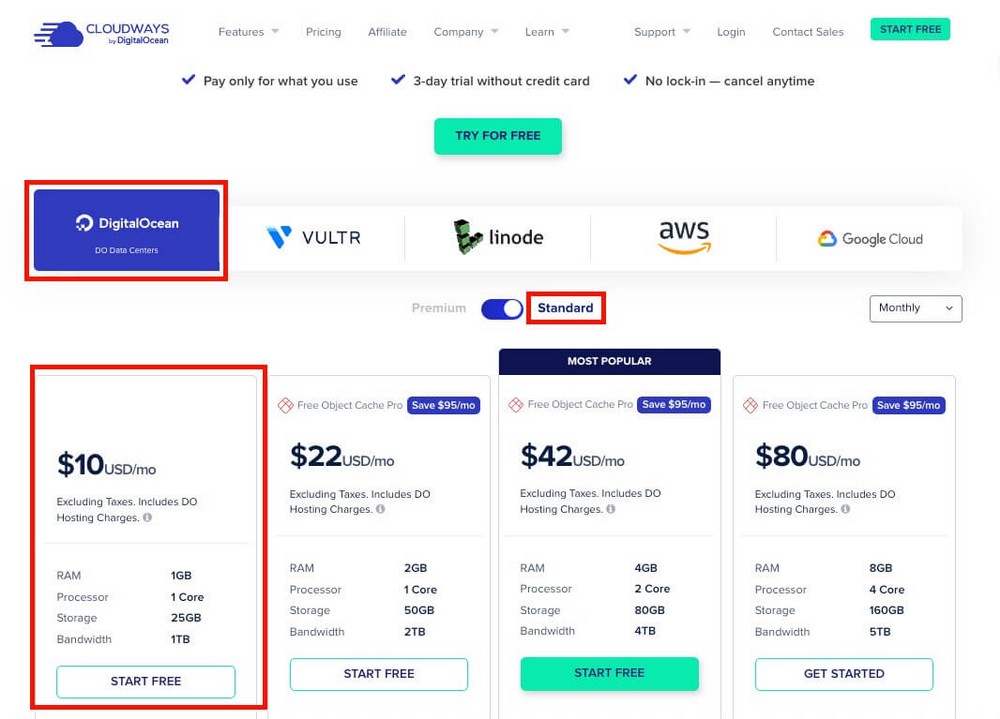
This plan offers 1TB of bandwidth. Something that not even Webflow’s $39/mo business plan offers.
It’s probably more than enough to get started, although you can always upgrade at any time if needed.
Step 2. Install WordPress
After signing up, you’ll have to install WordPress on the Cloudways server you’ve just bought.
- Pick WordPress as the application you want to install.
- Choose the closest location where most of your customers will be located.
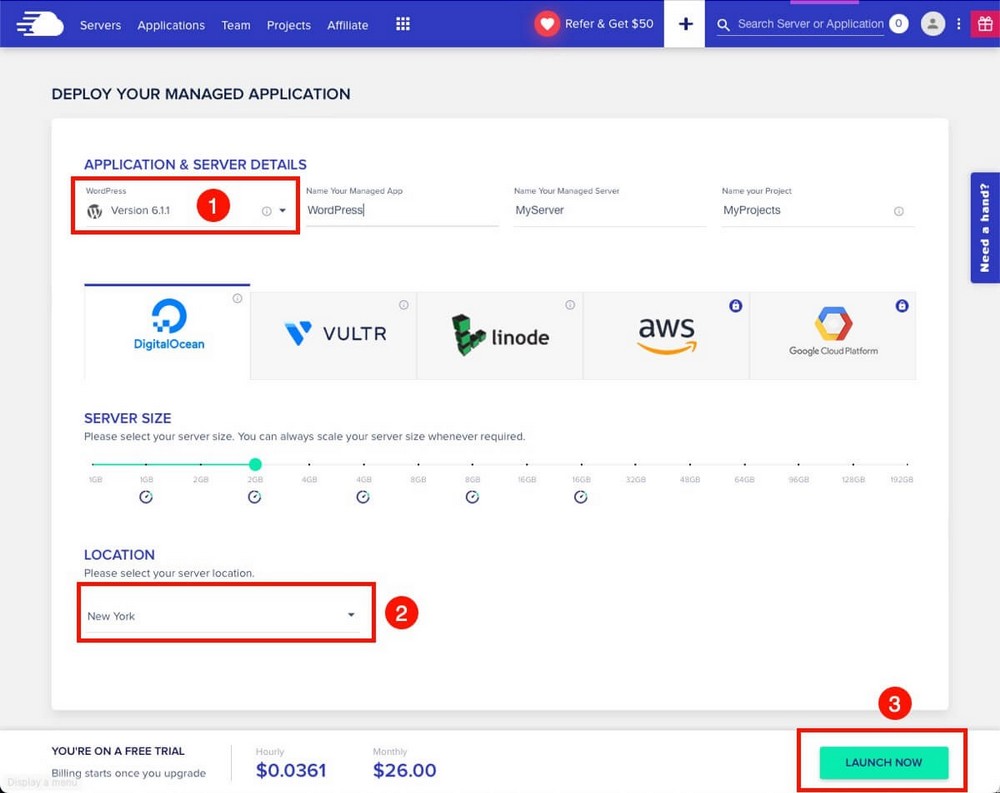
You can increase the server size at this point if you want.
Otherwise leave all the parameters as they are and click on Launch Now to finish server setup and the WordPress installation.
Step 3. Customize WordPress
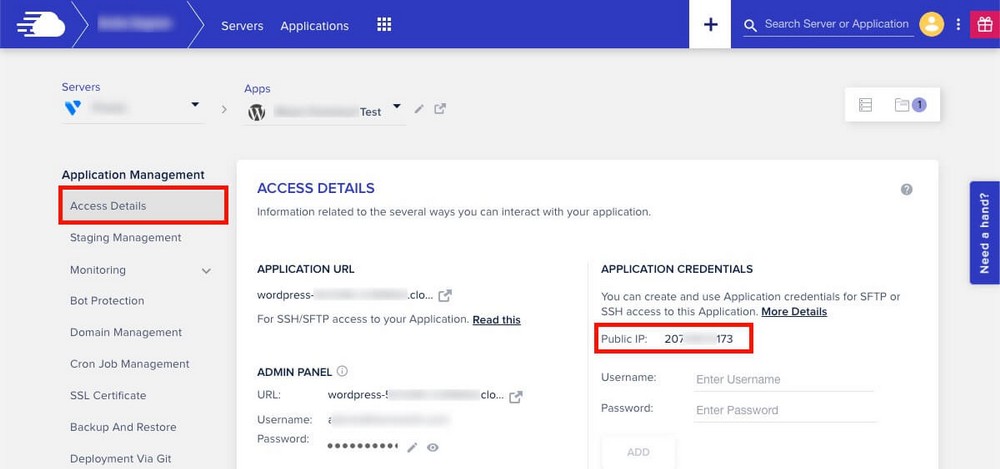
Go to the WordPress installation you just installed and find your WordPress admin login credentials in the Access Details tab.
- Notice that Cloudways provides you with a temporary free domain, which is a subdomain like name.cloudways.com.
- This is similar to the subdomain also provided by Webflow (domain.webflow.io)
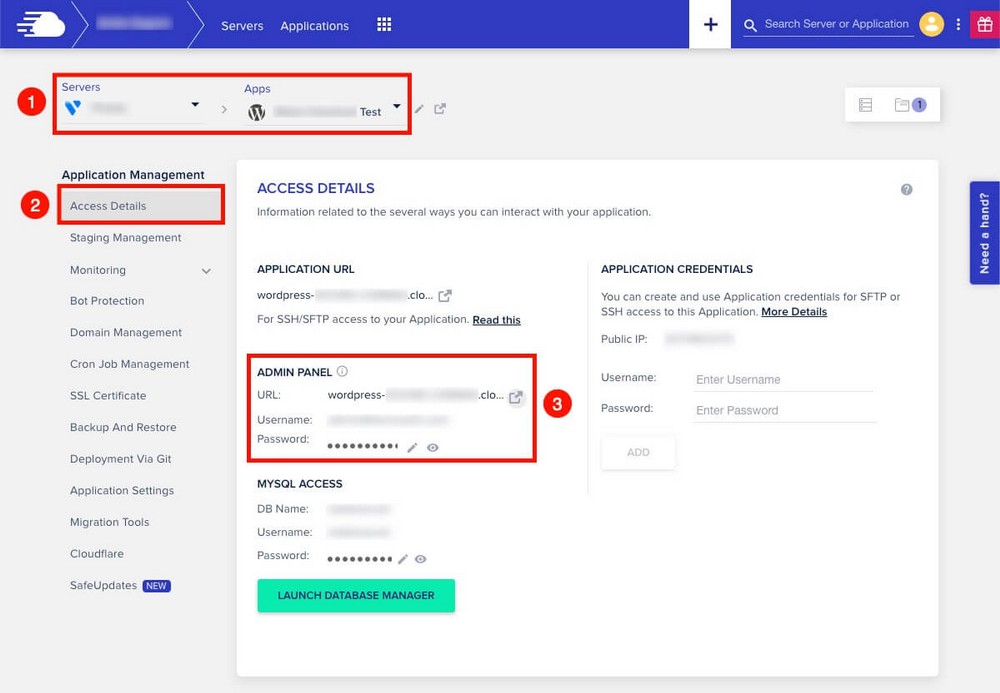
The above URL and credentials will take you to the WordPress administration panel, which is partly similar to Webflow’s dashboard.
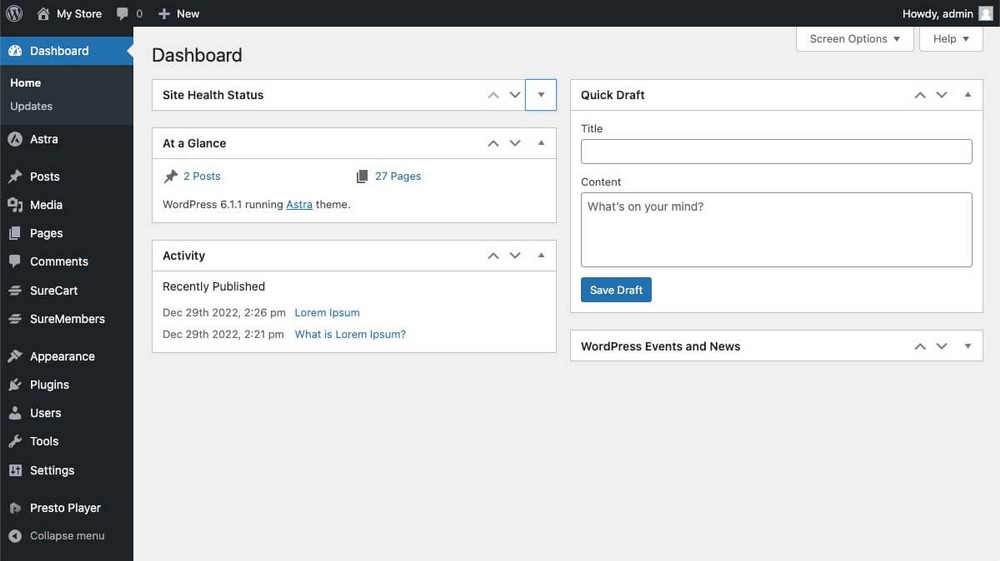
Now it’s time to customize WordPress.
First you’ll need a theme.
We recommend Astra. It’s very light and fast, and can be easily adapted to whatever you need.

WordPress already has a block editor for the design part.
But if you want something more powerful you can install Spectra, which includes more blocks and features.

WordPress is very flexible and allows hundreds of plugins themes and options.
For the moment we recommend that you only focus on the design and little else so we can continue with the migration process.
Step 4. Export Webflow Content
Now you have your new WordPress platform ready you need to fill it with content.
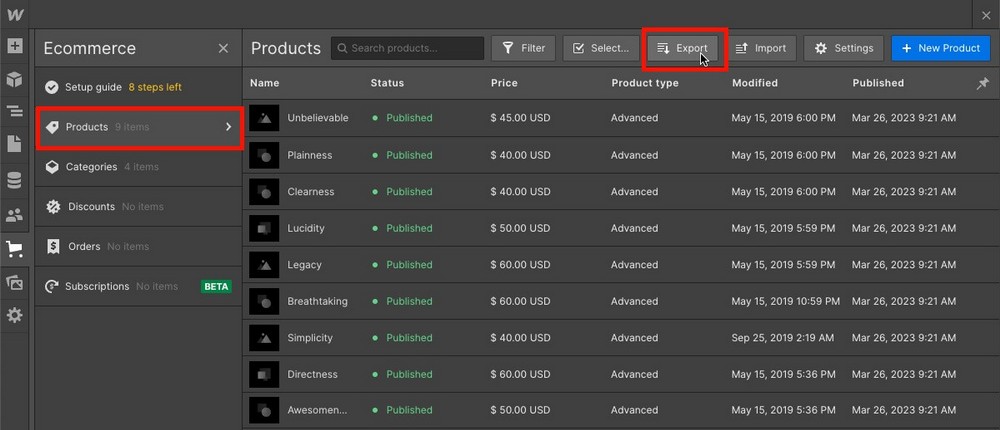
From the Webflow dashboard go to the CMS Collection section.
Pick the content you want to move, in our case the blog posts, and click on the Export button.
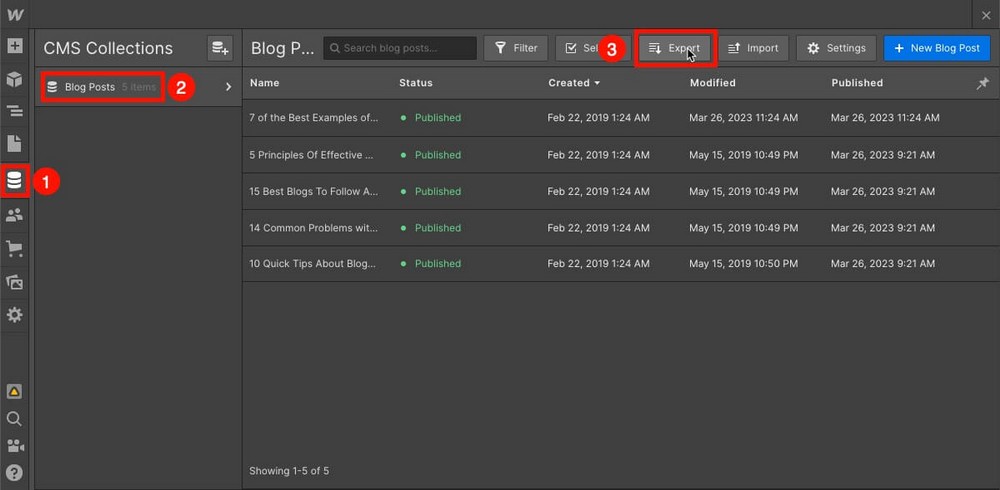
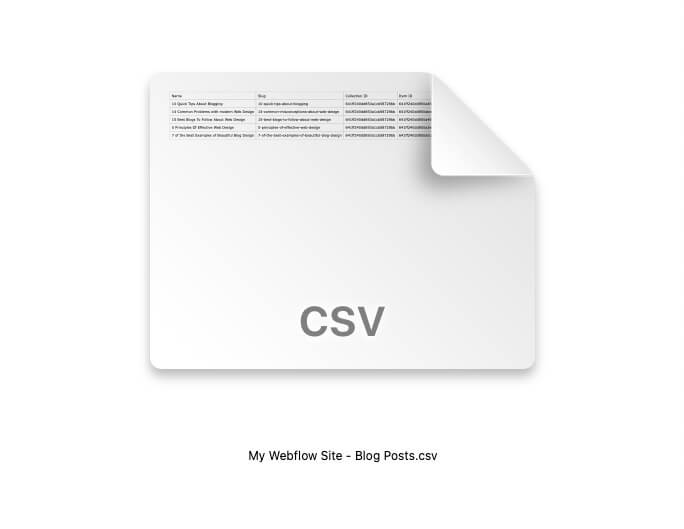
You’ll get a CSV file with the selected items.
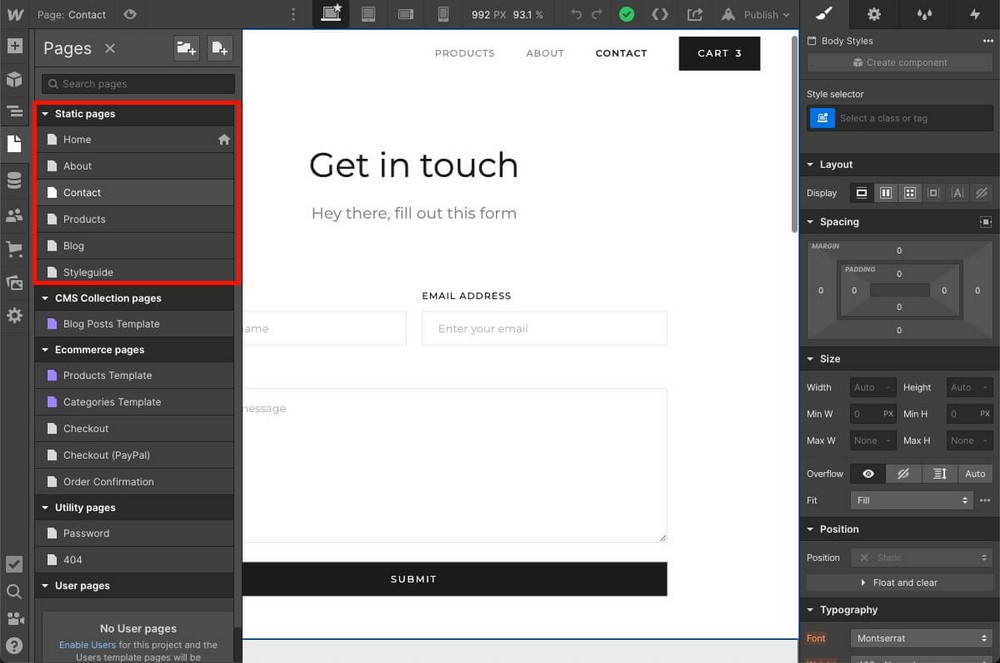
You can repeat this step for any collection you have. Unfortunately static pages can’t be exported, and neither can the images.
Important
From this point on you shouldn’t modify anything in Webflow. If you add more content it will no longer be imported into WordPress as we already have the content downloaded.
Step 5. Import the Content to WordPress
Now you’ll have to import the content you just exported in Webflow into WordPress.
There is only one small drawback: WordPress can’t natively import CSV files.
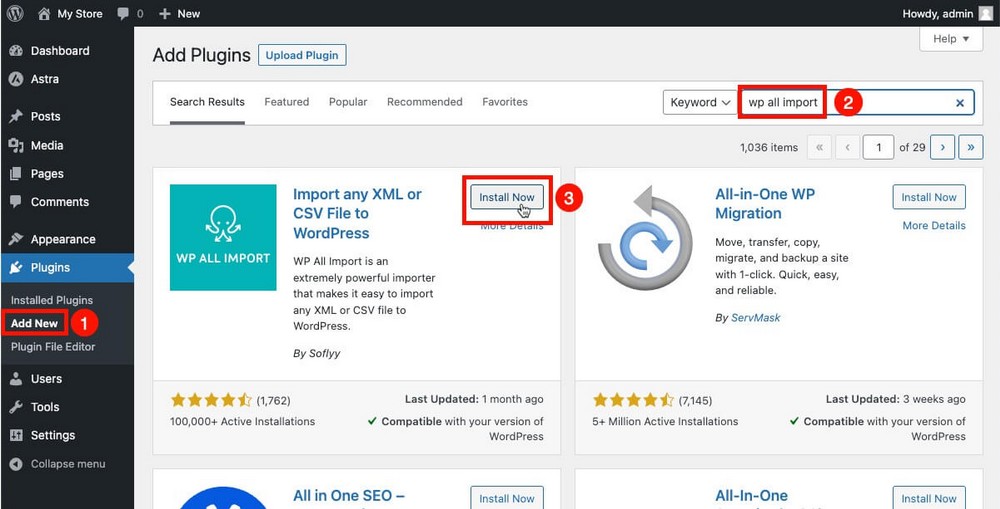
Luckily the solution is simple. All you need to do is install a free plugin called WP All Import.
You’ll do this from the WordPress administration panel > Plugins > Add New.
Use the search function to locate the plugin, then Install and Activate it.
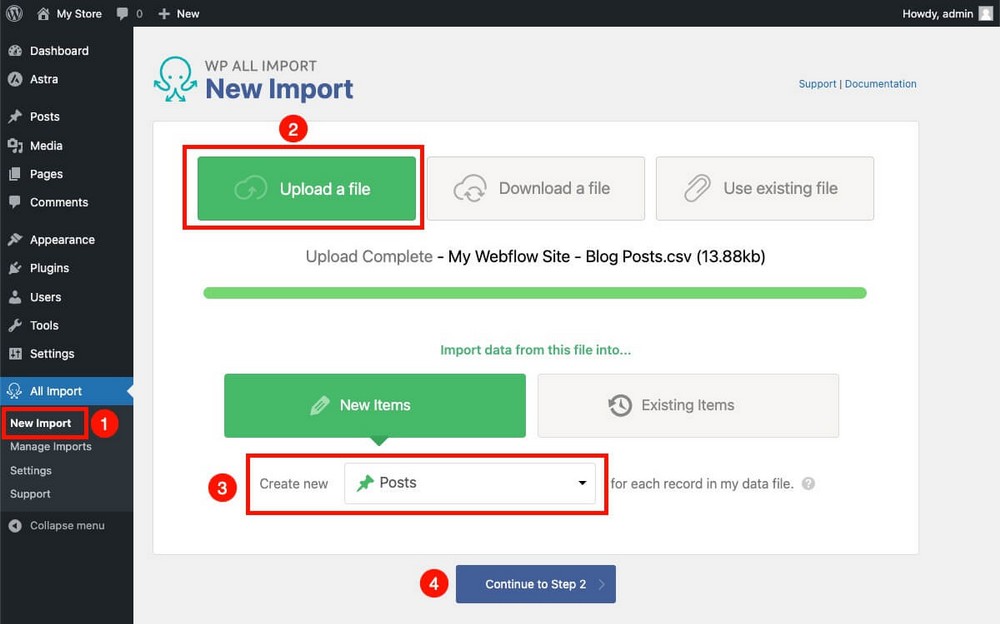
Then, select WP All Import from the sidebar, import the file you’ve previously downloaded and specify what type of content it is.
In this case posts. Change it to whatever you downloaded at the time.
Before finalizing the import you can review what content will be imported.

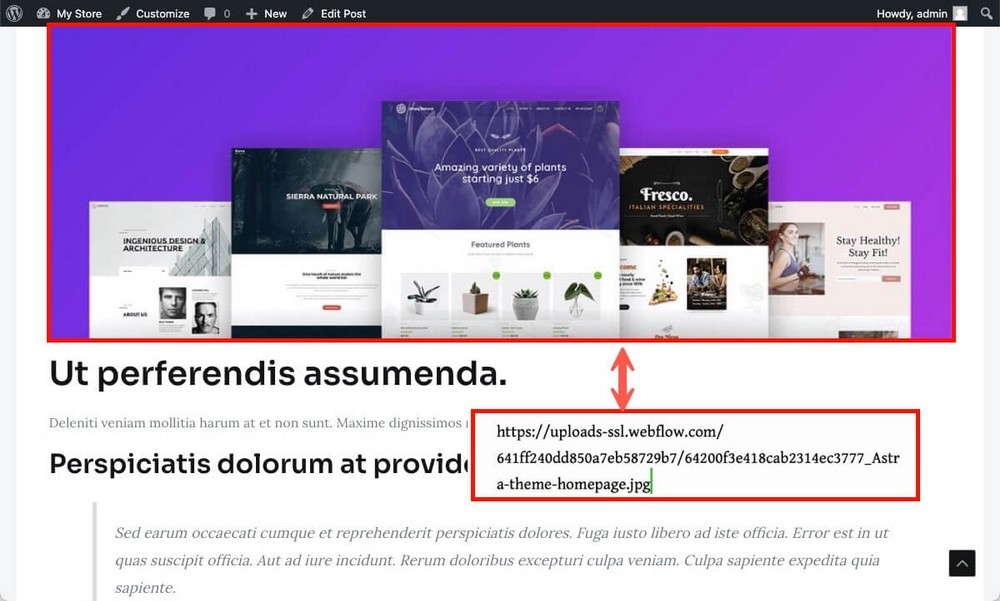
If you scroll to the bottom you’ll notice that images are still linked to your Webflow account.
Remember that images can’t be exported automatically from Webflow to WordPress.
It’s a process that you’ll have to do manually. But we’ll show you how to do it faster in the next step.

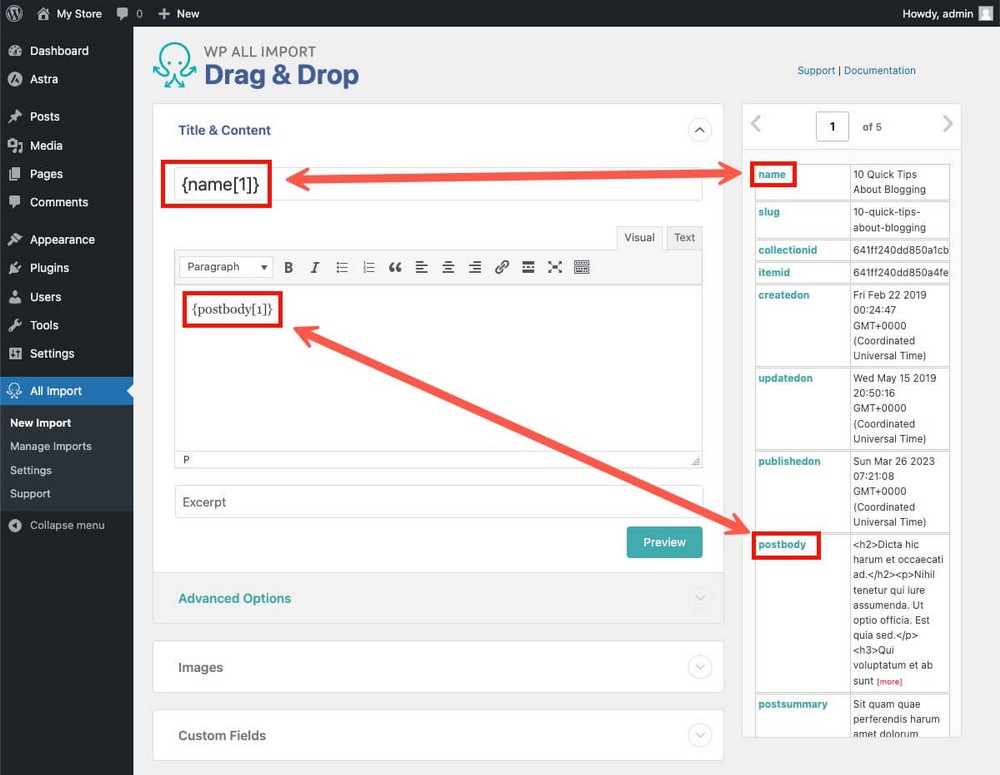
In the final step you need to create the import template.
That means telling the plugin what content will be included in what section of an article.
By dragging and dropping you can indicate that the information found in “name” will be used as the post title, “postbody” as the content, and so on.
Once you have everything ready, scroll to the bottom and click on Continue to get to the final step.
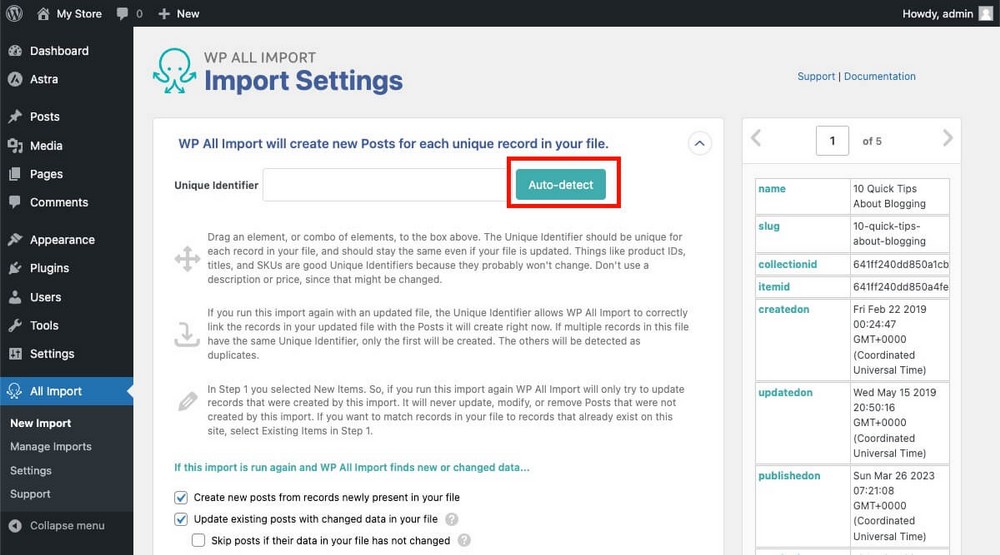
Click Auto-Detect so that the plugin assigns a unique identifier to each imported item and click Continue again.
Run the import and you are done.
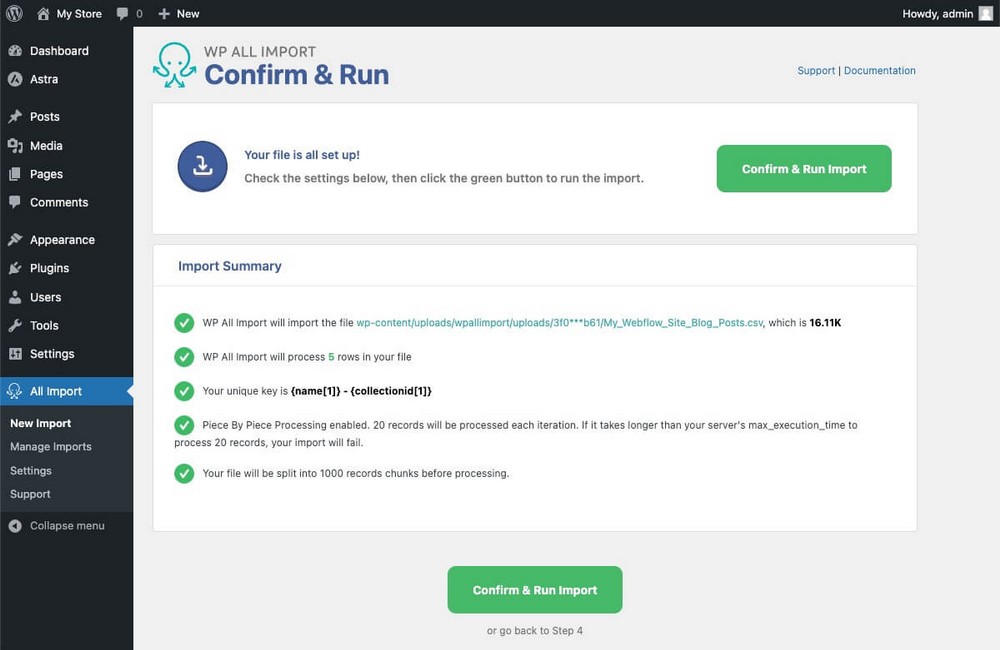
The articles will appear on the Posts page of WordPress.

Use the same procedure for migrating other content from Webflow so everything is added to WordPress.
Step 6. Re-upload images
Webflow doesn’t allow you to export images.
It does reference them using code, so they will be seen in your WordPress posts.
They will be hosted on Webflow, and they will disappear if you delete your account.
To solve this problem efficiently you can use the Auto Upload Images plugin as it:
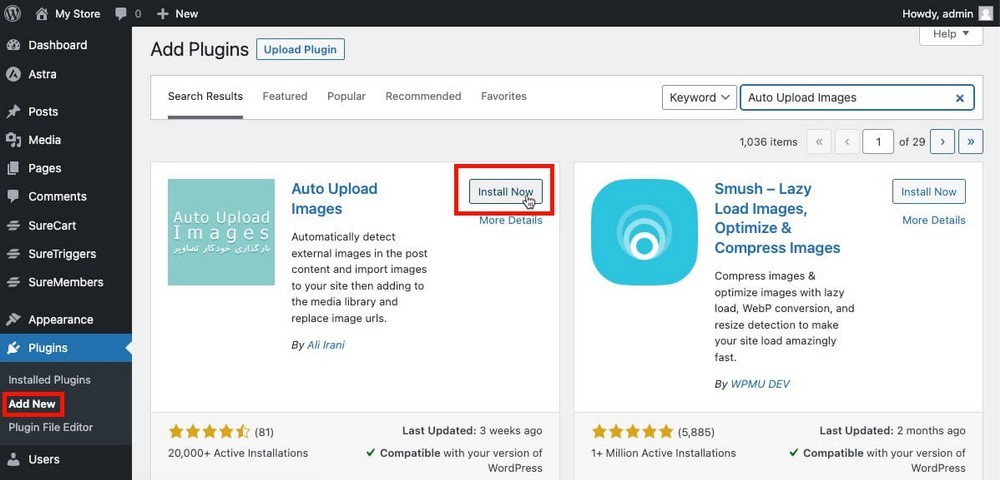
- Scans your articles looking for images embedded in external sites.
- Downloads them from the original source, uploads them to WordPress and exchanges the old reference.
Auto Upload Images is really easy to use, once installed and activated:
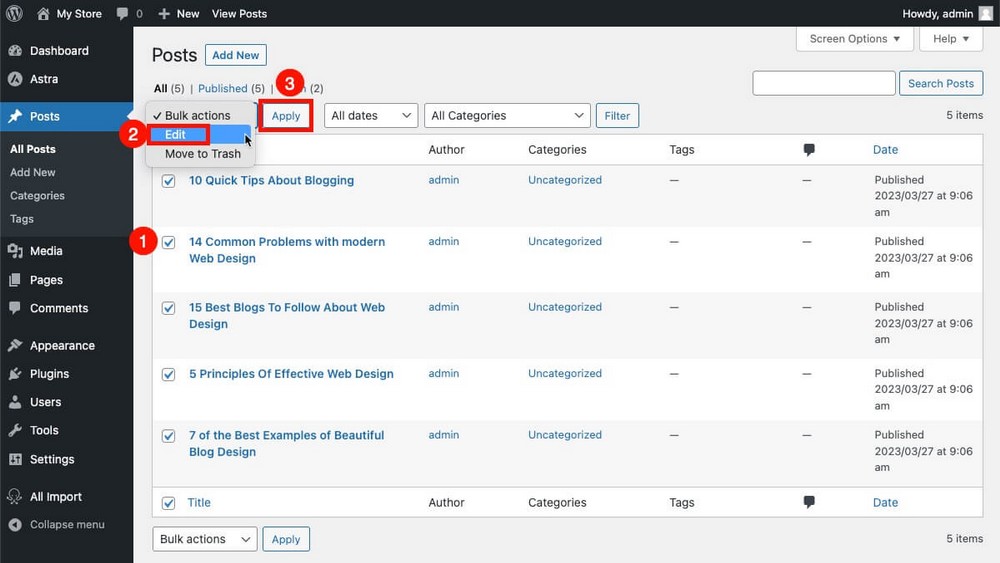
- Go to Post > All Posts.
- Select them all.
- In the first dropdown select Edit.
- Click the Apply button.
In the edit panel that will appear leave everything as is and just click Update.
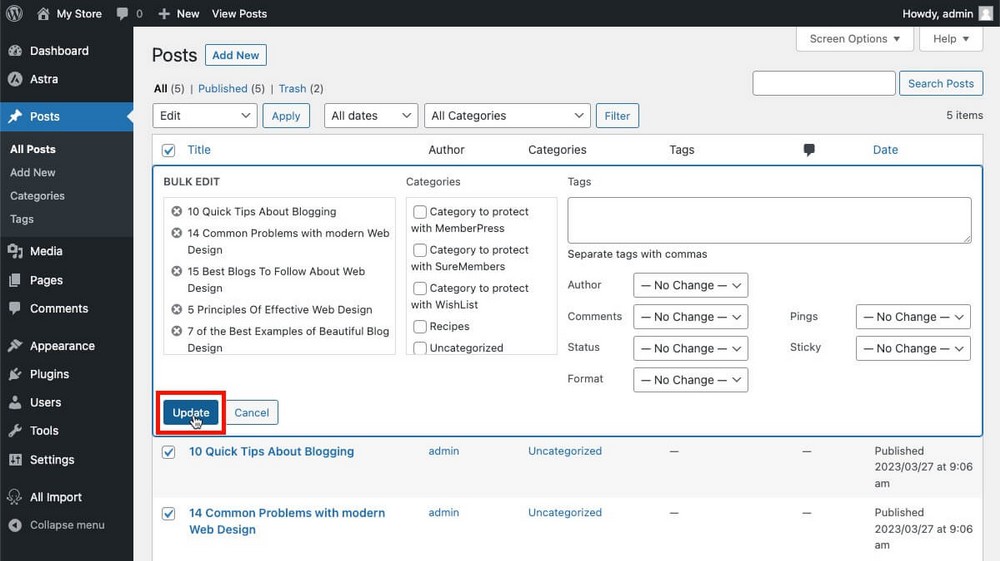
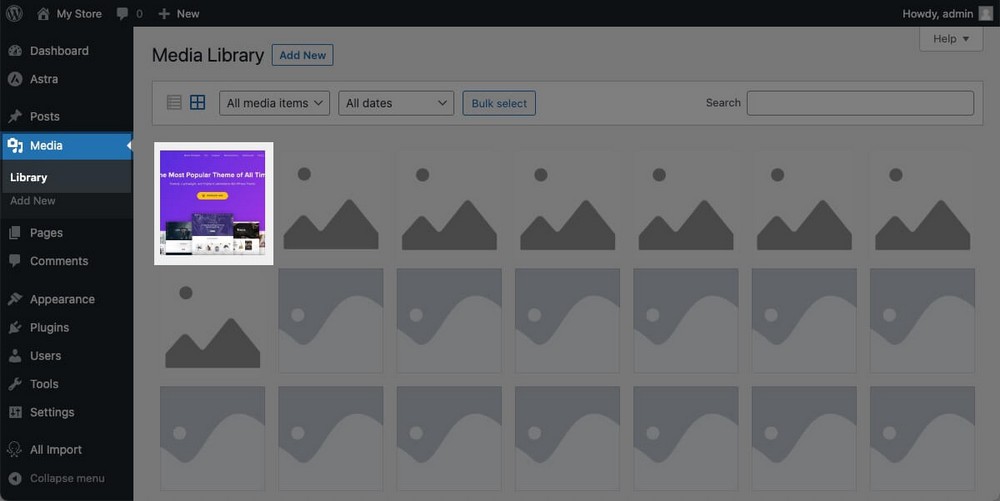
The plugin will work in the background and the linked images will be hosted on your website from now on.
Step 7. Redirect the Domain
Your website is now perfectly functional. But right now it’s only accessible through the temporary URL provided by Cloudways.

Your domain still points to your website made in Webflow.
To solve this problem you’ll have to follow two steps.
First, add the domain you want to use in the Cloudways dashboard panel, and make it a primary domain.

Then copy the public IP of your server.
You’ll find it in the access details tab in Cloudways.
Finally you’ll have to go to your domain registrar and modify a couple of values. Instead of pointing to Webflow servers, we want it to point to Cloudways.
This is done by modifying DNS by adding 2 new records.
See an example below of how this is done in Namecheap.
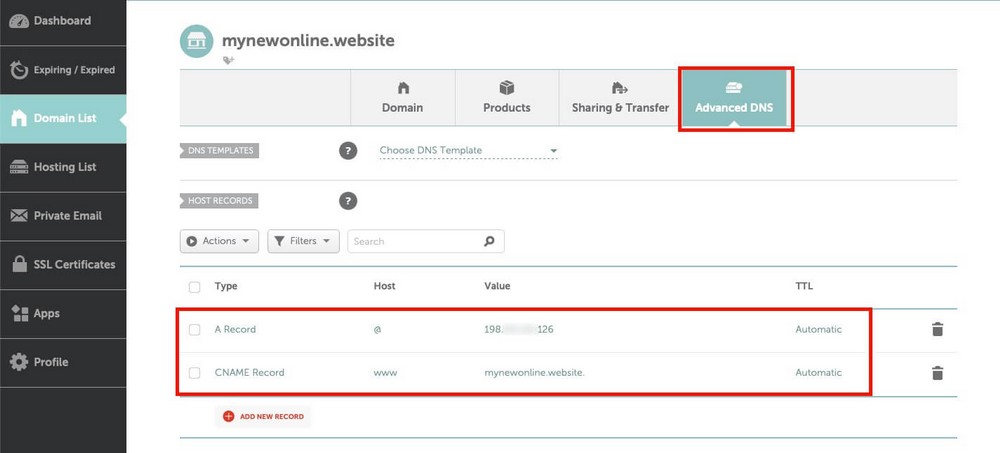
- A record:
- Host/Name: @ or blank.
- Value/Target: The IP address you’ve just copied.
- TTL: Automatic/Default.
- CNAME record:
- Host: www
- Value: your domain name (e.g. nameofyourstore.com)
- TTL: Leave default
After making this update you may have to wait up to 48 hours for the change to propagate.
If you get stuck, your domain registrar or new web host should be able to help.
Next Steps After the Migration
Once the migration is complete, you should perform a quick check and work manually on some aspects of your website.
- Recreate the pages: Webflow doesn’t allow you to export static pages. You’ll have to create them manually in WordPress.
- Recreate the navigation menu: And other elements like sidebar or footer widgets.
- Install extra plugins: For creating contact forms, lead capturing, and any other to get back vital features to your business.
- Reinstall code that now is missing. Like code from Google Analytics or Meta Pixels.
Test everything to make sure that it’s under control and that you have not left any content behind in Webflow.
When you are sure of this, close your Webflow account to avoid incurring extra costs.
Migrating From Webflow to WordPress FAQs
This guide contains everything you need to know but we appreciate you may still have questions.
Why Switch From Webflow to WordPress?
You should consider making the switch from Webflow to WordPress to work with a tool with far fewer limitations when it comes to growing your business. Working with WordPress is more affordable since this CMS is free and you only have to pay for hosting and the extra plugins you may need.
Plus, being open-source means that you can be confident that your website will remain future-proof.
Is WordPress Easier to Use Than Webflow?
Yes, WordPress is a much easier tool to use than Webflow, thanks partly to its modular approach that allows you to add features as you need them through plugins.
It’s a platform that has been around for nearly 20 years, so it has been improving with user feedback since then. On top of that, many themes like Astra further simplify the task of working with WordPress thanks to cleaner interfaces.
Can I Migrate Webflow eCommerce to WooCommerce?
Yes, it’s possible to migrate products from Webflow eCommerce to WooCommerce, as these items can be exported as a CSV to be imported from WordPress.
However, to import them with WP All Import you’ll have to buy an extra premium add-on.
Can I Migrate Webflow Memberships to WordPress?
No. It’s not possible to migrate Webflow memberships to WordPress as their system is composed of several elements, some of which cannot be exported. So a semi-automatic migration is not possible.
Final Thoughts on Moving From Webflow to WordPress
Migrating a website from Webflow to WordPress is not difficult.
Once you have created your new digital home with WordPress on the hosting of your choice and you have set up the design to your liking, it’s just a matter of moving the content from one place to another.
WP All Import will help by importing blog posts or products that you have previously exported from Webflow.
Remember though that images are not exported but embedded from the original source, so you’ll need to use the Auto Upload Images plugin to solve this.
Webflow and WordPress are very different platforms, and therefore it’s inevitable that certain elements are not transferable.
The navigation menu, the contact forms, or the design itself are intrinsic features of Webflow. You’ll have to recreate them manually in WordPress but it’s easy.
It might be an extra step, but you’ll only have to do it once.
And it’s worth it to start working with an easier-to-use and more affordable platform that can be expanded in limitless ways thanks to plugins and integrations.
What are the reasons why you decided to leave Webflow?
Do you want to know how to replicate a feature of the platform in WordPress?
Let us know in the comments below!