
Want to reach an audience that speaks a different language? Are you looking for ways to create a multilingual WordPress website? Then you’re at the right place!
WordPress makes it simple to create multilingual websites.
With so many WordPress plugins available, creating multilingual websites is as simple as installing a plugin and configuring it to translate your website manually or on autopilot.
In this article, we’ll use TranslatePress, a plugin that helps you easily create a multilingual website with just a few clicks.
What Is a Multilingual Website?
First things first, what is a multilingual website?
Most popular websites are in English. Because the language is widely used, English has become a standard for the web.
But that does not mean everyone understands it. There are still huge populations that only understand their local language.
According to this source, around 1.3 billion people out of a global population of 7.3 billion speak English.
While many people speak English as a second language, any website only in English leaves a huge potential market untapped.
If you want to ensure a wider reach than just the English-speaking population, offering multiple languages on your website is of utmost importance.
Here’s what localization means:
- Translating all the pages on your website into another language
- Selling products that are relevant to the local market
- Offering customer support in other languages
- Ensuring contact details are available in English and other languages
When you translate your website into more than one language, it becomes a multilingual website.
You can then offer users an option to switch the language at will. You can also automatically send users to the pages with their local language by detecting their country from their IP address.
Let’s ignore the technicalities for now and jump right into understanding how a multilingual website is beneficial for your business.
Why Should You Translate Your Website?

Translating helps make your website more accessible to a global audience, but it can also improve your search engine ranking.
By translating your website into other languages, you’ll be able to reach out to new audiences and increase traffic to your site.
Here are 5 reasons why you should consider translating your website:
1. Reach a Global Audience
If you have a website in English but want to reach a global audience, then translating it into other languages is a great way to do that.
You’ll be able to connect with more people from around the world who might not otherwise be able to understand your website.
2. Improve Your SEO
Another reason to translate your website is to improve your SEO. When you have a website that is in multiple languages, it will show up in search engine results for each of those languages.
This can help you to reach even more people who might be interested in what you have to offer.
3. Increase Sales
In some cases, translating your website can actually help to increase sales. This is because potential customers will be able to find information about your company and its products or services in their own language.
This will make it much easier for them to make a purchase decision.
4. Better Customer Service
Translating your website can help improve the quality of customer service. Potential customers will be able to find information about your company and its products or services in their own language.
Localized customer service has obvious benefits to purchasing decisions and building confidence in your business.
5. Provide a Better User Experience
Translating your website can provide a better user experience for those who visit it. Users will be able to find information about your company and its products or services in their own language.
Visitors won’t have to work so hard to understand what you offer or potentially miss out because of incomplete vocabulary or English language level.
There are many benefits to translating your website, and TranslatePress makes it easy to get started.
Things to Consider Before Translating Your Website
Let’s look at some of the most important things you’d need before you get translating your website.
1. Identify Which Languages You Want to Translate
If you want to translate your WordPress website into more than one language, the first step is to identify the languages you want to target.
You can do that in two different ways:
- Niche down on the target markets you want to, or can, serve
- Find out where most of your traffic comes from using Google Analytics
Both of these methods can help you decide which languages to translate into.
If you’re serving a diverse country like India where there are hundreds of spoken languages, you may want to pick a few of the major languages to get your website translated into.
You can choose any number of languages, but keep in mind that translating your website into more languages will increase the time and effort needed to maintain it.
2. Identify Your Translation Budget
Next, identify your translation budget. How much are you willing to spend on translations?
This will help you determine the type of translation option you need and how many languages you can afford to translate your website into.
There are two ways to translate a website:
- Machine translation is the cheapest and most accessible option, but it often results in translations that are inaccurate and difficult to understand.
- Human translation is the most expensive but the translations are far more accurate.
Once you’ve identified the type of translation you need, determine how many languages you want to translate your website into.
Keep in mind that some languages are more expensive to translate than others.
For example, the cost of translating a website in a language like Norwegian, Finnish, or Korean using human translation could be sky-high due to the cost of living in those countries.
On the other hand, you could translate a website to English from most other major languages for a very low cost because a large population of the world speaks English as a second language.
Once you’ve determined your translation budget and the number of languages you want to translate your website into, you’re ready to start translating!
In the next section, we’ll walk you through the steps involved in translating your website using TranslatePress.
3. Choose the Translation Plugin
There are a few translation plugins for WordPress, but the most popular and comprehensive plugin is TranslatePress.
It allows you to create a multilingual website with ease and covers all the bases – from translating your menus and posts, to creating translations for your pages and widgets.
What Do You Need to Set up a Multilingual Website in WordPress?
There are just 3 things you need for translating your website.
With this setup, you can have a fully translated website ready to go:
1. Multilingual Plugin
You could manually create multiple versions of your website, each for a different language, and then maintain them – or you can use TranslatePress which takes care of all of this for you.
TranslatePress is one of the few plugins that we recommend for its ease of setup.
You’ll learn how easy it is to use this plugin in a little while.
2. Translated Content
You need to recreate your content in all the different languages you want to provide.
You can do that in a number of ways:
- Manually rewrite pages and posts in different languages
- Translate your content using a translation service
- Automated translation using Google Translate or DeepL or some paraphrasing app that can paraphrase content from one language into another.
3. Compatible WordPress Theme
You need a WordPress theme that works great with translated content, supports Unicode fonts, and does not cause errors while transitioning between languages.
In this tutorial, we use Astra, which is not only a multipurpose theme but also a great theme for multilingual websites.
The 5 Best Multilingual Plugins for WordPress
TranslatePress is one of the most popular multilingual plugins for WordPress. It’s easy to set up and use, and it offers a lot of features.
But there are also other great multilingual plugins available.
Here are 5 of the best:
1. TranslatePress
TranslatePress is a WordPress plugin that makes it easy to translate your website into multiple languages.
It includes a built-in translation editor so you can easily translate your content without having to use a separate translation tool.
TranslatePress also includes a translation management system so you can easily manage your translations and keep track of which translations are updated.
2. Polylang
Polylang is a WordPress plugin that allows you to create a website in multiple languages.
It can be used to create a bilingual or multilingual website. You can add translations of your posts, pages, media, and custom post types.
Polylang includes a language editor so you can manage your translations. You can also use Polylang to create a multilingual e-commerce website should you wish.
3. Google Translate for WordPress
With the GTranslate plugin, WordPress sites are now able to be translated automatically by using Google’s powerful translation service.
It offers 103 languages that you can translate your website into. This covers more than 95% of the world’s population!
The paid versions have full SEO compatibility which will help increase international traffic on any business site while saving you time from having employees spend hours each day managing these changes yourself – all at once!
4. MultilingualPress
MultilingualPress is a plugin that allows you to create a multilingual website with WordPress.
It lets you translate your content into different languages, and also helps manage your translations.
You can use MultilingualPress to create a bilingual or multilingual website, or you can use it to create a website with multiple languages.
MultilingualPress is easy to use and it is available in both free and premium versions. The free version includes basic features, while the premium version includes advanced features.
5. Weglot
Weglot is another translation plugin for WordPress. It lets you create all your translations from a single place. Weglot’s first layer of machine translation helps you create a multilingual website instantly.
You can then improve upon the translations and then publish the content faster than with a traditional translation method.
6 Easy Steps to Create a Multilingual Website With TranslatePress
Let’s now take a look at the steps necessary to create a multilingual website using TranslatePress.
1. Install TranslatePress
The first step is to install the TranslatePress plugin. Follow the steps below to get TranslatePress on your website:
Step 1: Hover your mouse over Plugins. Then click Add New.

Step 2: Type TranslatePress in the search bar and hit Enter.
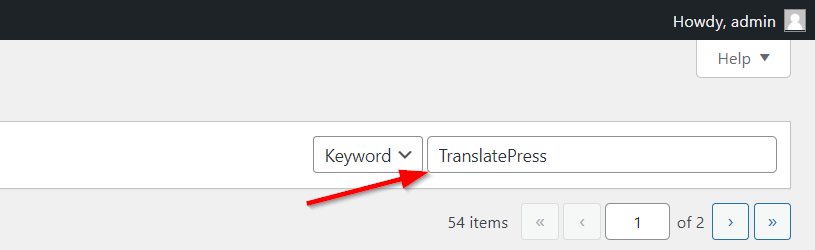
Step 3: Click Install for the TranslatePress plugin and then click Activate.
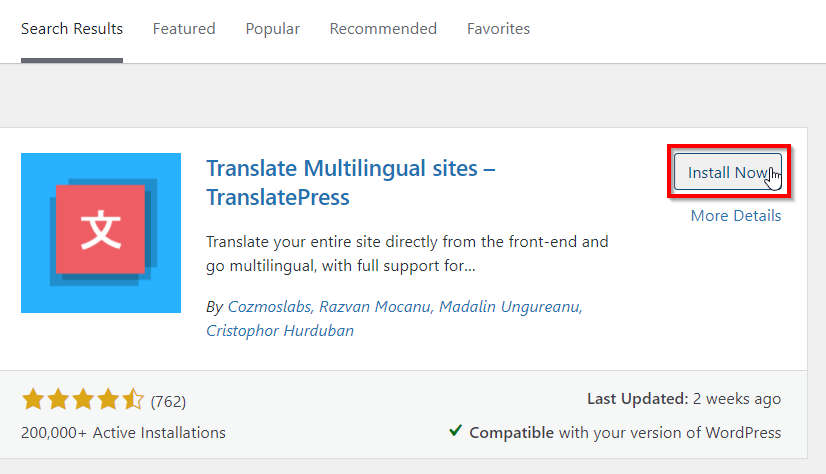
After you click Activate, you’ll be redirected to the Installed Plugins page.

Click Settings and then proceed to the next step in creating your multilingual WordPress website.
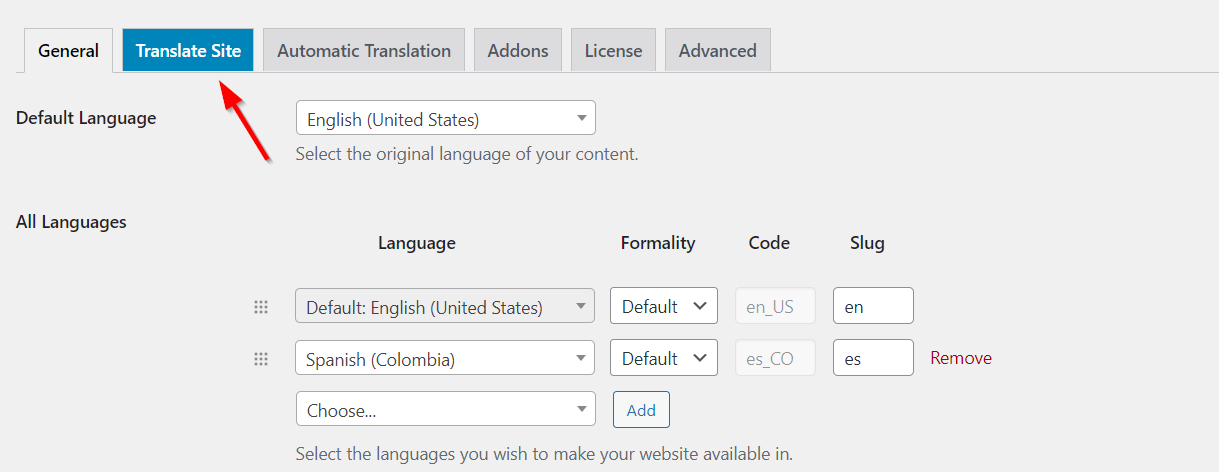
2. Enable the Language(s) You Need Within the Plugin Settings
Now, you’ll be taken to the TranslatePress settings page. This is where you can set up the languages that you need for your website.
Select a language from the All Languages dropdown and then click Add.
You can select as many languages as required if you’re a Pro user.
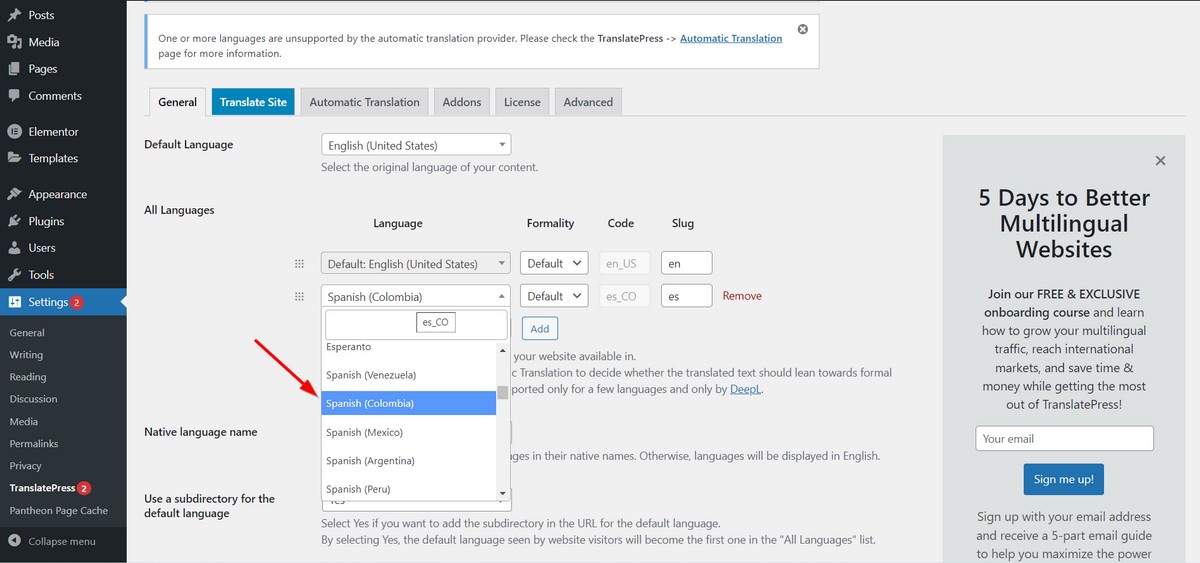
Once you’ve added all the languages you need, scroll down to Save Changes.
Please note that the free version of TranslatePress lets you add only one additional language.
If you want to add more languages, you need to upgrade to the Pro version of TranslatePress. You can upgrade TranslatePress from here.
3. Translating Your Website Manually and Automatically
Next, you have the choice of translating manually or automatically. Manual translation requires you to enter the translation text for every section of your website. While this is time-consuming, translations will be more reliable.
Alternatively, TranslatePress can use the Google Translate API to translate each piece of text on your website.
If you know the language translates well with Google Translate, you can go with Automatic Translation.
Please note: some languages like Mandarin and Japanese are known to not translate well. If you do translate them with Google APIs, it is recommended that you get a translation expert to proofread it.
Cloud Translation is priced as below and you can find all the details on this page:
| Usage | Price |
| First 500,000 characters* per month | Free (applied as $10 credit every month)† |
| 500,000 to 1 billion characters* per month | $20# per million characters |
| Over 1 billion characters* per month | Contact Google for enterprise pricing |
Choose the type of translation that suits your needs the best, and we can move ahead!.
1. Translating Your Website Manually
Let’s learn the steps to translate your website manually. Follow through the steps below to translate individual text on your website.
Step 1: Click Translate Site on the settings page to go with manual translation.
Step 2: You’ll be taken to the TranslatePress translation page. Here, click on the string you’d like to translate.
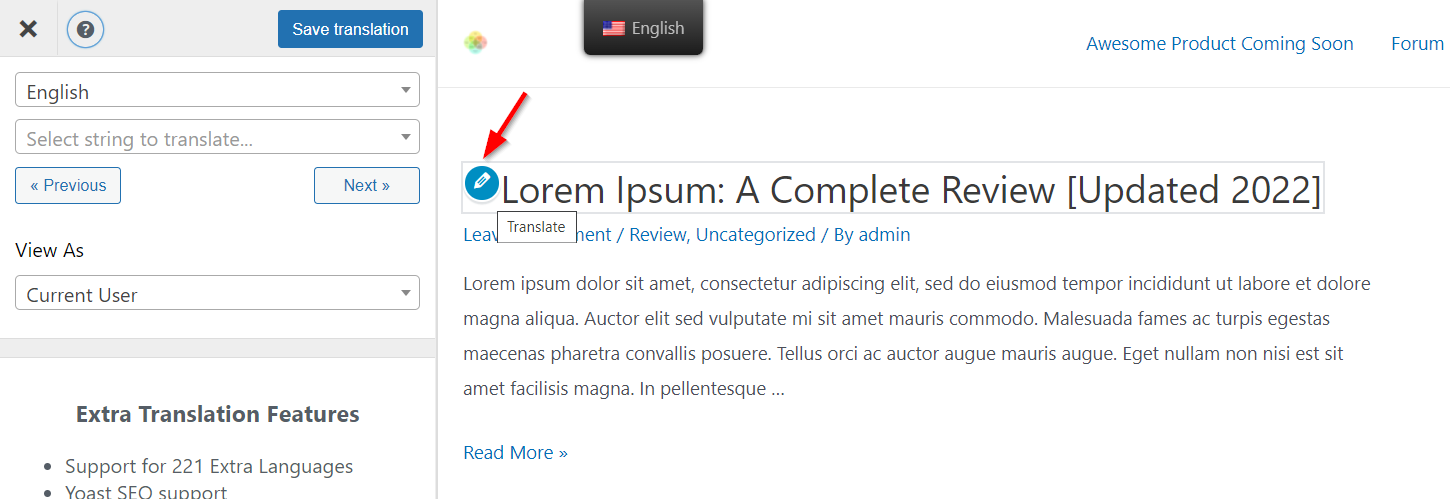
Step 3: You’ll immediately see a translation box in the left panel. Enter the translated string and click Next.
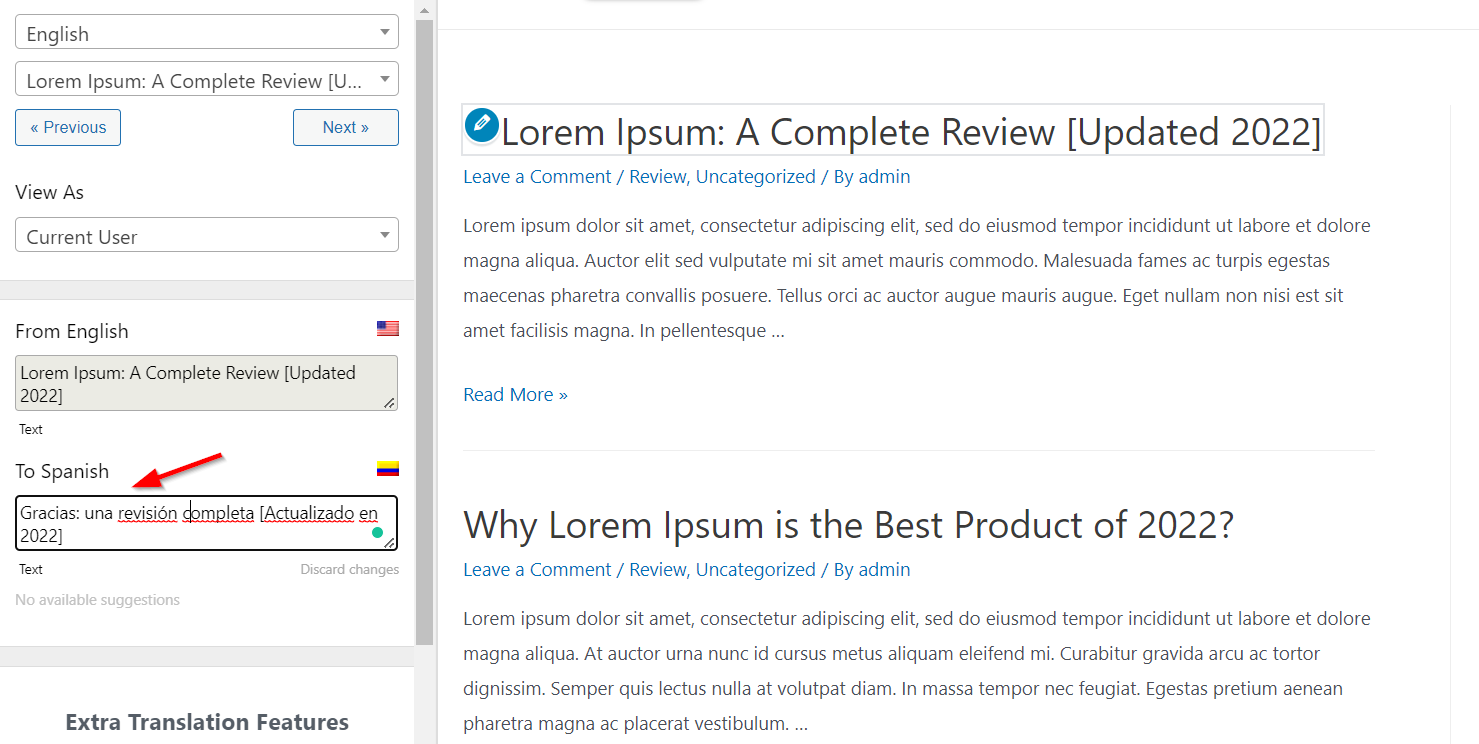
Step 4: Click Next to move to the next text block. This will make things easier for you to navigate through all the text blocks.
Step 5: Finally, when all the text pieces are done, click Save Translation or press CTRL(⌘) + S.
You can also visit individual category and tag pages to translate them into the chosen language.
2. Translating Your Website Automatically
Have too many pages that you cannot translate manually? Let automation take over.
With the Google Translate API, you can easily translate every single page on your website with a little bit of initial setup.
And the best part? Any new pages that you add, will also be auto-translated to the selected languages!
Step 1: Go to the Automatic Translation tab from your TranslatePress settings.
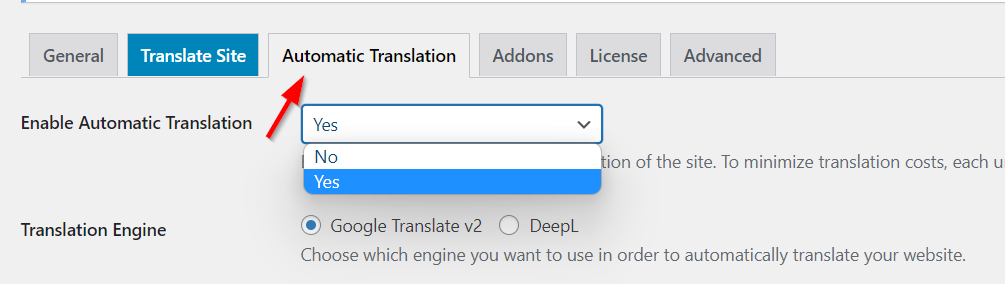
Step 2: Switch the Enable Automatic Translation dropdown to Yes.
Step 3: In this case, we’ll choose Google Translate v2 as the translation engine. If you have access to DeepL and are on TranslatePress Pro, you can set that up instead.
Step 4: Get access to your Google Translate API key by following the instructions mentioned here. Once you have the API key, enter it in the box below:

Step 5: Save your changes and you should see a Test API Credentials button.

Step 6: Scroll further to set up the characters per-day budget.

Step 7: Click Save Changes to finalize all the settings and let TranslatePress translate your entire website!
Since translations are chargeable, TranslatePress saves all the translations in a database. So the next time you need to retranslate the text, you are not charged for additional characters!
4. Translating URL Slugs
After you’ve translated the text, categories, and post tags on your website, there’s one final thing left – the URL slugs.
You need the TranslatePress SEO Pack addon for translating the URL slugs on your website.
Note: You need to be registered as a paid user to get this addon.
Let’s get started with the steps to translate URL slugs!
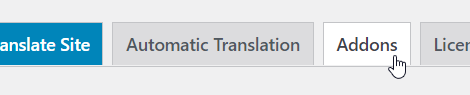
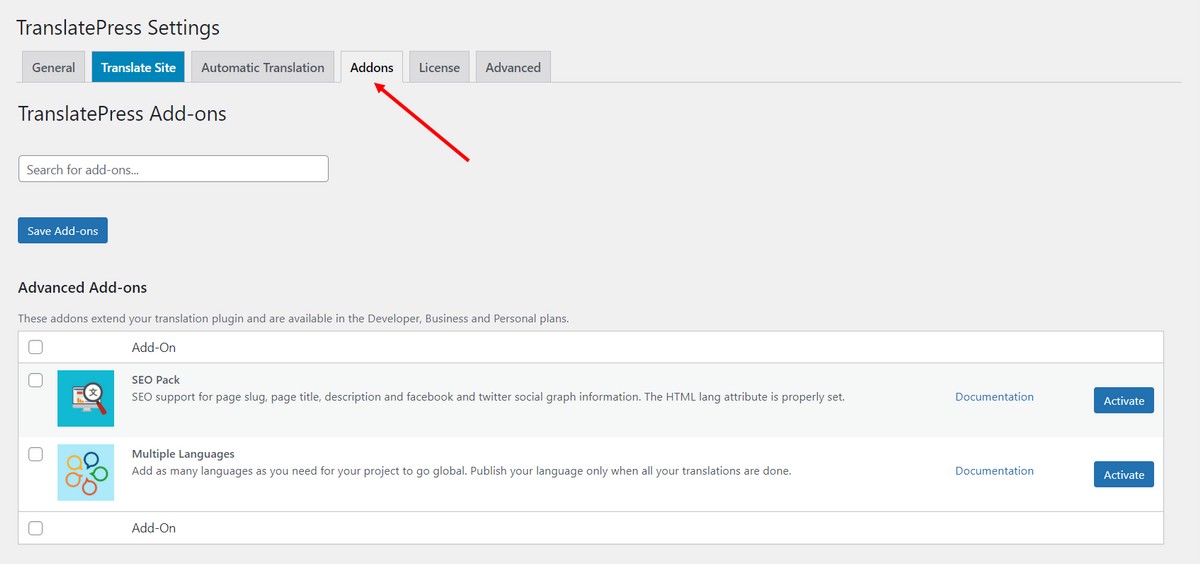
Step 1: Click on the Addons tab in the TranslatePress settings.
Step 2: Install the SEO Pack add-on from the list. Click Activate and you should be ready to get started.

Step 3: Go to the Automatic Translation tab and scroll to the section under your API key box. Check the box for Automatically translate slugs.
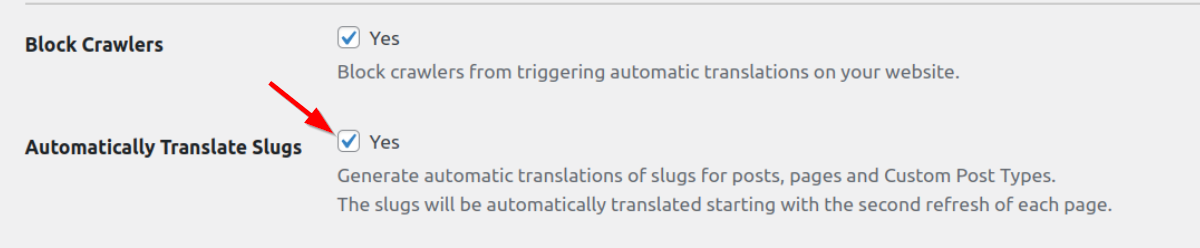
That’s it. You need to have automatic translation enabled for this to work but otherwise, it’s simple!
5. Finalizing Your Changes
Now that everything is translated, we have to make a few usability tweaks.
Step 1: Go to the General tab in TranslatePress settings.
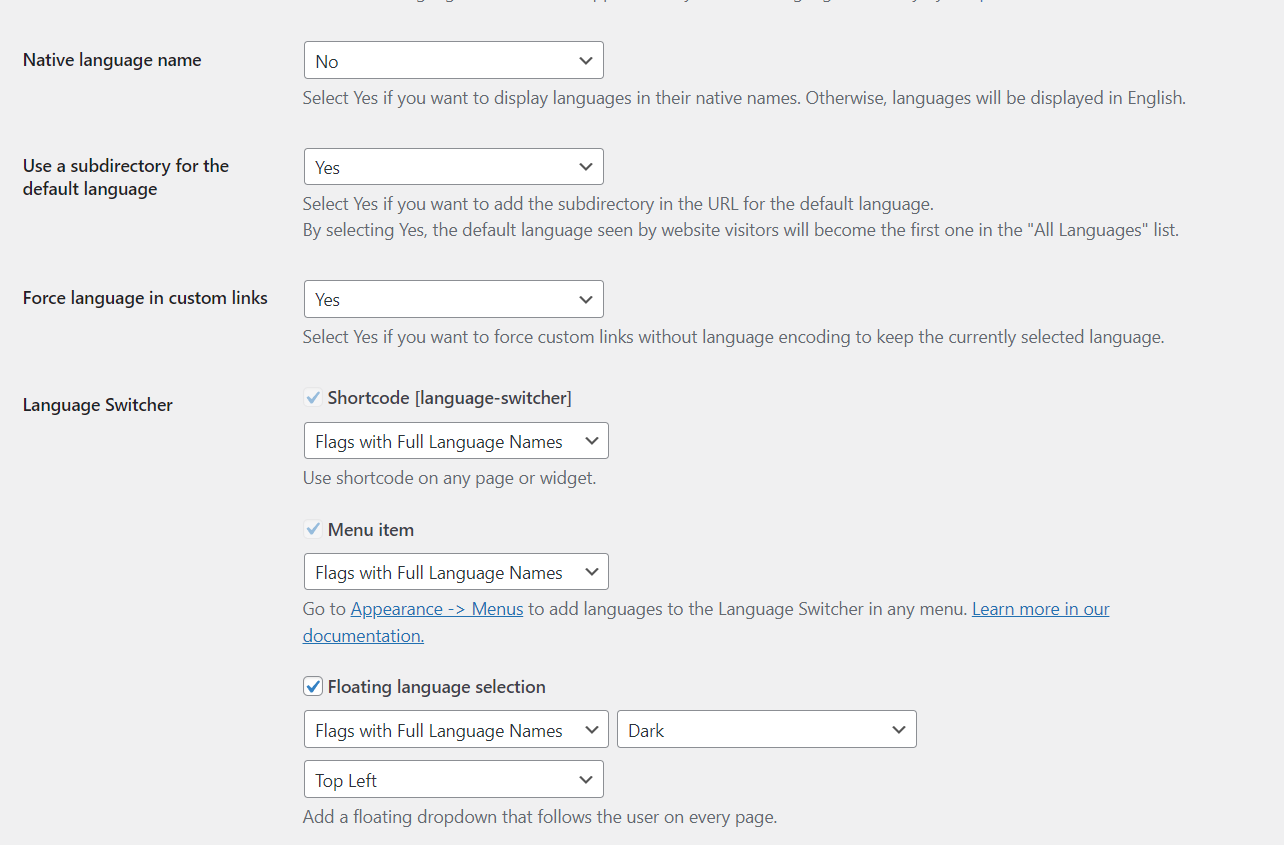
Step 2: Switch the Native language name to Yes if you want the language names to be displayed in the native format. For example, Spanish will be displayed as Español.
Step 3: Switch the Subdirectory for the default language to Yes, if you want it to be inside a folder. For example, yourdomain.com/en.
Step 4: The next dropdown allows you to force the selected language across your website even if the user accidentally clicks through to a page with a subdirectory of another language.
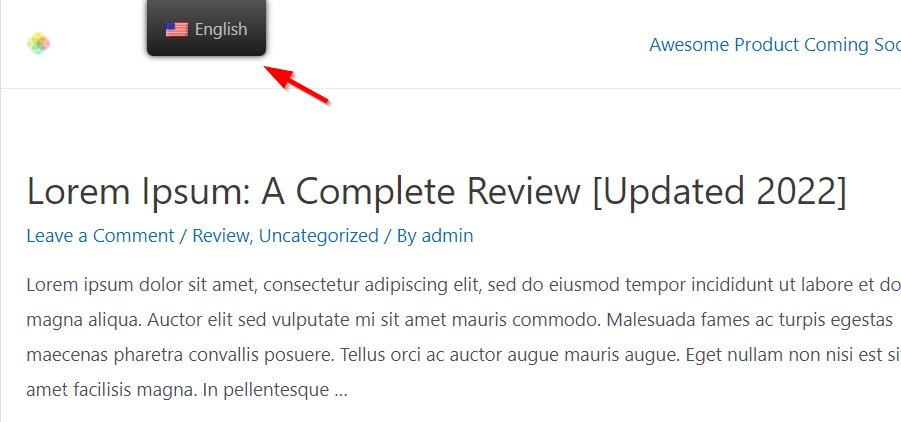
Step 5: Language selector is the small dropdown that floats on all the pages of your website as shown in the screenshot. You can switch the style of this dropdown, where it appears on your page, and if you want to display the full language name or not from this settings page
And that’s it.
You’re now done with the setup of TranslatePress! If you’re looking for further recommendations for multilingual plugins, you can check out this awesome article by WP Mayor.
What to Do After Translating
Now that you’ve translated your website, what do you do next?
Here are a few things that you’d need to do once everything has been set up.
1. Publish the Translated Pages
While all the translated pages are automatically published, it helps to check and ensure that all of your important pages are published, translated properly, and visitors can switch between them.
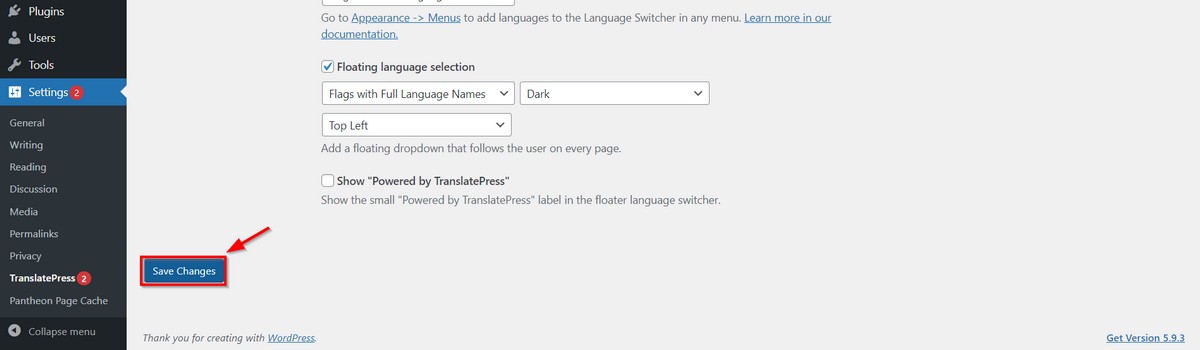
2. Add a Floating Site Language Menu
To make it easy for visitors to change the language, you can add a floating language menu. This is a menu that will always be visible, no matter where they are on your website.
Go to TranslatePress Settings > General tab.
Scroll to the bottom of the page and set up your floating widget. You can choose to show the widget at any of the four corners on your website.
You can further customize it to display only the flag, the short names, or the full names of the languages.
3. Ensure Proper URL Structure
You’ve already worked on translating the URL slugs using the TranslatePress automatic translations.
To be absolutely sure, we need to manually check that the most important landing pages and blogs have proper URL structure.
Depending on how you’ve configured the URLs, each language will either be within a subdirectory or only the translated versions of your pages will be within subdirectories.
Also, make sure that the entire URL except the domain name is translated into the language that you switch to. This helps with SEO so your pages appear on the local search engines.
4. Set Up Auto-Redirect to Localized Webpage Based on IP Address Detection
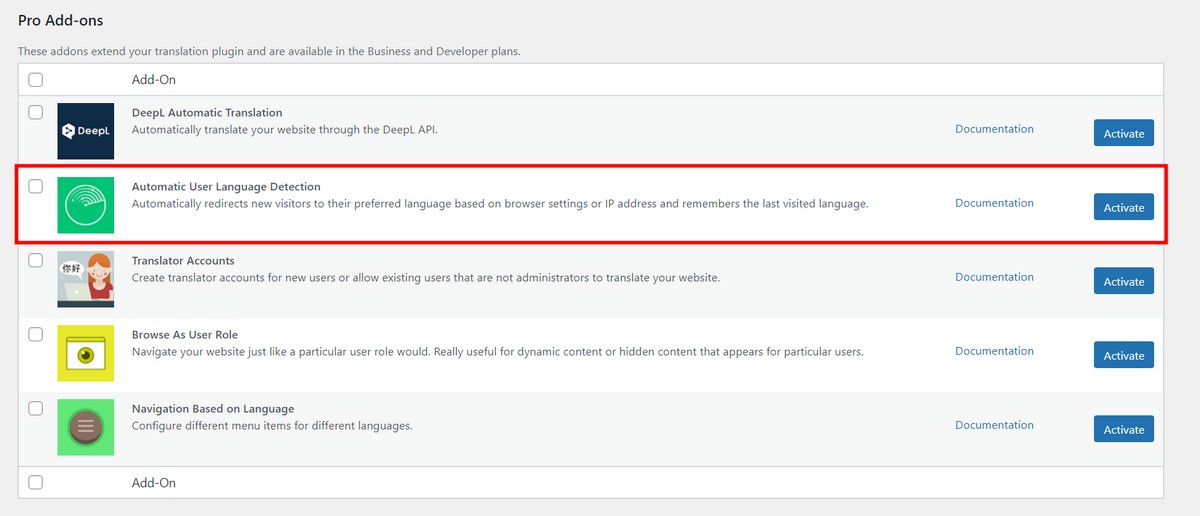
If you want to automatically redirect your visitors to the localized version of your website based on their IP address, you can do that with TranslatePress Pro.
In TranslatePress settings, go to Addons:
Scroll down to find Automatic User Language Detection and click Activate.
Finally, go to TranslatePress settings > General tab and scroll to the bottom of the page. Here, you can find the language detection settings.
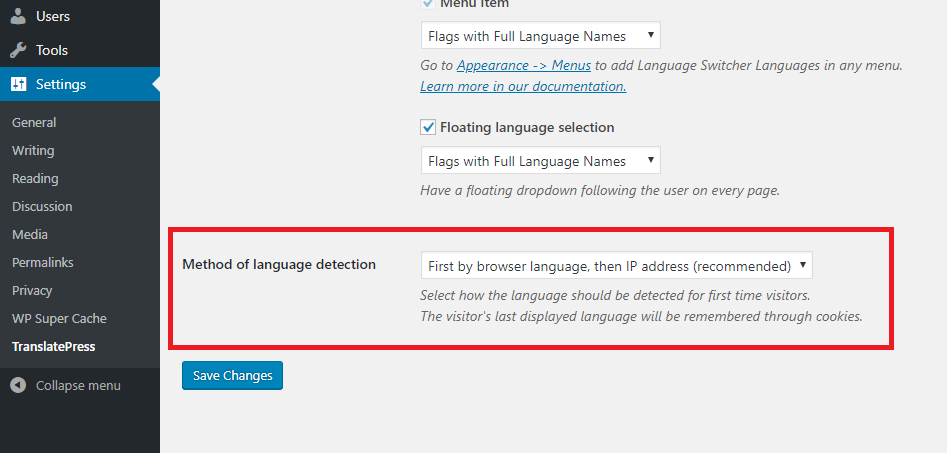
We recommend you select “First by browser, then by IP” as that’s the fastest way to detect language.
However, you can always switch to detecting by IP first.
Save your changes and you should be good to go!
Conclusion
Translating your WordPress website is one of the easiest ways to access a wide audience with minimal effort. You can quickly test these markets through SEO or paid campaigns at a very low cost.
But that’s just one benefit of translation.
As you expand the selection of languages you offer on your site, you’re reaching wider and wider audiences.
When you talk to your customers in a language they feel comfortable with, you not only connect with them better, but also become the brand they go to when something is needed.
With TranslatePress’ easy automatic translation, you can go all in and build trust with your audiences, create additional sales and revenue channels for your business, and begin to see additional growth across all channels!
So what are you waiting for?
Try translating your website to another regional language where you already serve!
Did you use any new methods or plugins for translating websites? Did you like automatic or manual translations? Let us know in the comments!