All the world’s a stage, including your WordPress site. You do not have to be afraid to test any update in your WordPress website before fully implementing it. Setting up a staging site is the answer, especially if you have a large website and traffic. Or, even if you’re starting a new website and you don’t want to mess things up with untested themes and plugins.
So, what is a staging site? It’s fundamentally a clone of your WordPress website that you can log into for testing purposes. If you’re running into problems on your website and want to pinpoint the issue and test out the solution, then you would want to set up a staging area. You can log into it and later try to unearth what’s causing the problem, without compromising your main site.
Problems can range from a plugin that you installed or a recent change that you applied. So, putting up a staging site will allow you to troubleshoot without your live visitors getting all the 404’s. You can disable all the plugins, activate them one at a time, and then see if it is incompatible to a theme or another plugin. This way, you’ll be able to narrow down which code, plugin, or theme is causing the issue.
Here are some of the benefits of having a WordPress staging site:
- You can make updates and test them without worrying that they will break your live site.
- There’s less chance of issues, downtime, and negative impact on the visitors of your live site.
- There’s less risk of affecting your website’s SEO, conversion, and other initiatives you’ve set up.
How To Set Up A Staging Site
Now, there are a few different ways on how you can set up a staging site. It can either be automatic or manual. So, you can do either of them depending on how comfortable you are in coding or using the tools from your hosting provider.
Using Managed WordPress Hosts 1-Click Staging Install
If you don’t want to bother creating a staging site, then go for a managed WordPress hosting provider that offers built-in staging sites. Some of them are:
Aside from setting up the staging site for you with their one-click solution, managed WordPress hosts do the heavy lifting when it comes to your website maintenance. So, if you’re a non-techie, you might want just to let them manage your website for you. The limitation, though, is you don’t have full control over it, as well as your WordPress staging site.
Using WordPress Staging Plugins
Another way that you can set up a staging site is by using plugins such as:
Last year, we had a video tutorial on how to set up a WordPress staging site with the WP Staging plugin. It is a free plugin that is time-tested for creating a staging or development environment in just a few seconds.
It clones your website into a subfolder of your main WordPress installation and a complete copy of your database. Plus, it automatically searches and replaces all links.
You’ll love this plugin if you’re a non-techie and using a shared hosting solution. It’s easy, fast, and safe.
You might also want to check its pro version where you can migrate and clone multiple WordPress sites, select a separate database and directory, close your live website into a subdomain, configure user roles, and migrate your staging site to production. Pricing starts at € 89 for a single site, € 139 for five sites, € 239 for 30 sites, and € 499 for 100 sites.
Let’s start.
1. Go to your WordPress Dashboard.
2. Under the Plugins menu, click on Add New.
3. Search for staging.
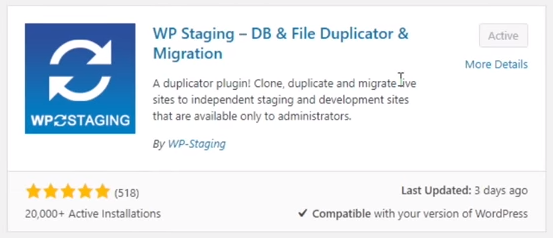
4. Install and activate WP Staging – DB & File Duplicator & Migration.
5. Click on the new menu WP Staging and click on the Create new staging site button. 6. Enter your staging site name.
7. Click on the Start Cloning button.

Once it starts cloning, it’s going to create a new folder on your web server and make a copy of the database. The congratulations message comes with the link to your staging site, and you can now use it as your playground where you can do anything that you want.
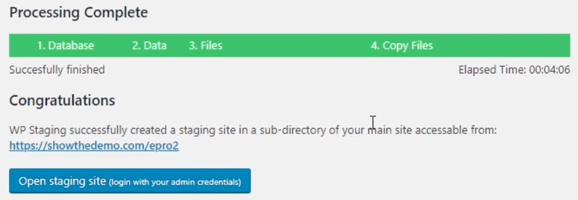
Once you get to the staging site, no one will be able to access it, not even Google. You can log in using the username and password of your live site.

Manually Creating a WordPress Staging Site
If you want full control over your staging site, then you might want to create it manually or hire a web app company. Now, I do not recommend this if you’re a non-techie since it involves technical knowledge in setting it up.
Here are the steps that you would need to create a customized staging environment.
- Set up a local WordPress site, or create a subdomain.
- Copy the files and database of your live website.
- Import the copied files into your localhost or newly-created WordPress subdomain. Make sure that all links redirect to your database.
Copying All Modifications On Staging Site To Production Site
Once you’re done testing on the staging site and validated that everything is okay, you can now push the changes on your live website. You can do this with just a click of a button when you’re utilizing a staging plugin or your web host’s staging environment.
If you’ve set up your staging site manually, you have to deploy your files to production manually as well. So, make sure that everything is tested on the staging environment before production deployment.
Conclusion
Testing is a crucial phase in website development. By all means, you need to have a staging environment where you can do anything that you want to test before fully implementing the changes on your live site.
Setting up a staging site might seem a bit of an effort, but it’s a great time saver when resolving or troubleshooting WordPress issues. Remember, your website is a digital asset and you must always be prepared when these issues arise.